
Email, SMS and marketing
Build a website for your events
Festival teams, venues and promoters want one place where fans find every event, the line-up and how to get tickets. You build that website in your dashboard from the events and brand details you already have, so you spend your time on what makes your events different rather than on web design.
Give your festival, venue or club night its own website: Fai drafts it from your events and brand, or you start from a template, then you change the pages, sections and look and publish it for ticket buyers.
- For
- Building a website for your events
- Takes
- 12 minutes
Before you start
- You are an owner or an admin of the brand. If Website is not in your brand menu, contact us to switch the Website Builder on for your brand.
- Your upcoming events are created, so Fai can build the website around them. You can also start from a template and add your events later.
-
Open your websites
Open your brand, then select Website. The Websites page lists each website of your brand with its status.
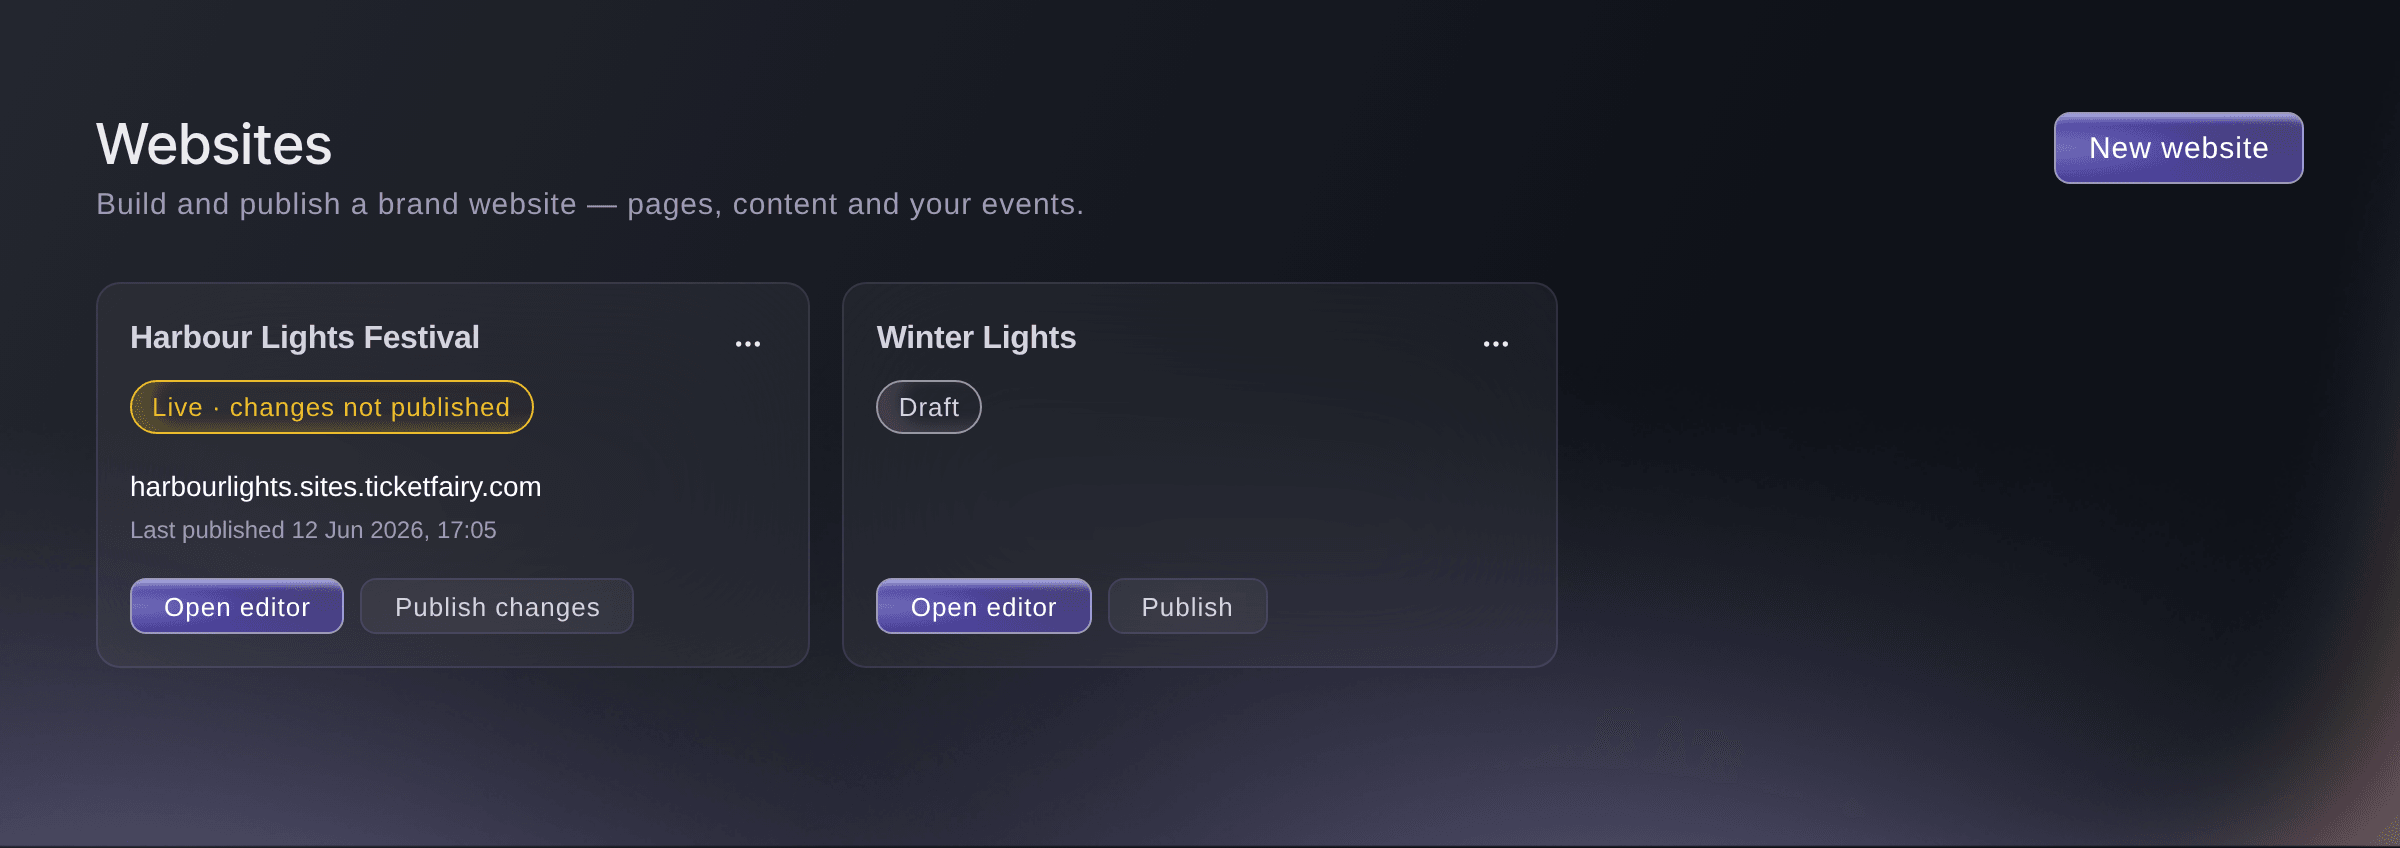
Website, Websites. -
Start a new website
Select New website, then choose how to start under How do you want to start?.
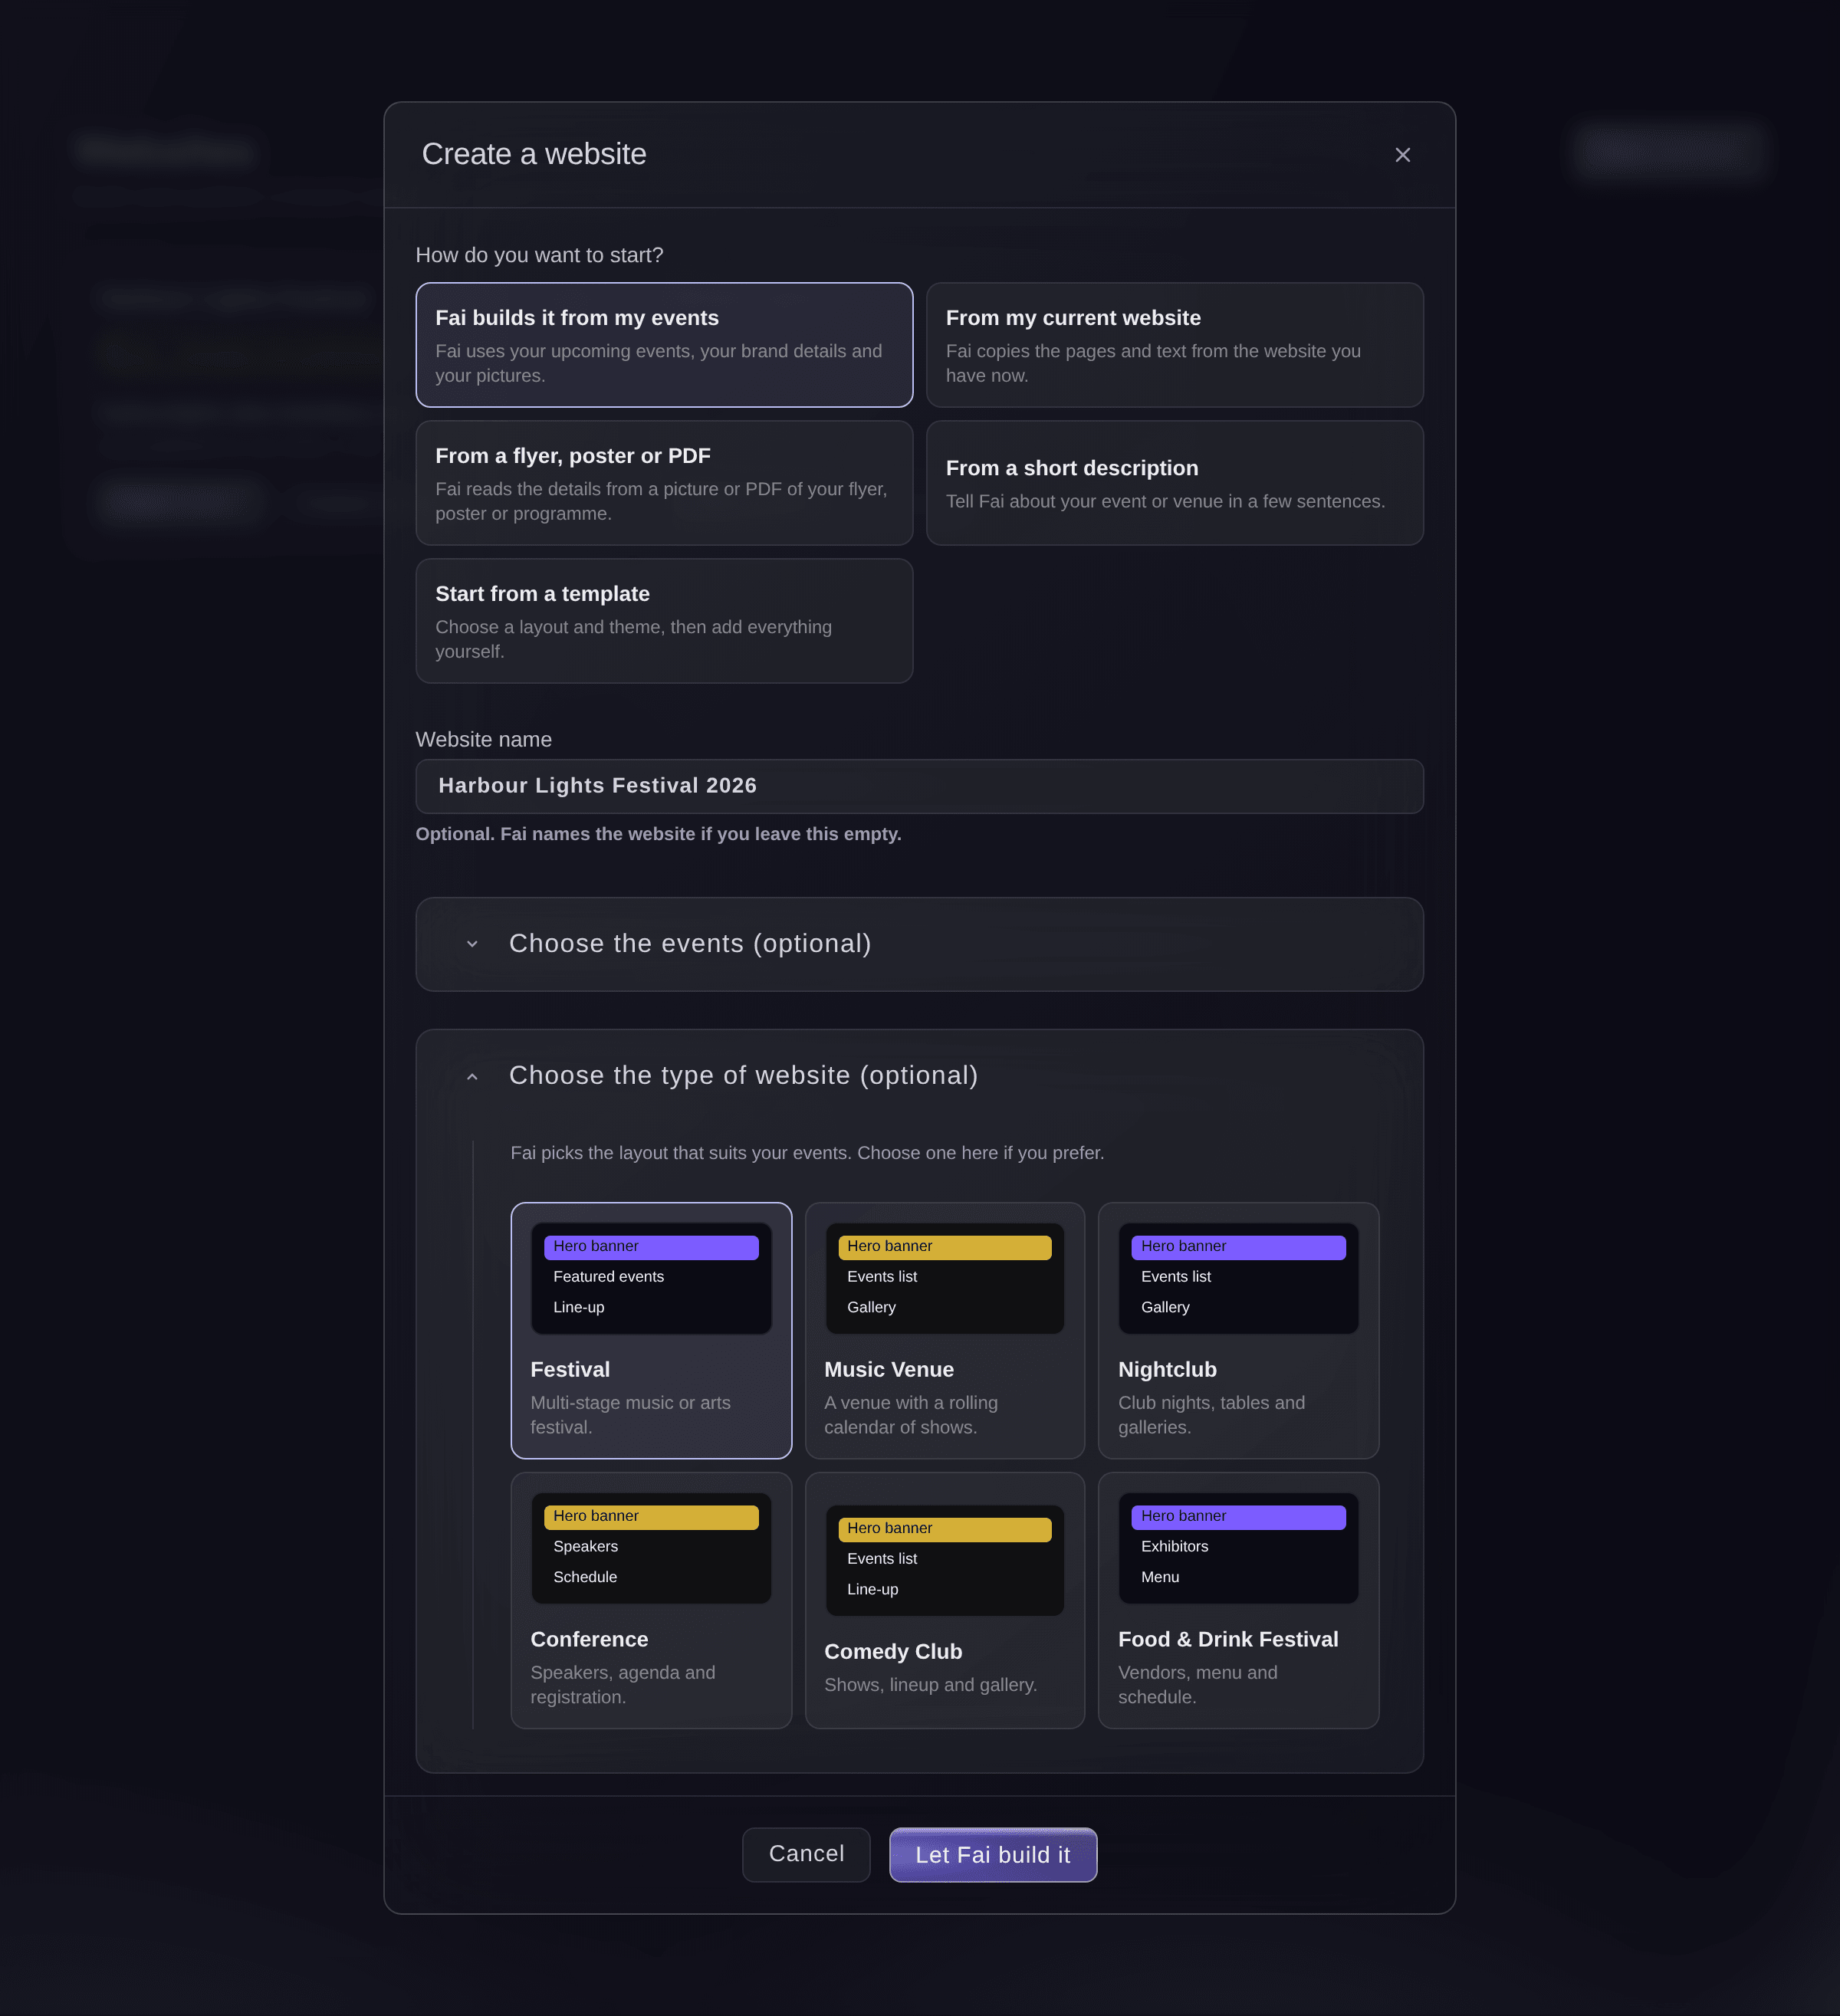
Create a website. -
Let Fai build the draft
Optional: enter a Website name, then select Let Fai build it. Fai shows each part of the work as she does it.
Note: You can select Close while Fai works. The draft appears on the Websites page, and a message with Open tells you when it is ready.
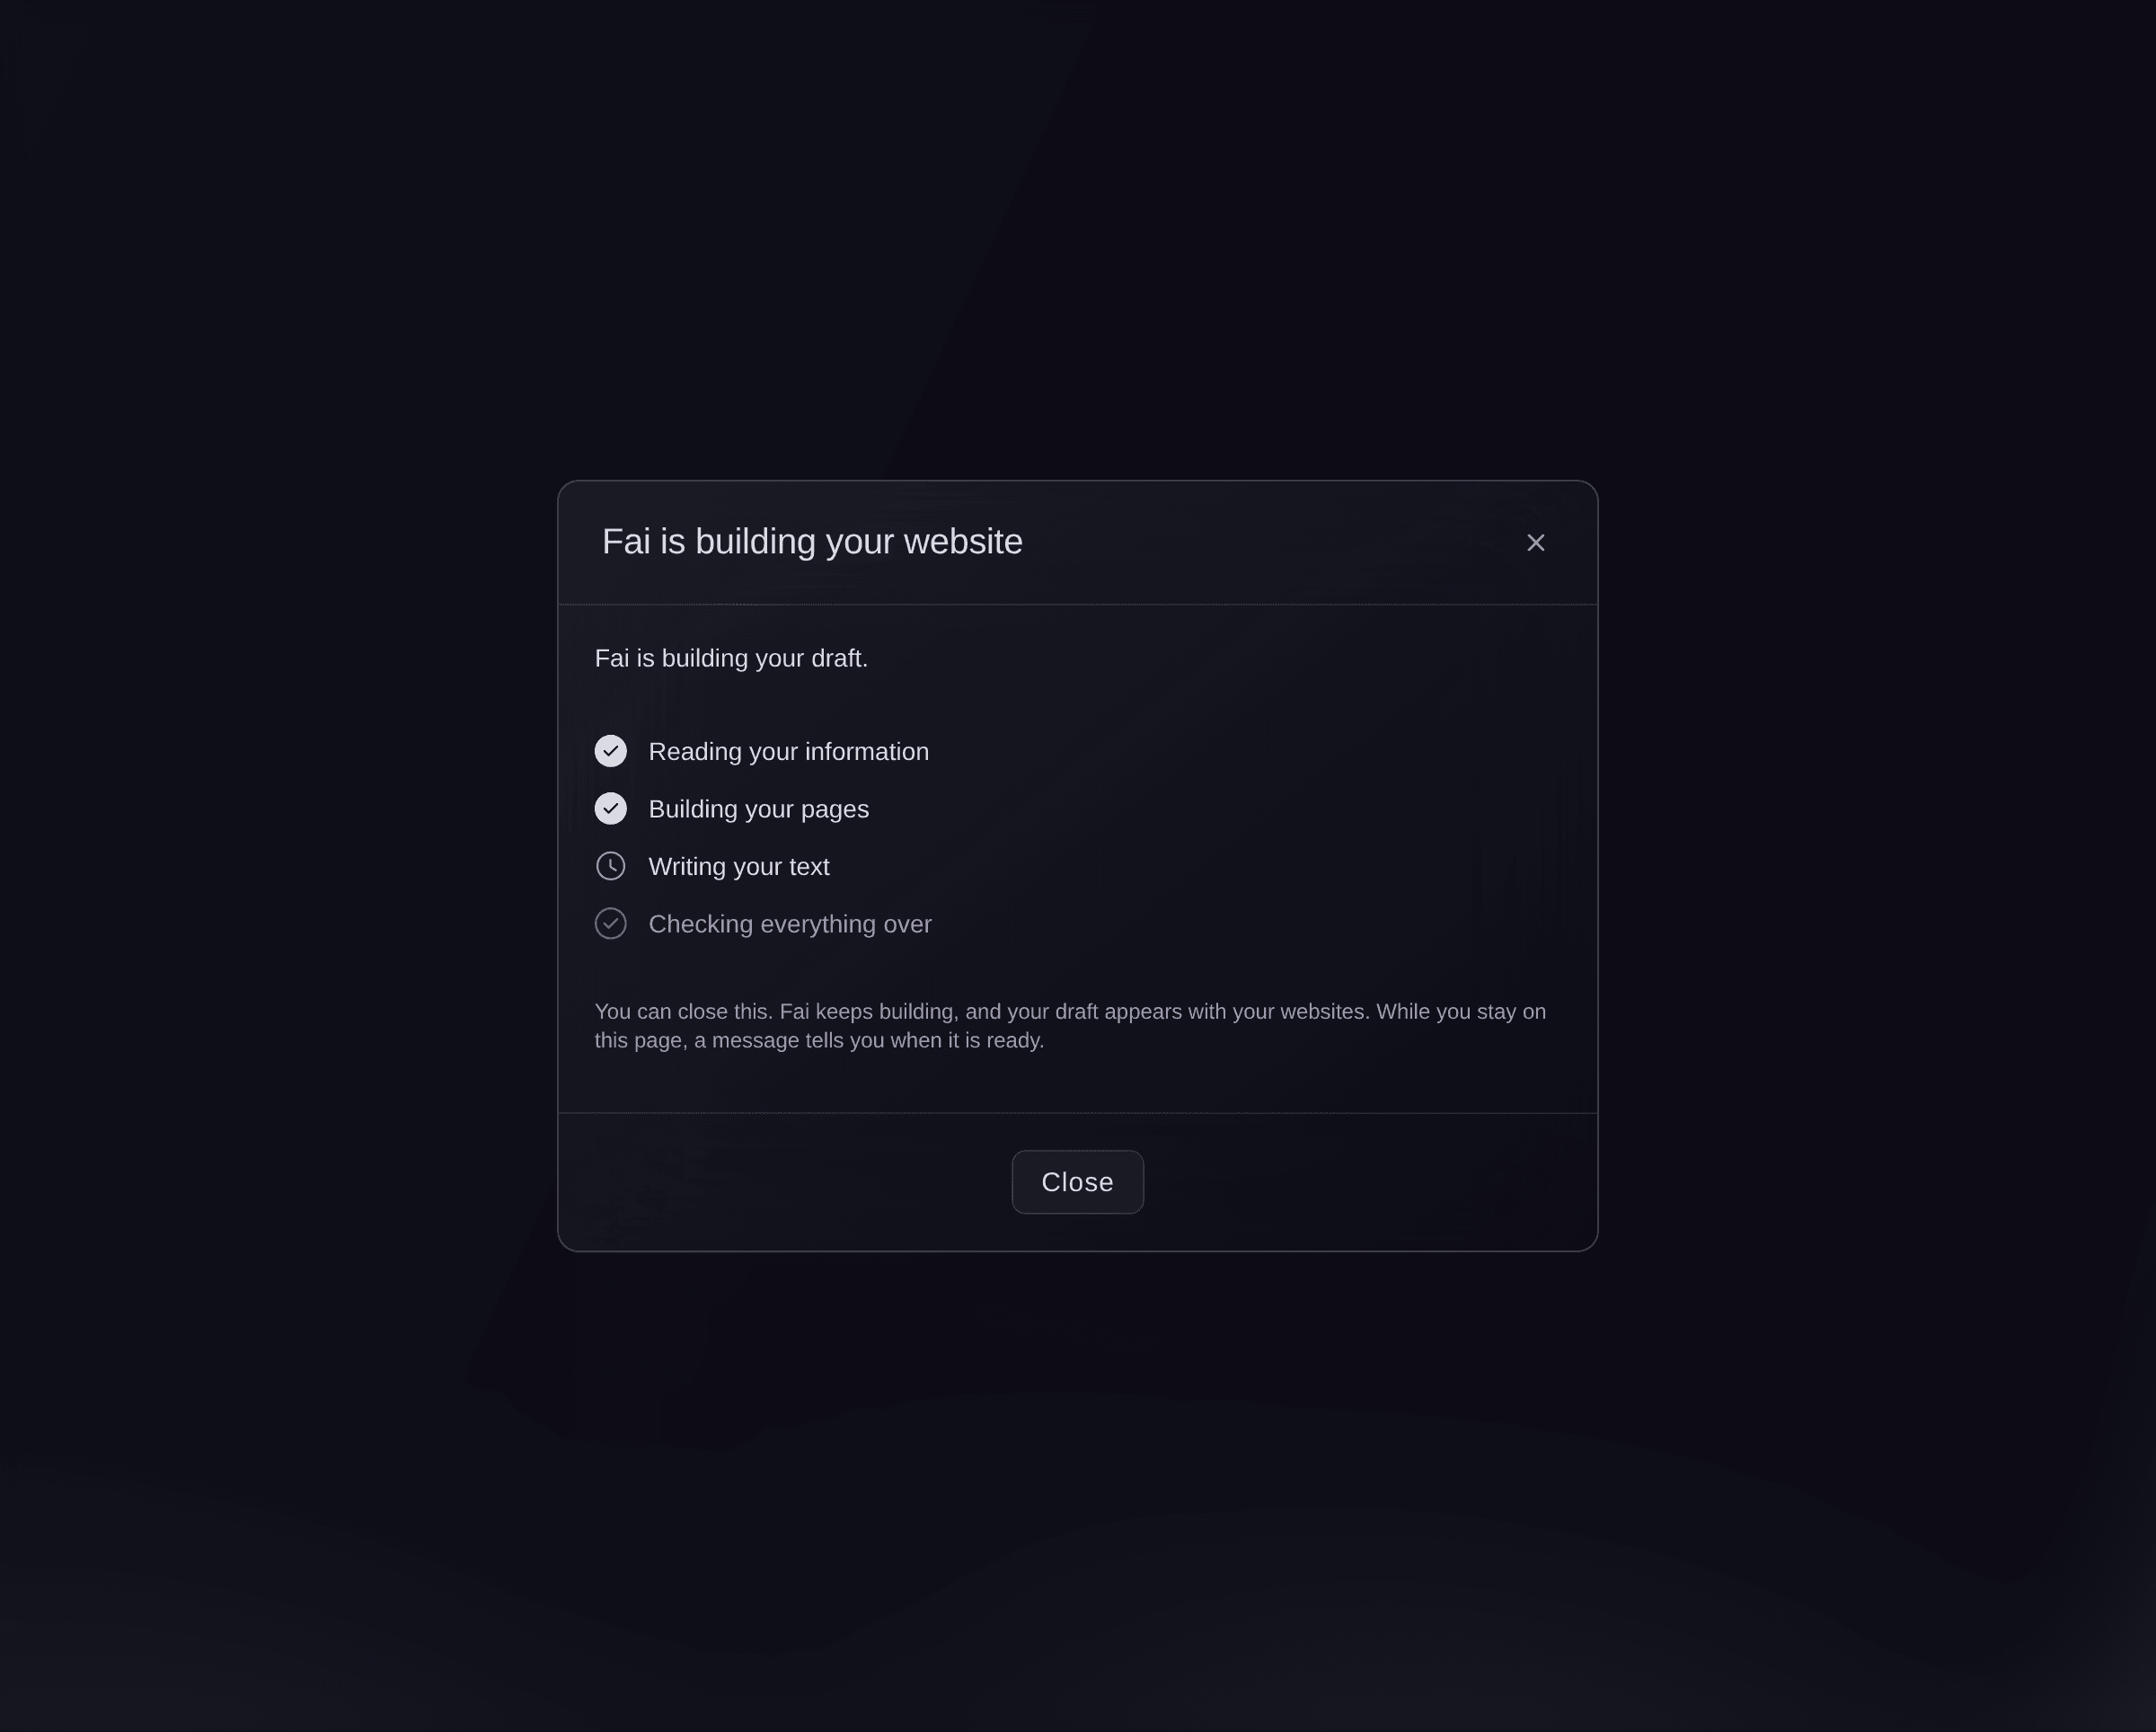
Fai is building your website. -
Or start from a template
If you chose Start from a template, enter the Website name, choose a type under What type of events do you run? and a Theme, then select Create website.
Note: Each type starts with the pages that kind of event needs, such as Line-up, Schedule and Tickets for a festival. The theme of the type is chosen for you until you choose another.
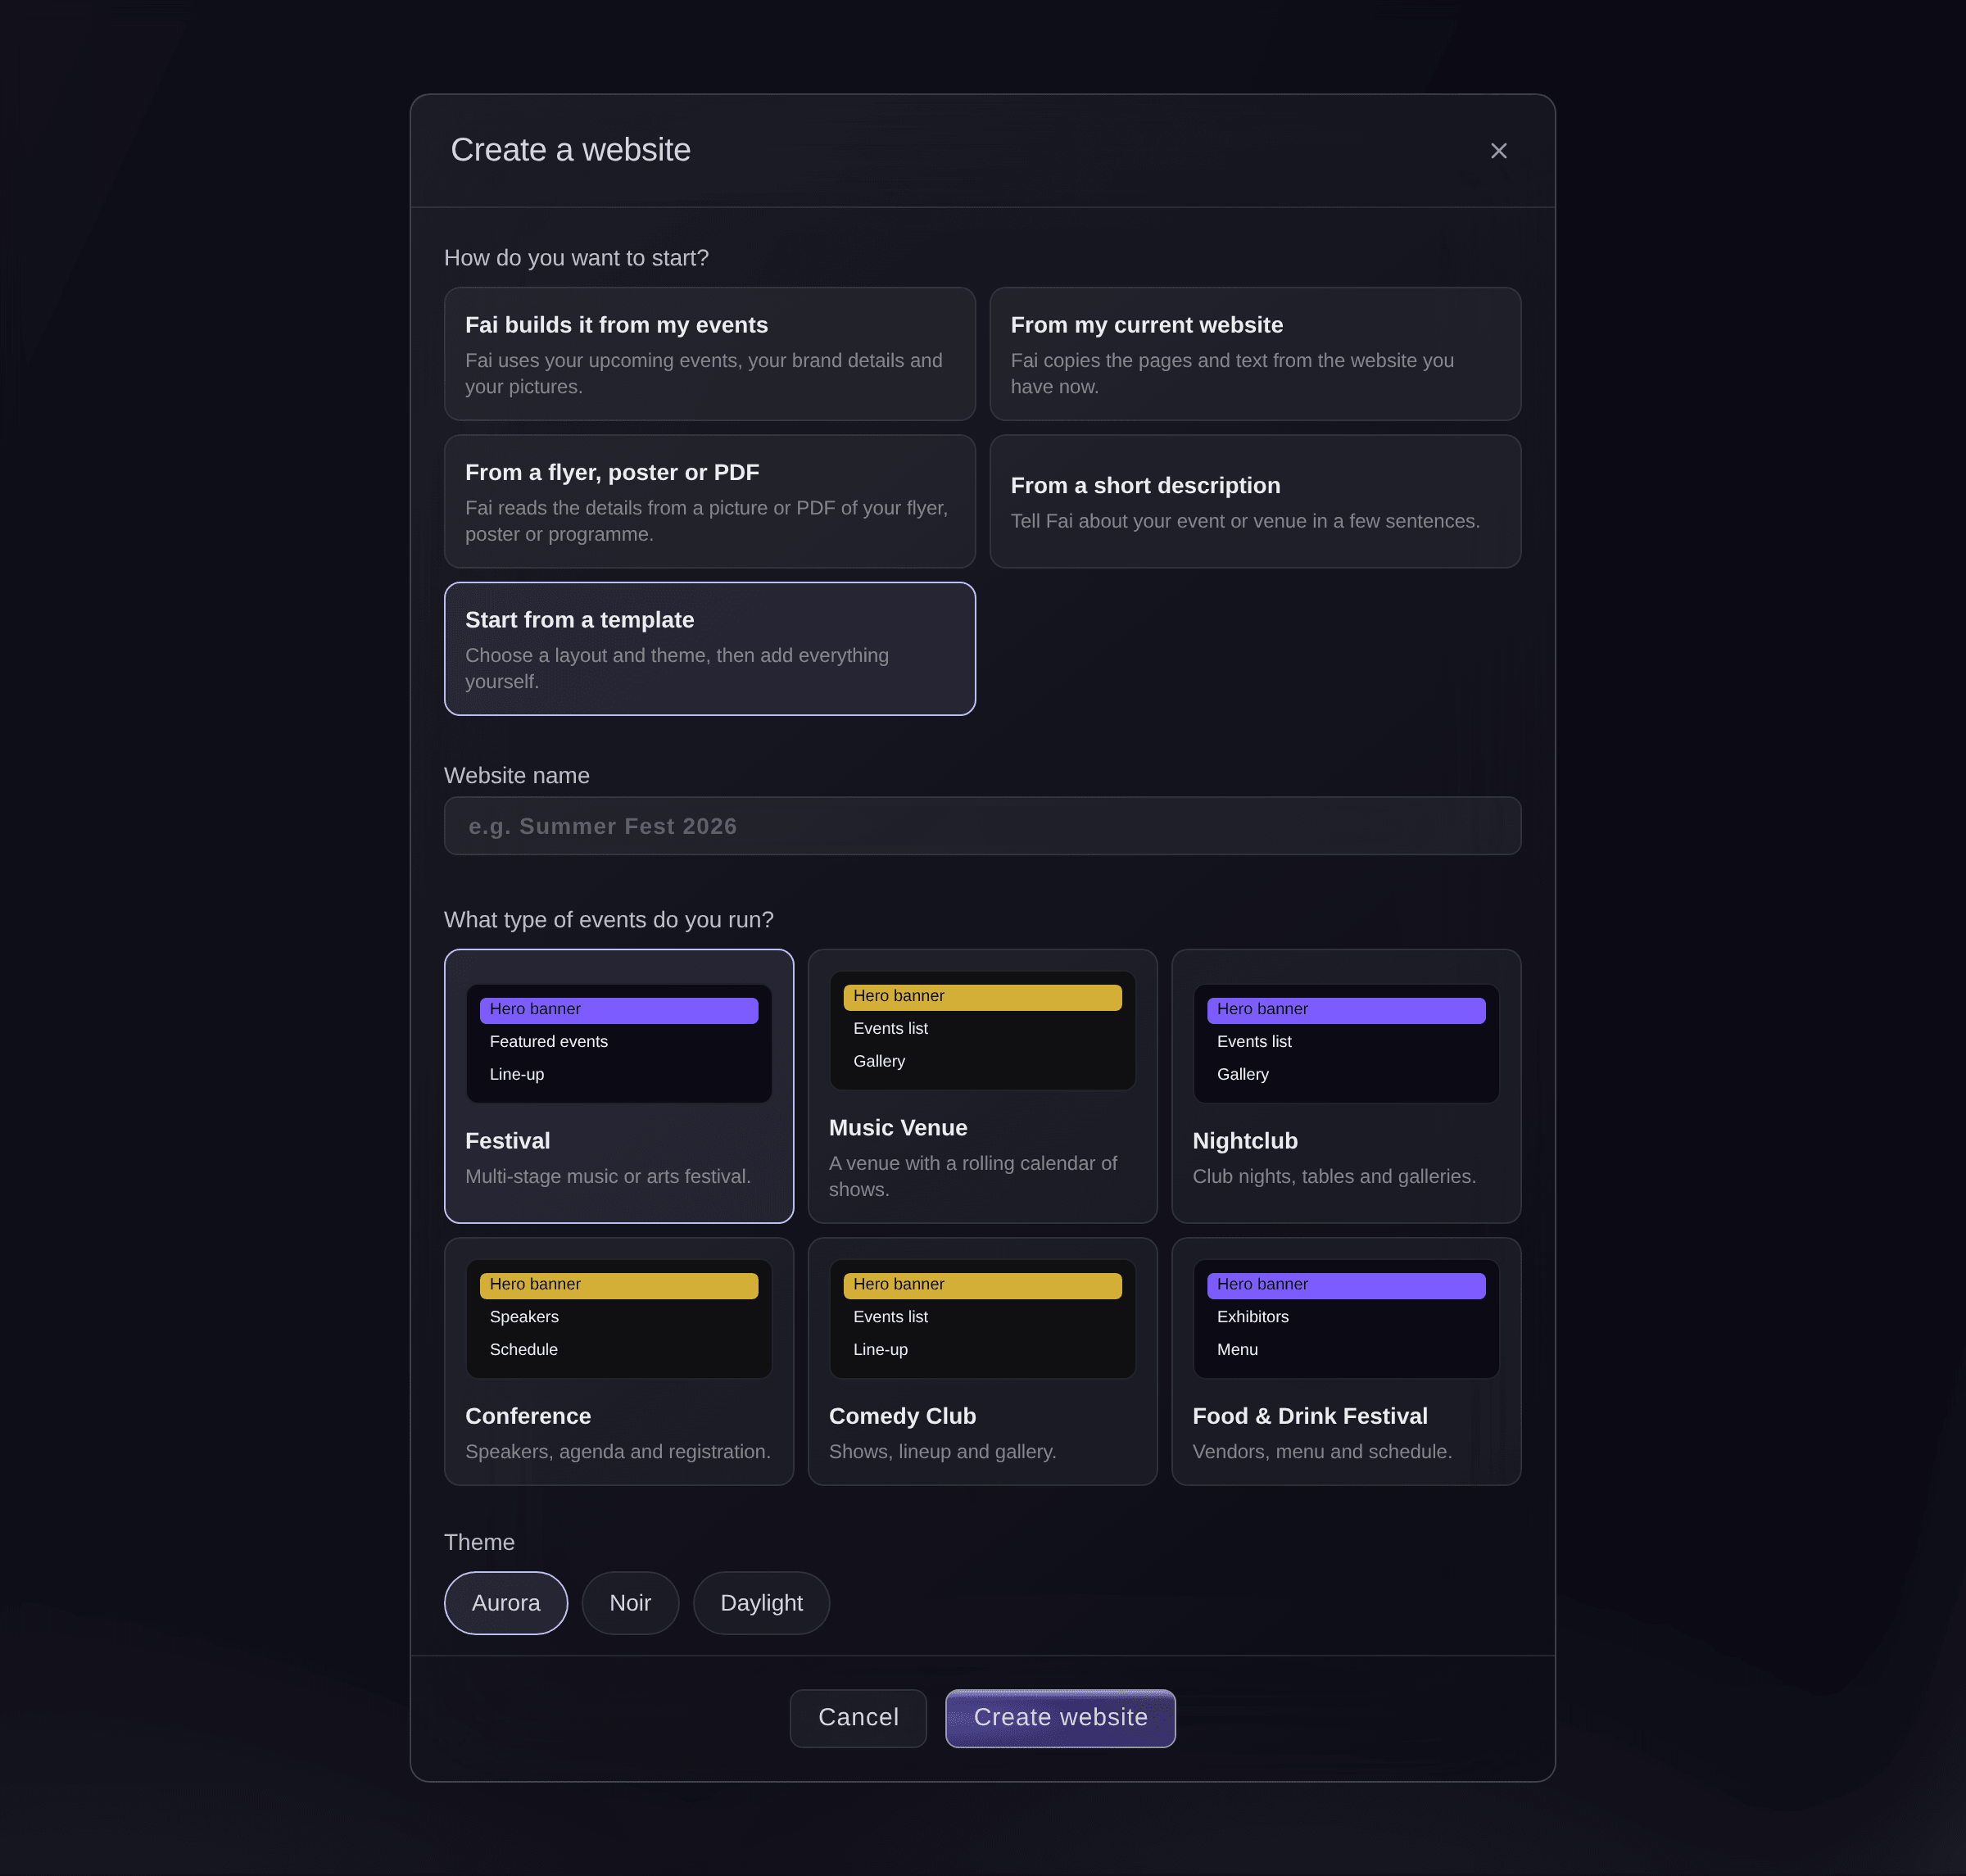
Start from a template.


Fai’s draft and her ideas
The new website opens in the editor as a draft that only your team can see. A draft Fai built opens with Fai’s ideas, the changes she suggests next, such as an event to add or text a page is missing. Nothing changes until you apply an idea.
Tip: The guide to letting Fai improve your website shows how to apply, change or dismiss each idea.
-
Change the text on a page
Select Pages, select a page, then select any heading or text on the page and enter your own words.
Note: The editor saves each change as you make it and shows All changes saved at the top. Visitors see your changes only after you publish.
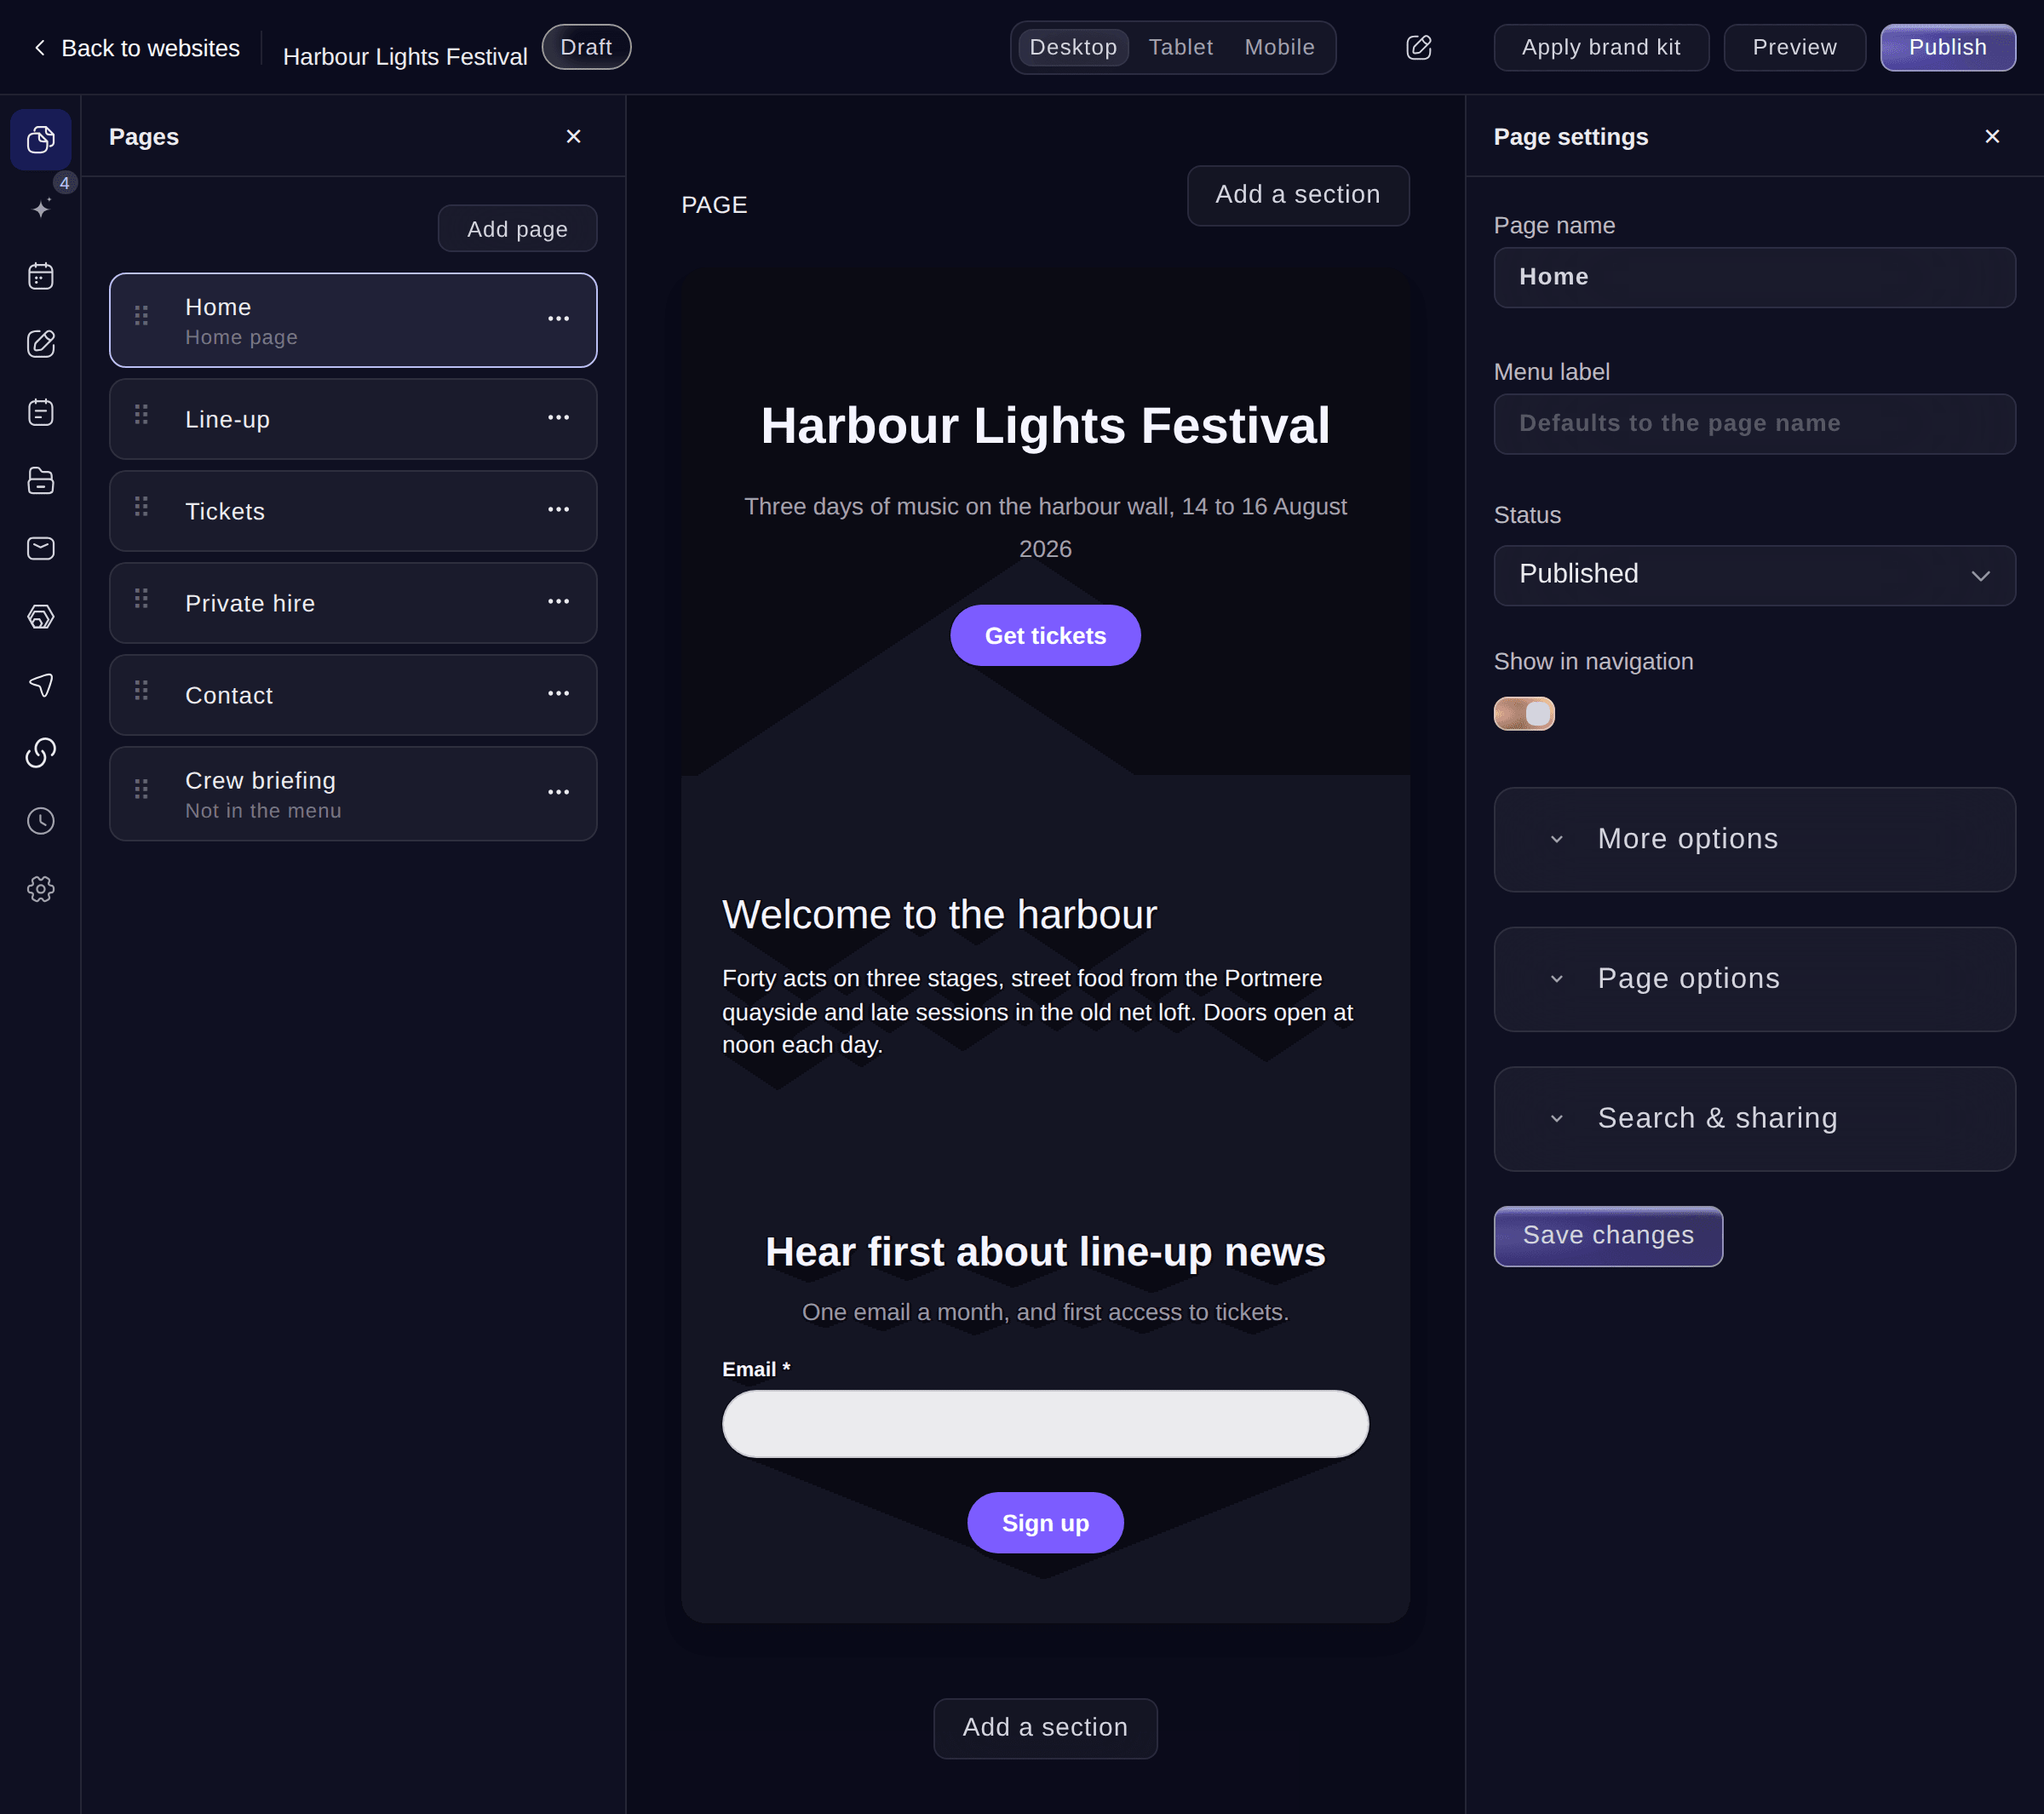
The editor, Pages. -
Change a section
Select a section on the page. Its settings open beside the page: change the fields you need, then select Save changes.
Note: Turn off Show on page to hide a section without deleting it. Move up and Move down change its place on the page.
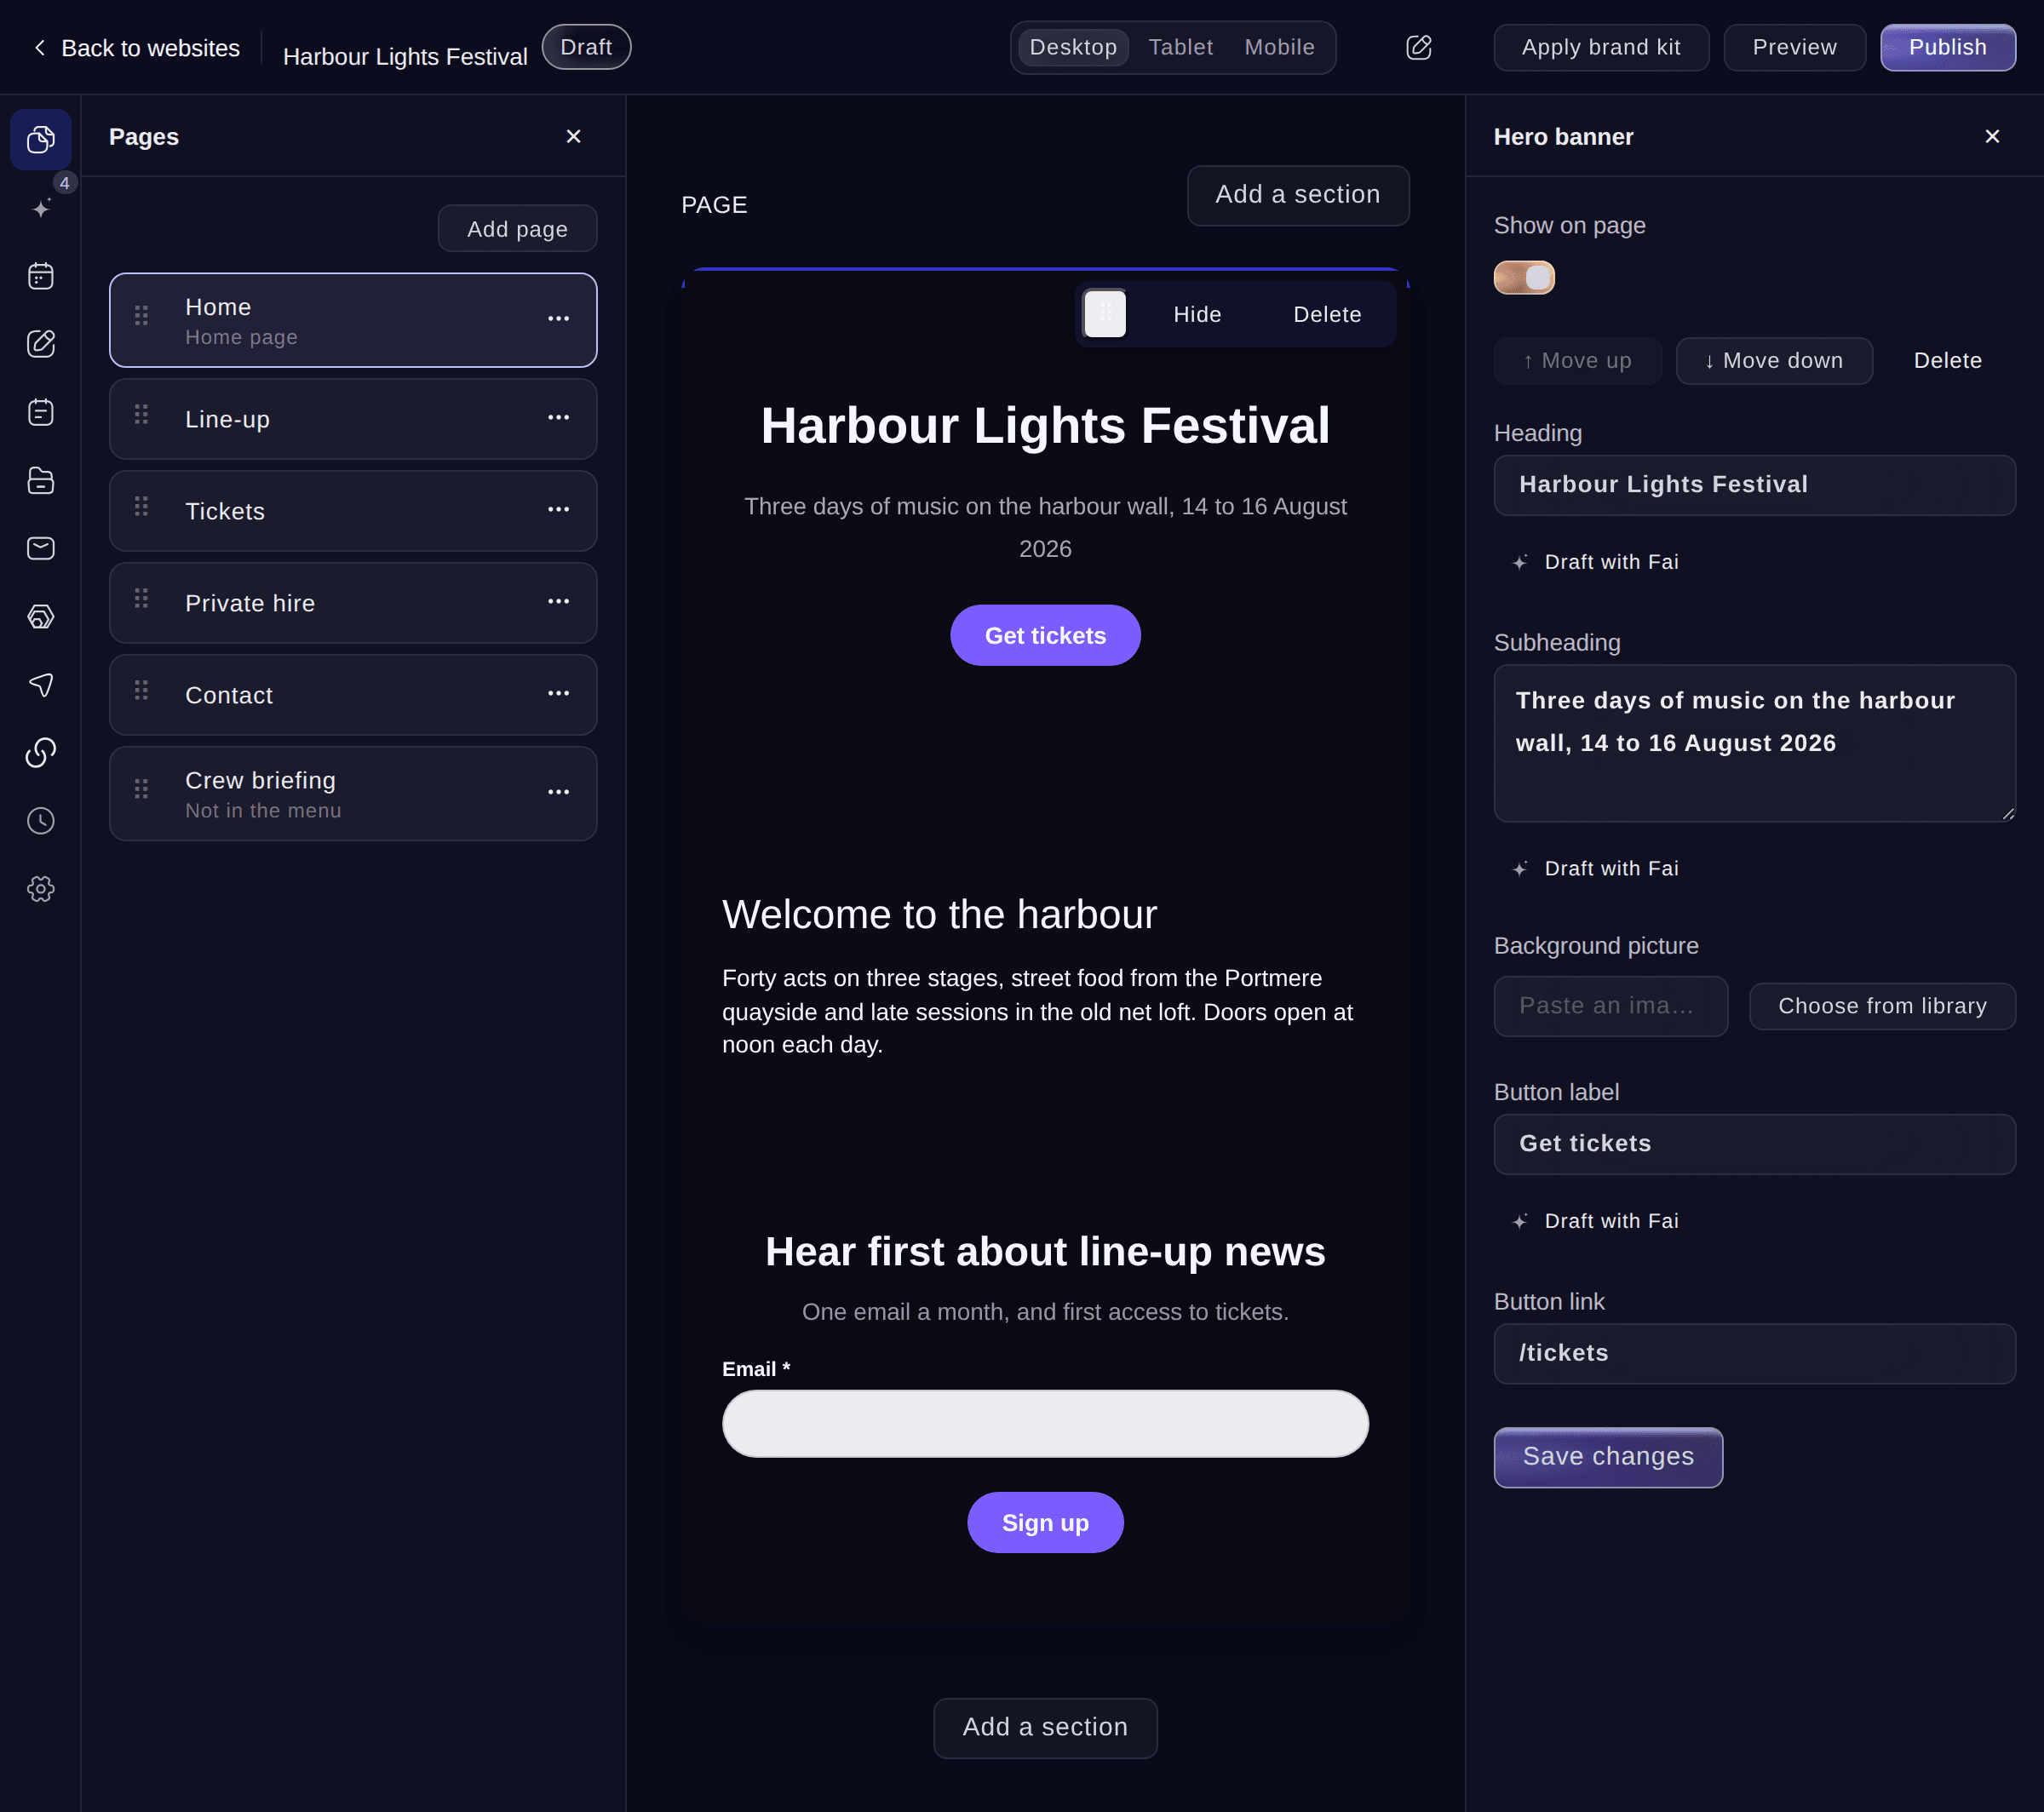
A section's settings. -
Add a section
Select Add a section, then choose the kind of section, such as Text, Gallery, Line-up or Contact form.
Note: To put a section between two others, point at the gap between them and select Add a section here.
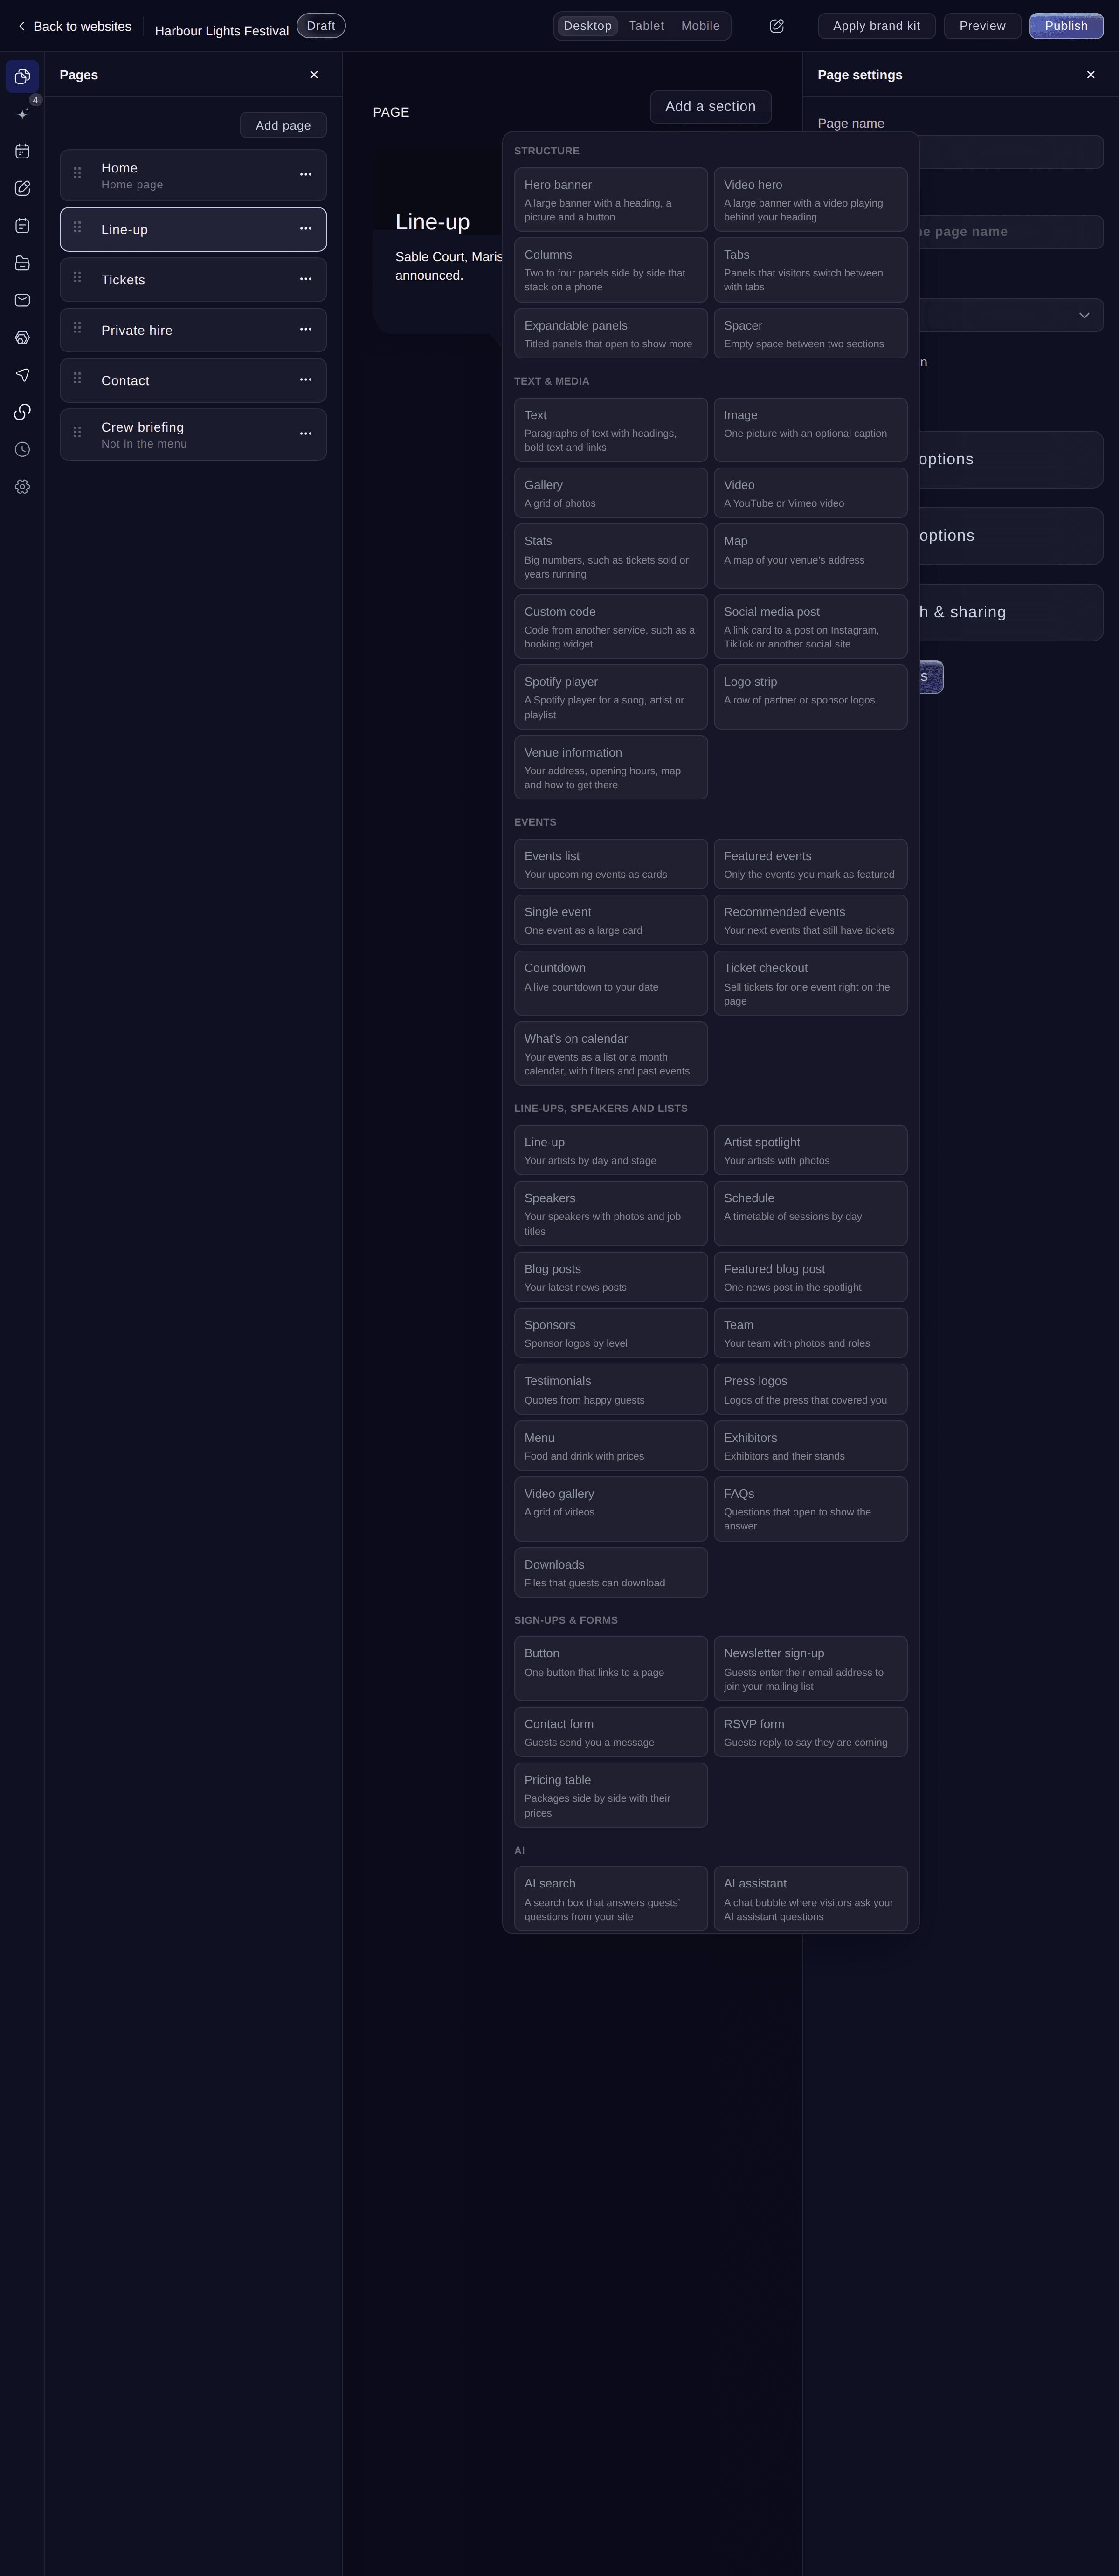
Add a section. -
Add a page
In Pages, select Add page, enter the Page name, then select Add page.
Note: Turn off Show in navigation for a page people reach only by its link. More options holds the Page address and the Page type.
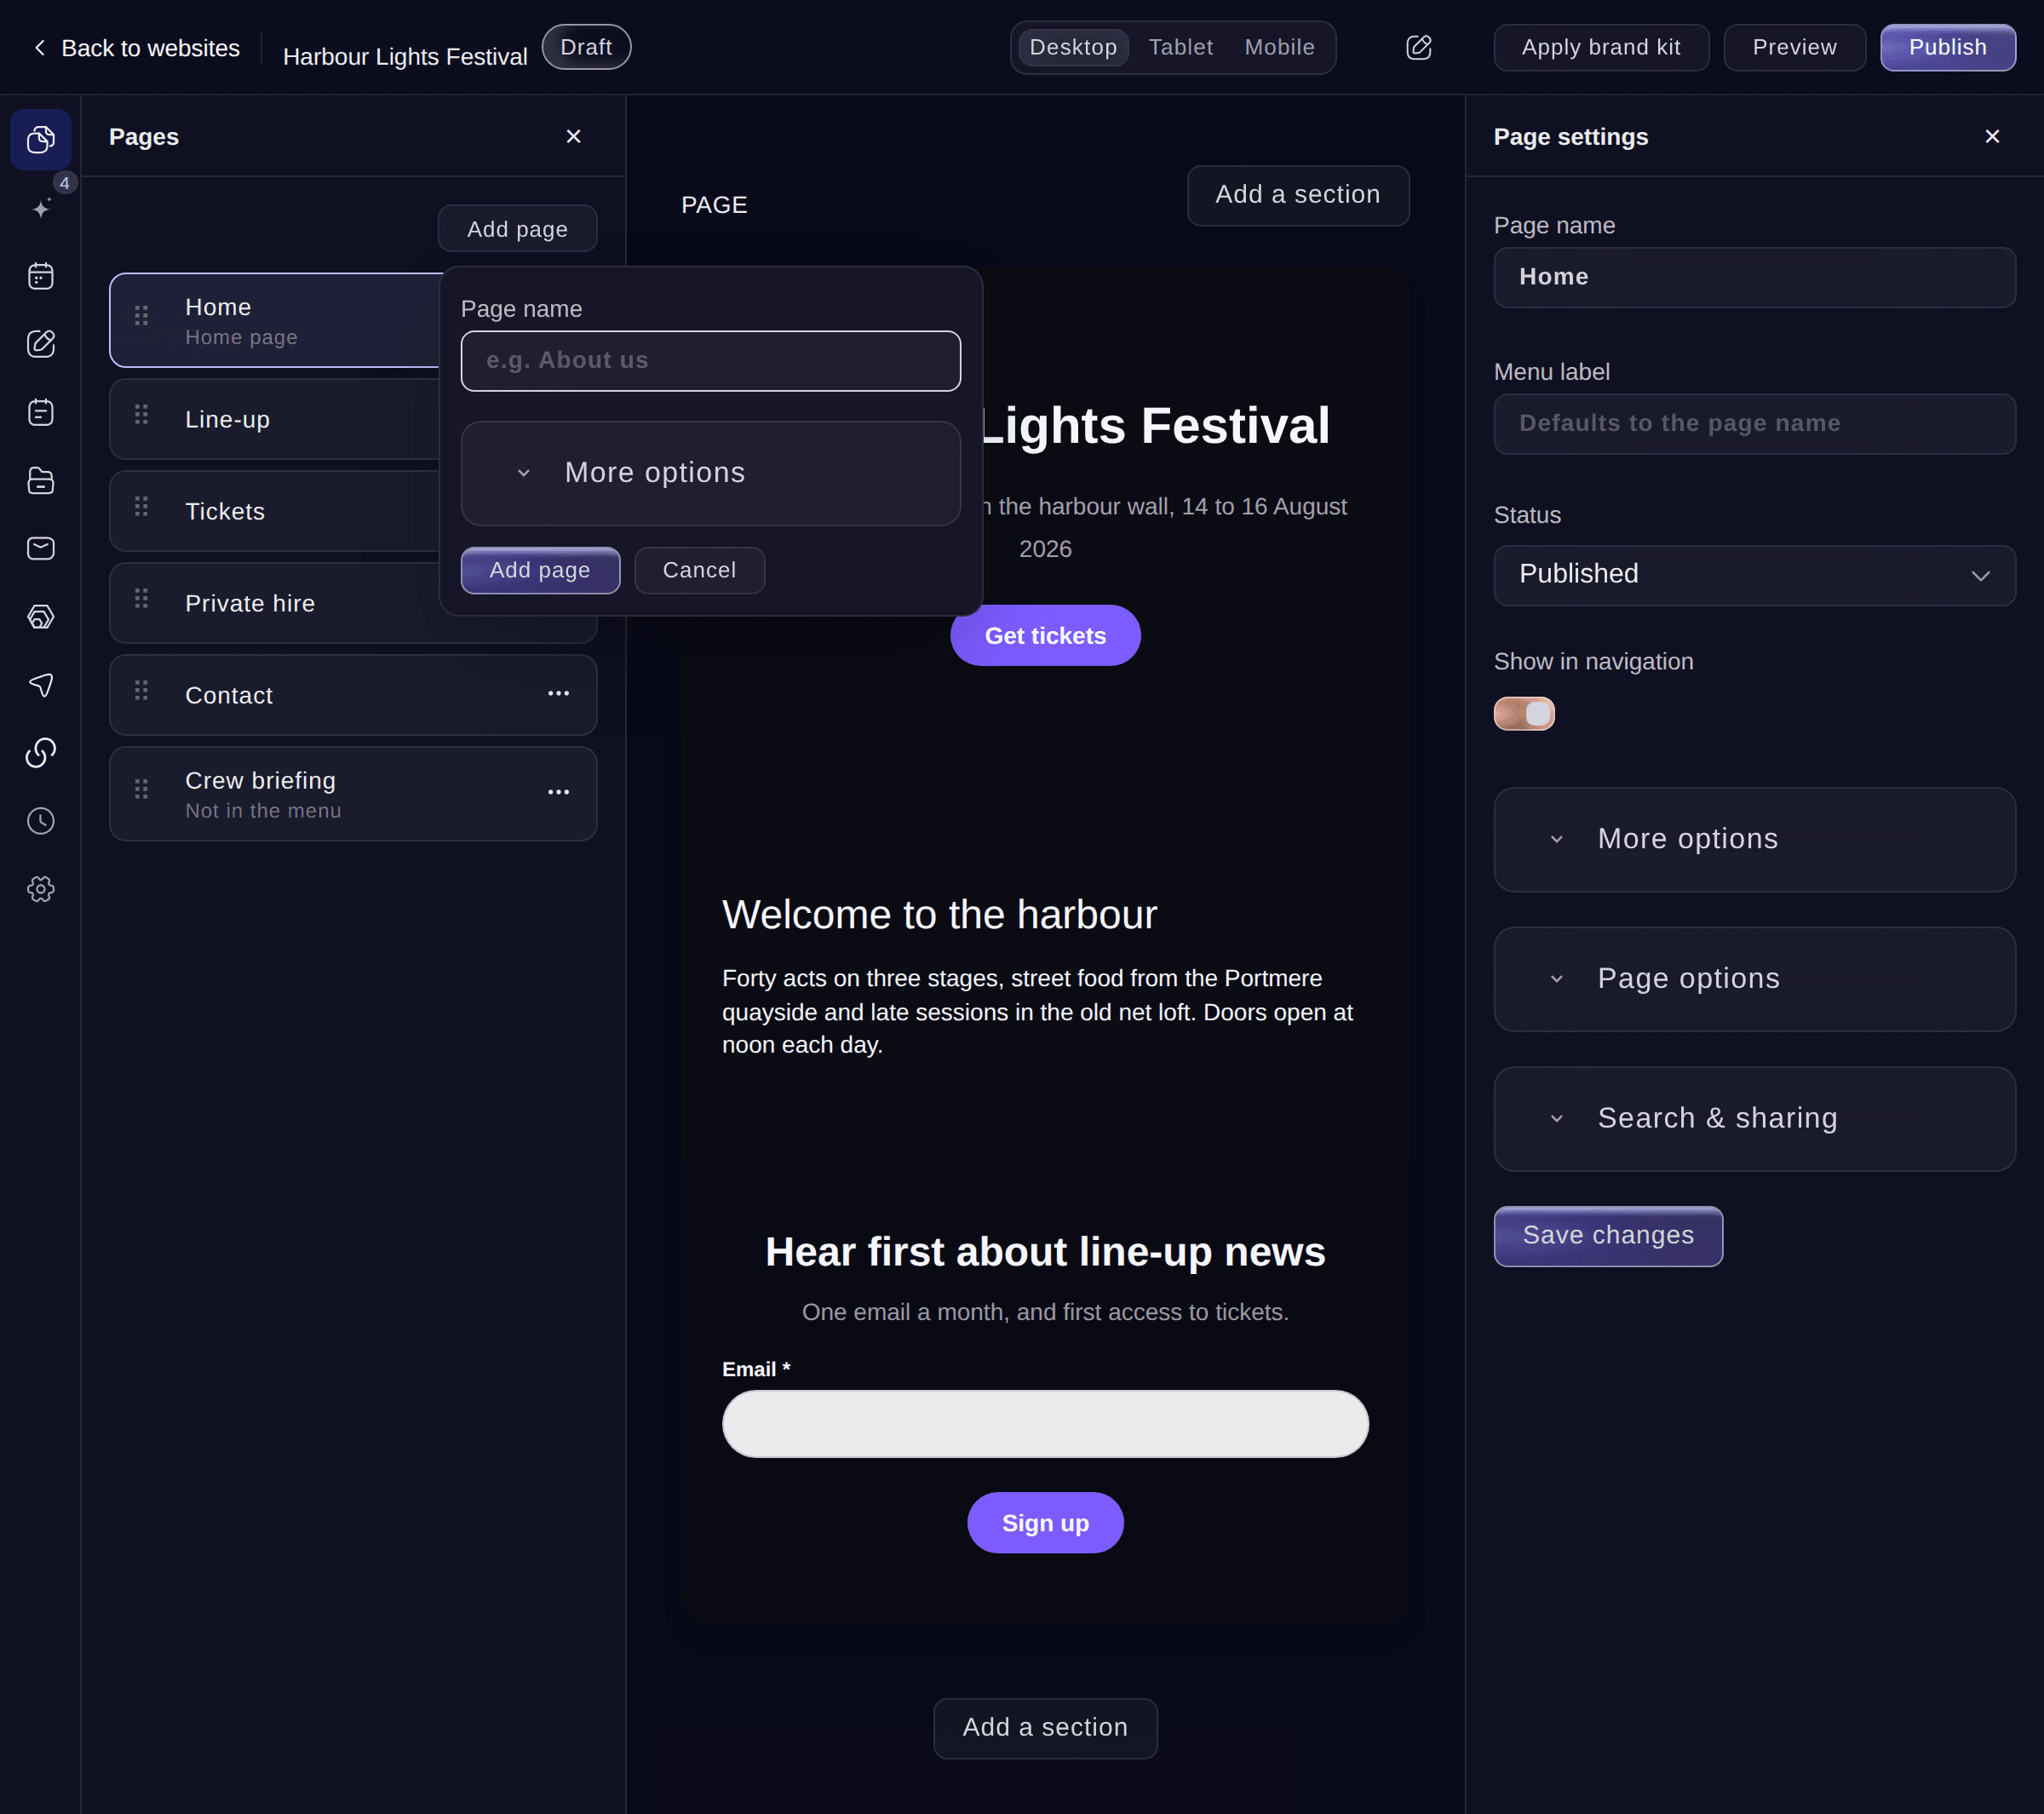
Add a page. -
Choose the look
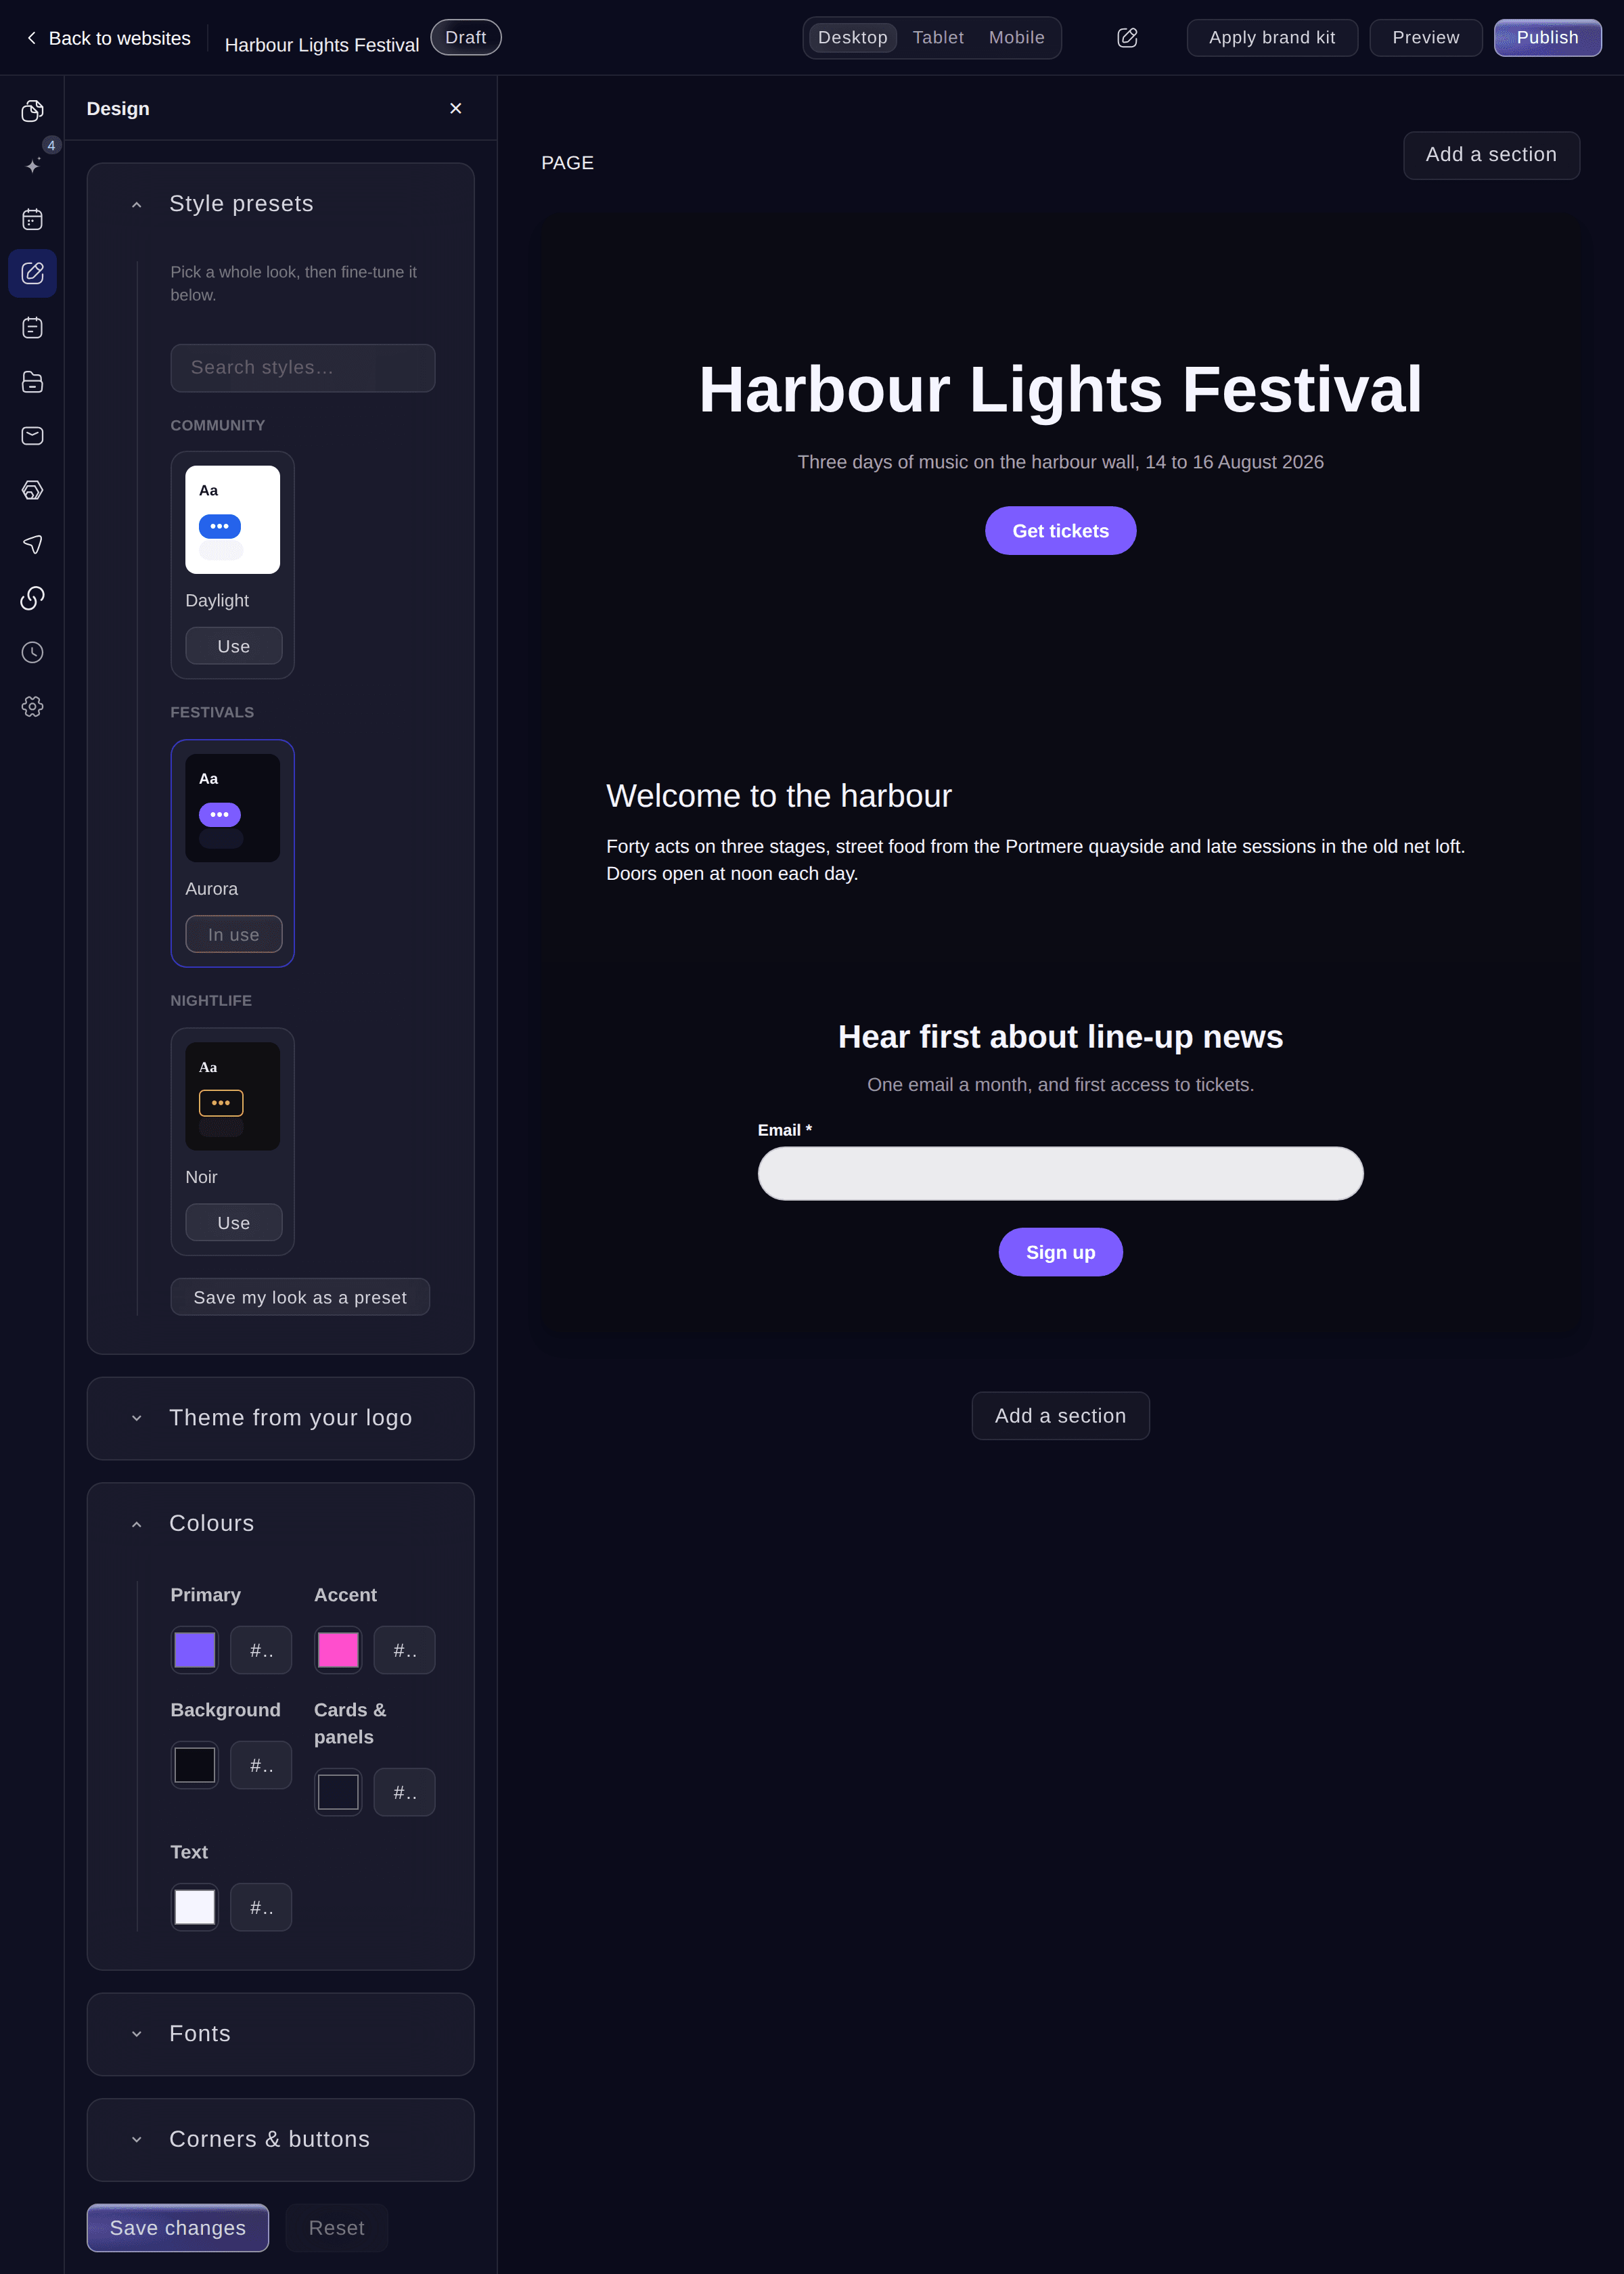
Select Design, select Use on a style under Style presets, change the Colours, Fonts and Corners & buttons if you want, then select Save changes.
Tip: Select Apply brand kit at the top to give the website your brand kit's colours, fonts and logo in one step.
Design. -
Check the website on a phone
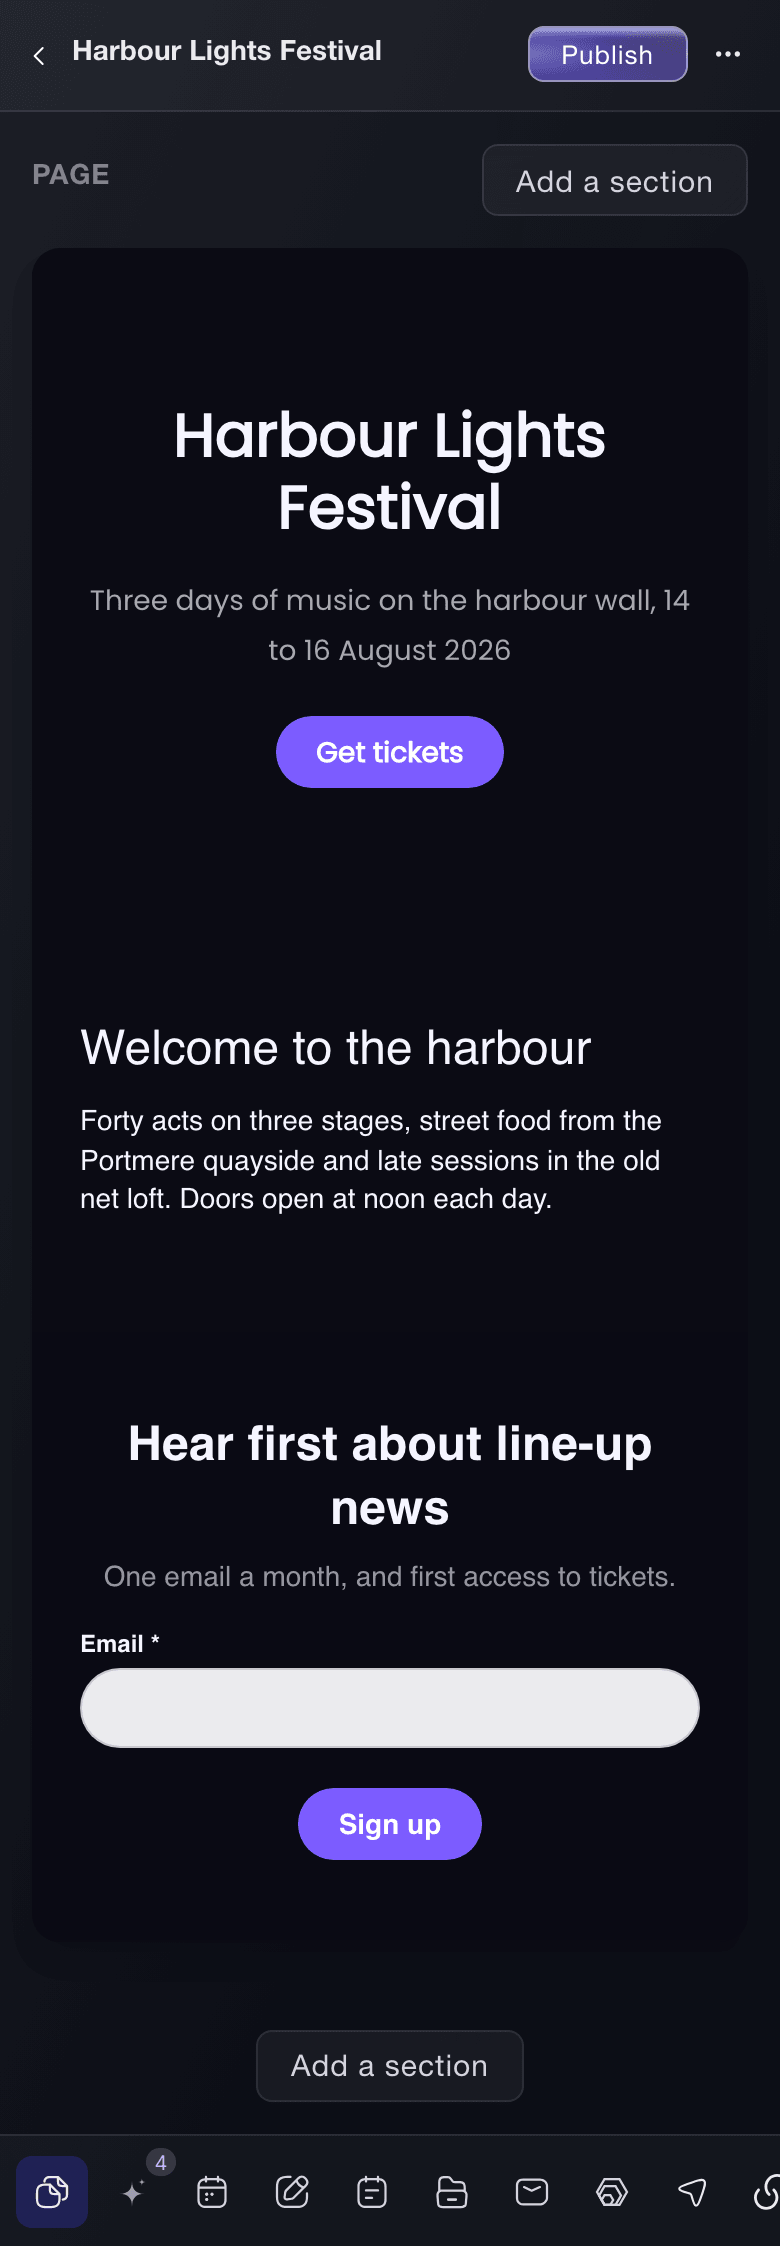
Select Mobile at the top to see each page as a phone shows it, then Desktop to go back.
Tip: Select Preview to open the draft in a new tab, with a link you can send a teammate.
-
Publish your website
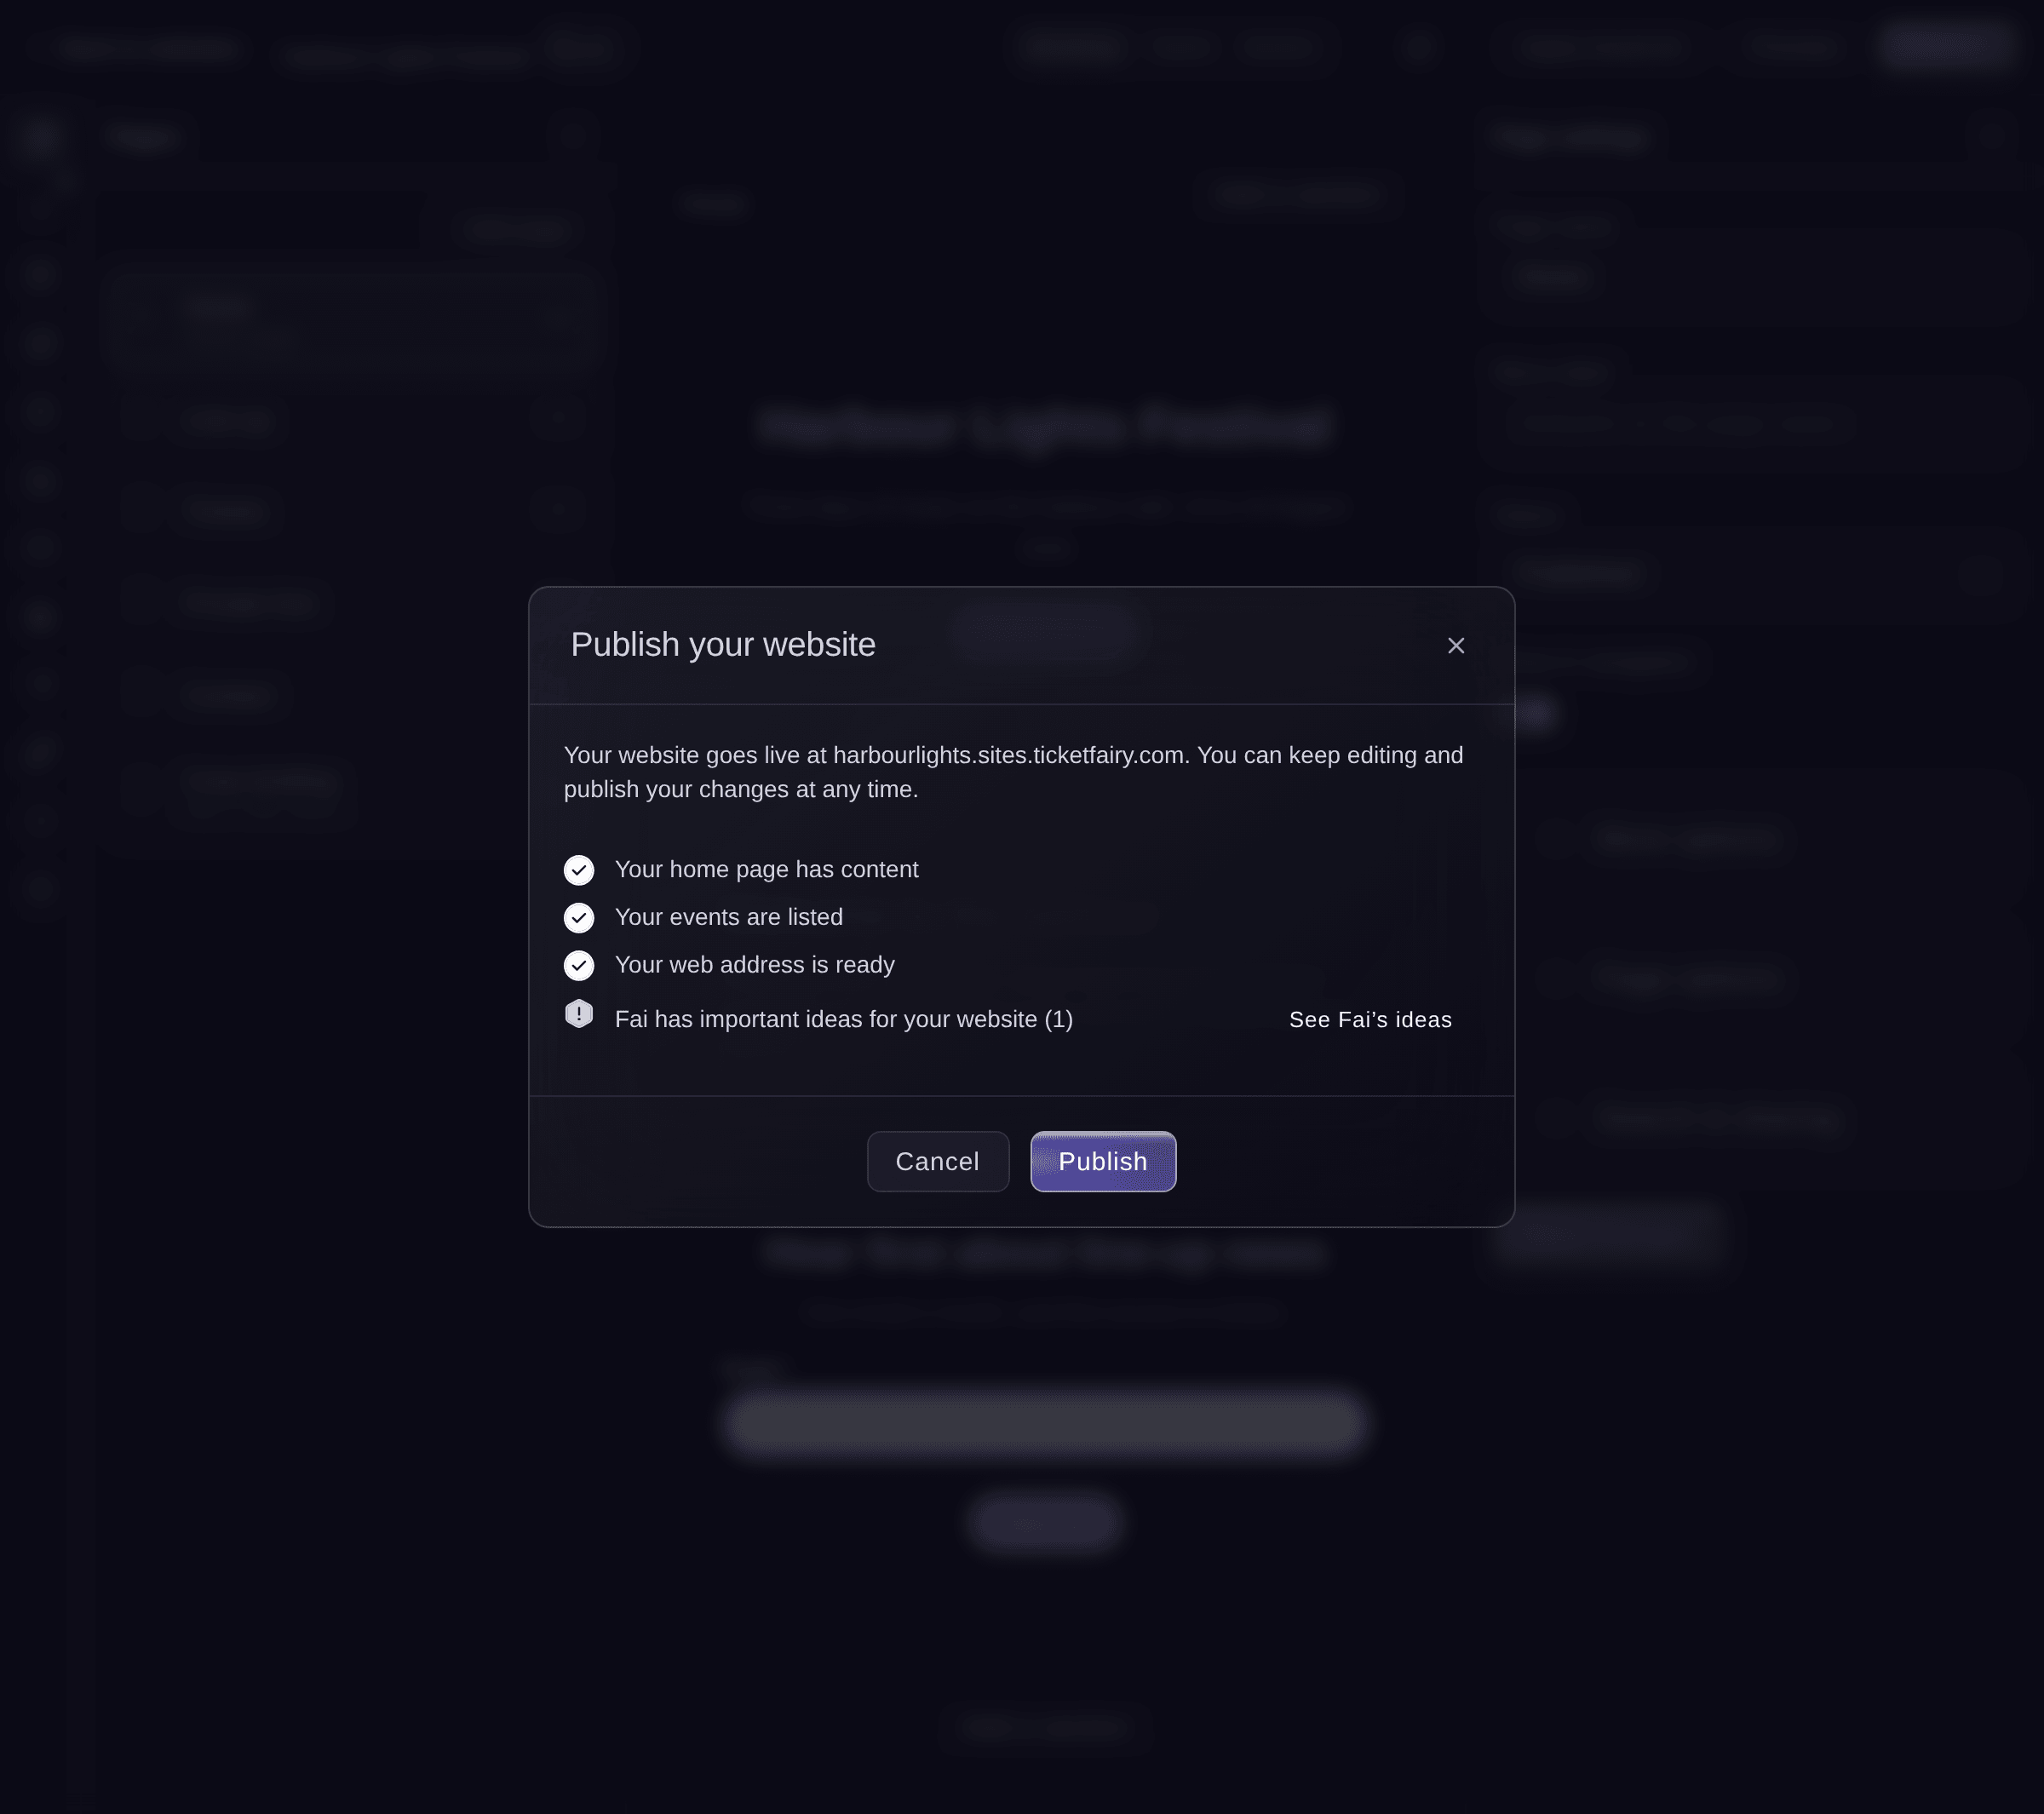
Select Publish at the top, read the checks under Before you publish, then select Publish.
Note: Each check that needs work has a button that takes you to the fix, such as Choose events. You can publish with checks open.
Publish your website. -
Check that your website is live
When Your website is live shows, select Open website. Your website opens at its web address, and Copy link copies the address to share.


Try these steps on your own event
Create a free account, build your event and follow the steps above in your own dashboard. It takes a few minutes and you do not need to book a sales call.
No setup fees. No required monthly ticketing fee. No credit card required.
Or have it done for you
Fai, the assistant inside your dashboard, can start a website from your events, your current website or a description, add and change pages and sections, change the design, publish the website and put an earlier version back. She shows you each change and waits for your yes first. To start from a flyer or PDF, upload it in the dashboard.
In your dashboard, with Fai
Build a website for <BRAND NAME> from our upcoming events, then show me what you made before you publish it
Let Fai do it for you
Fai works inside your Ticket Fairy dashboard. Create your account, open Fai and paste the prompt above.
No setup fees. No required monthly ticketing fee. No credit card required.
Publish your later changes
-
Publish the changes
When the status at the top says Live · changes not published, select Publish changes, then Publish changes.
Note: Your website stays online while you edit. Visitors keep seeing the last version you published until you publish again.
Fai publishes your latest changes after you confirm.
In your dashboard, with Fai
Publish the changes on my <WEBSITE NAME> website
Go back to an earlier version
-
Open History
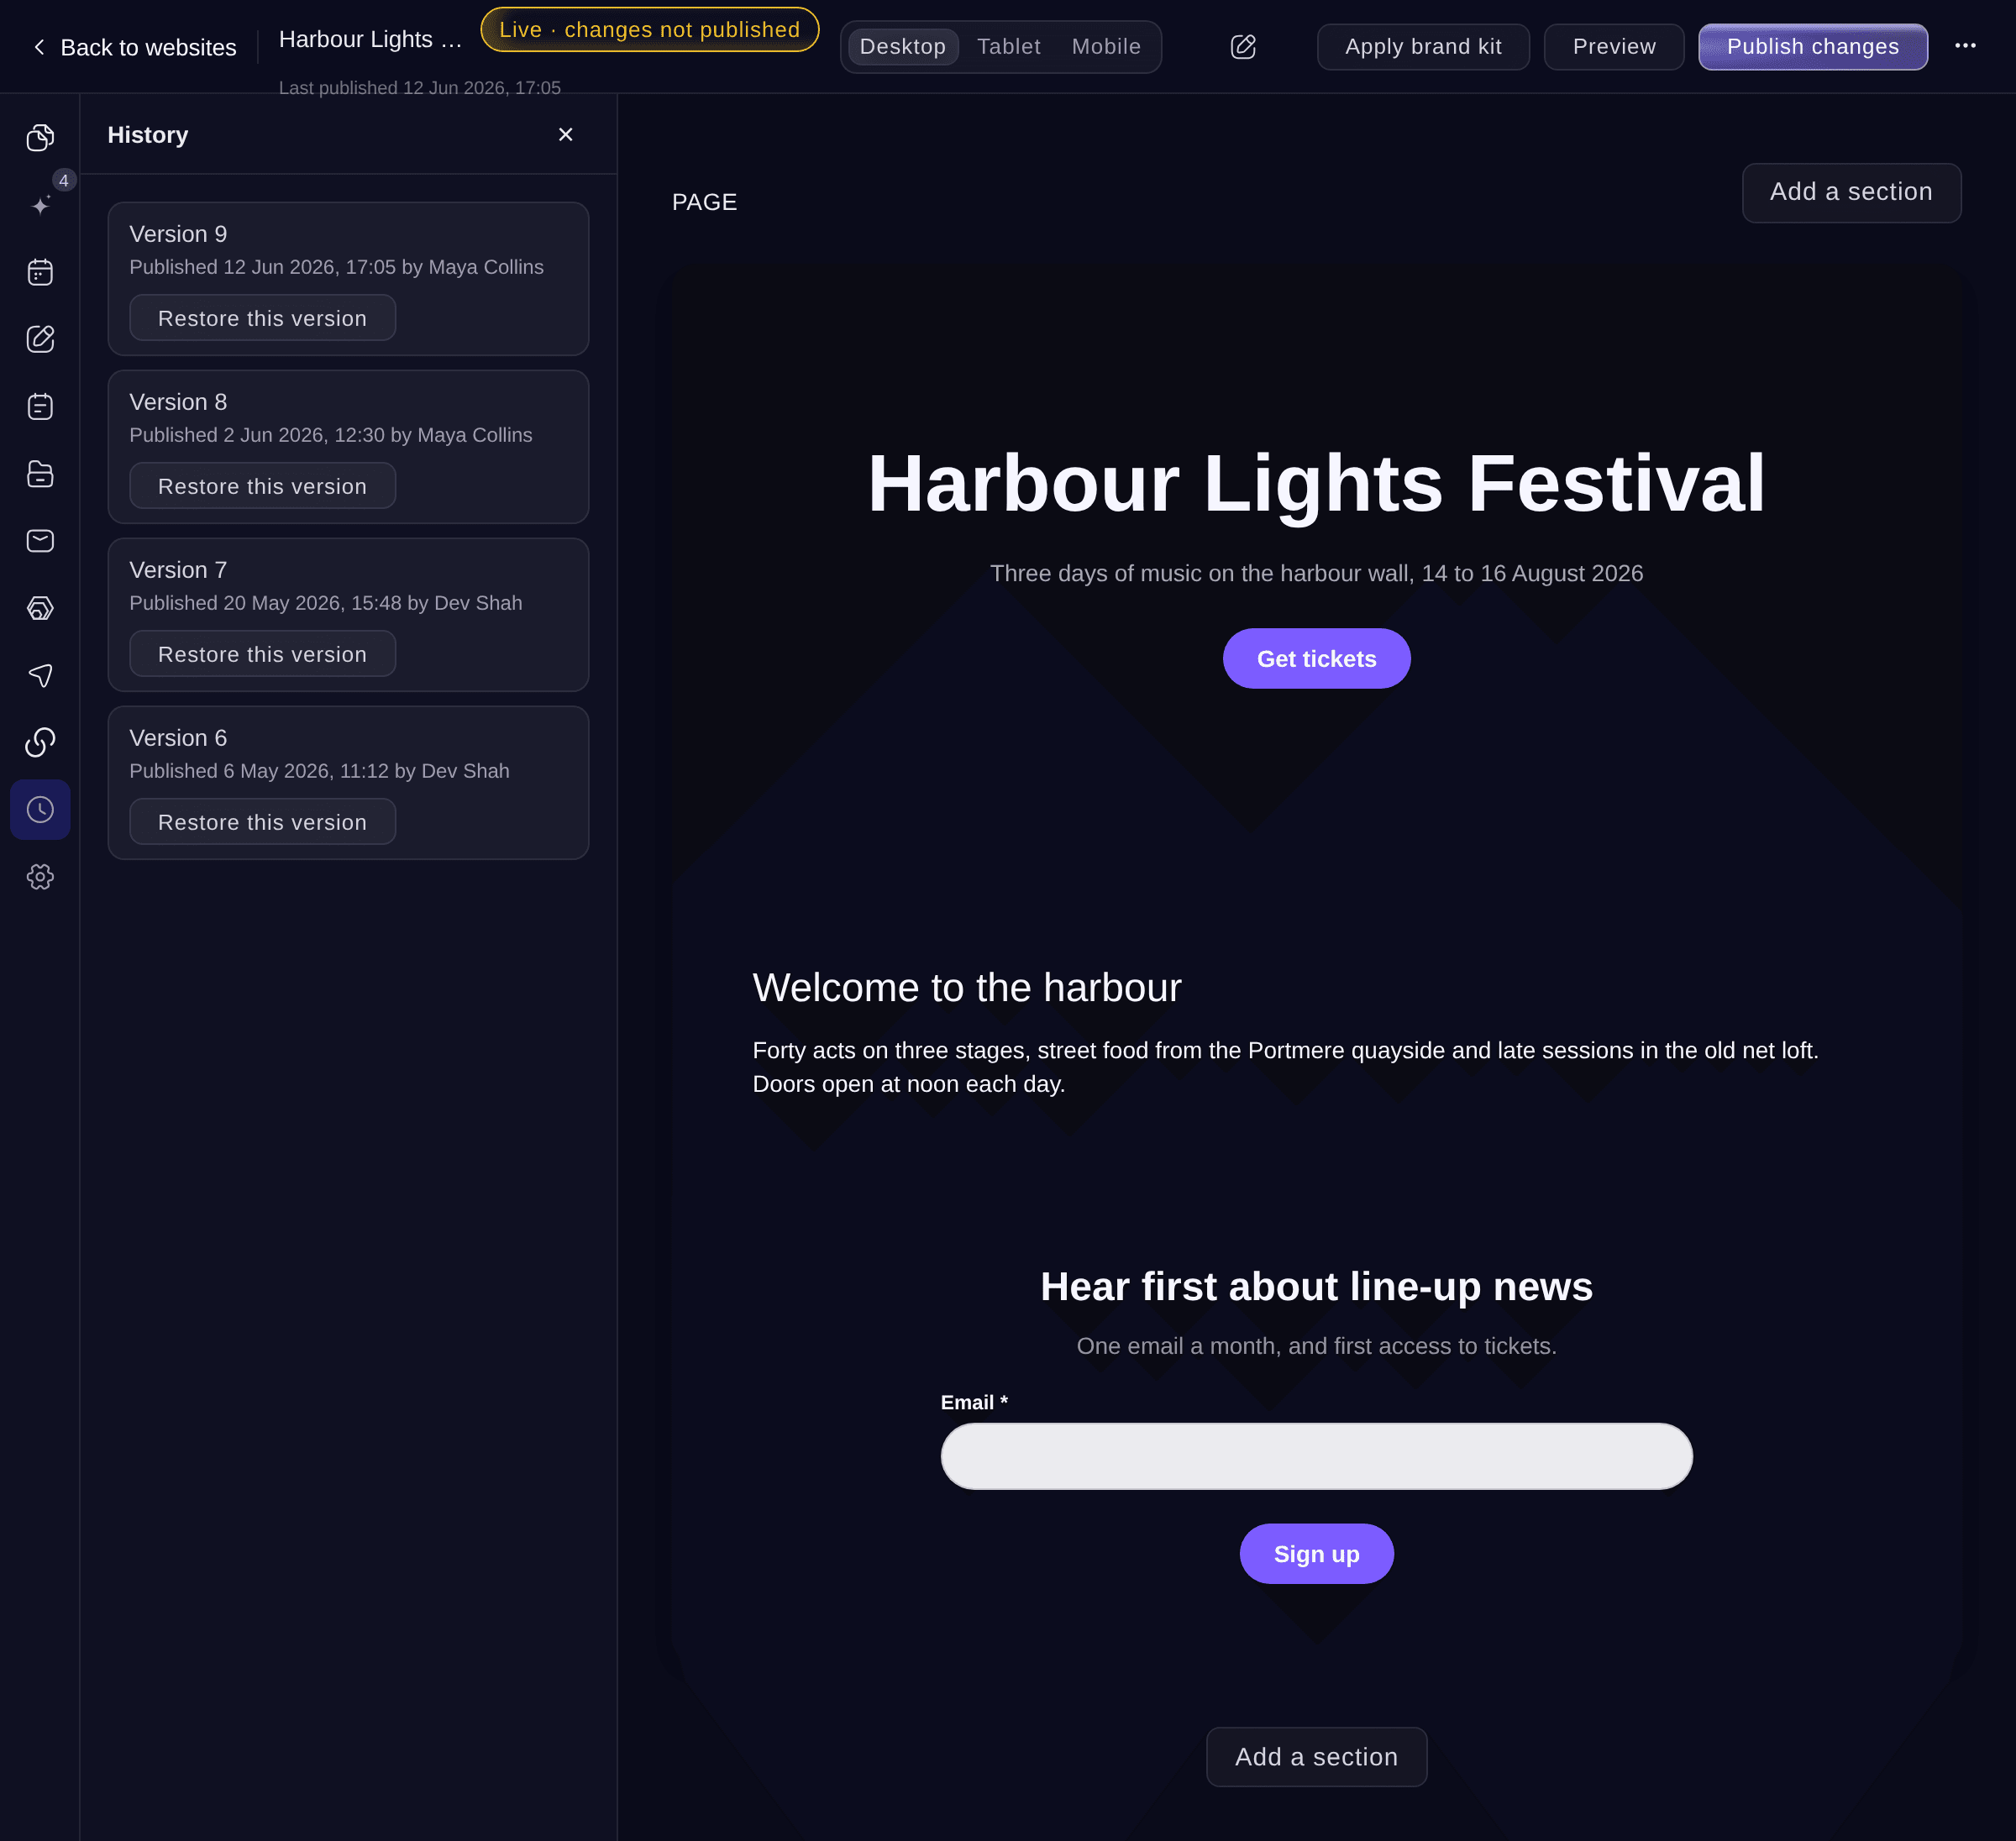
Select History. Each time you publish, that version appears here with who published it and when.
History. -
Restore the version
Select Restore this version on the version you want, then Restore and publish.
Warning: Visitors see the restored version straight away. Your drafts in the editor stay as they are and are not published.

Fai lists your published versions and puts one back on your live website after you confirm.
In your dashboard, with Fai
Put my <WEBSITE NAME> website back to the version published on <DATE>
Take your website offline
-
Take it offline
In the editor, select the more actions button at the top, select Take website offline, then Take offline.
Note: Visitors see nothing at your web address until you publish again. Your pages and content stay in the editor.
Fai takes a website offline after you confirm.
In your dashboard, with Fai
Take my <WEBSITE NAME> website offline
Questions you might have
- Can visitors see my website before I publish it?
- No. A new website is a draft that only your team sees in the editor. Preview gives you a private link for a teammate. Visitors see the website when you publish it.
- Why can I not let Fai build my website?
- Fai building your website and drafting its text are part of some plans. When your plan does not include it, the dialog says so and you can start from a template instead. Contact us to add it.
- Can my brand have more than one website?
- Your plan decides how many websites your brand can have. When the limit is reached, a new website says
Your plan includes a single website. Upgrade to create more.
Contact us to add more. - What happens if a teammate changes the same section as me?
- The editor shows
Someone else changed this
when you save. Select Reload their version to see their change, or Keep my version to save yours over it. - Which address does my website use?
- Each website gets a free address that ends in .sites.ticketfairy.com. You can connect a web address you own, as the guide to connecting your own web address shows.
- How do I delete a website?
- On the Websites page, select the more actions button on the website, select Delete, then confirm. Deleting cannot be undone, so take the website offline instead if you might want it back.
- Can I use some premium styles?
- Styles marked Premium are part of some plans. Contact us to add them.
Still have a question?
Book a demo and we will answer it on a call, on your kind of event. Or create your account and see it for yourself.
No setup fees. No required monthly ticketing fee. No credit card required.
Related guides
Do this on your own event
Create your account, build your event and follow the steps in your own dashboard. You do not need to book a sales call.