
Running the production
Issue accreditation passes for your event
Festival production managers and venue operations teams accredit hundreds of people behind an event, from the lighting crew to a headliner's plus-ones and the press pit. Passes bring everyone confirmed elsewhere in your event into one list, keep each department and performer to their allowance, and put zones, meals and parking in front of your gate team at every scan.
Give your crew, performers and their guests, traders' staff, volunteers and press a named pass for your event, with the zones it opens, the days and hours it works, meals and parking. Your door team scans each pass in the same app as your tickets and sees what it allows, and you print photo badges from the same list.
- For
- Accrediting everyone who works on or visits your event
- Takes
- 12 minutes
Before you start
- You are an owner, admin or producer on the event. The event's Management page opens for those roles only.
- Your wristband and badge types are set up on the event's Credentials page. Each one becomes a pass type. An owner or admin adds them there.
- The event has a ticket type to issue passes as, such as a free crew or guest-list ticket.
-
Open Passes
Open the event, select Management, then select Passes in the list of sections.
Note: If Passes is not in the list, select More sections and open it there. The groups and their allowances are under the list of passes.
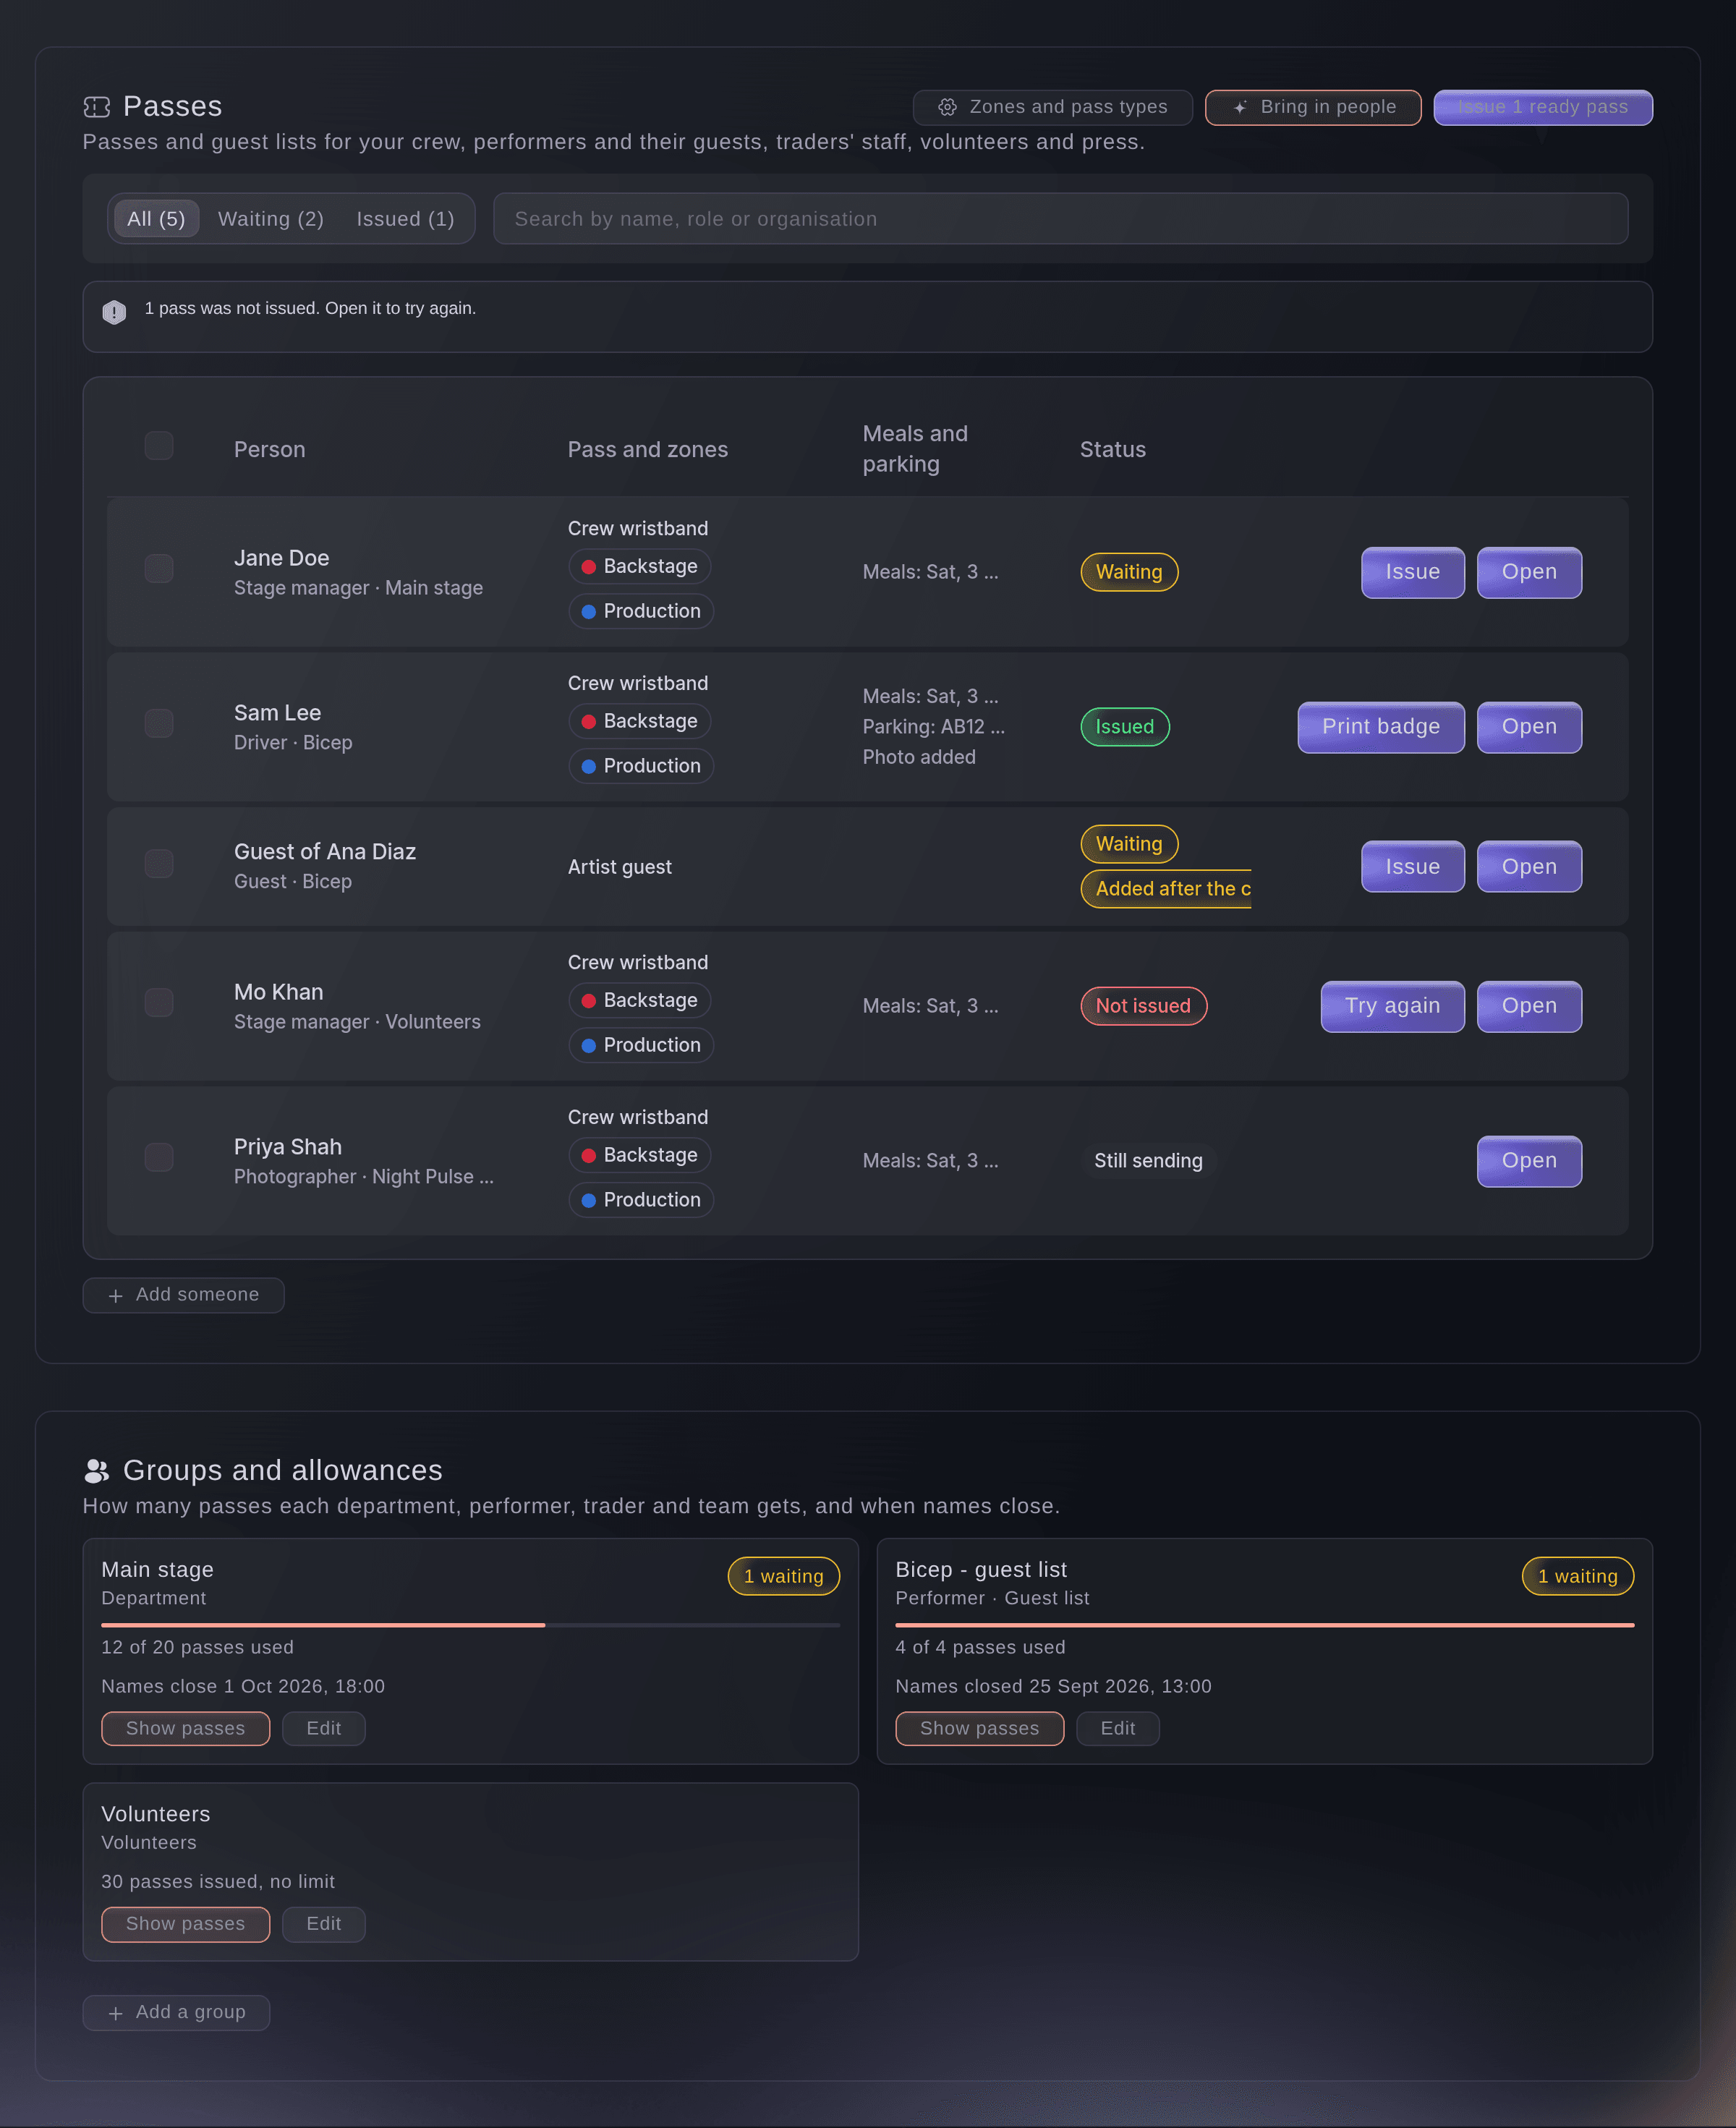
Passes for one festival. -
Add your zones
Select Zones and pass types, enter a zone name such as Backstage, then select Add zone.
Note: Choose a colour for each zone, which is the band printed on the badge. Select one of the suggestions to add a common zone in one click.
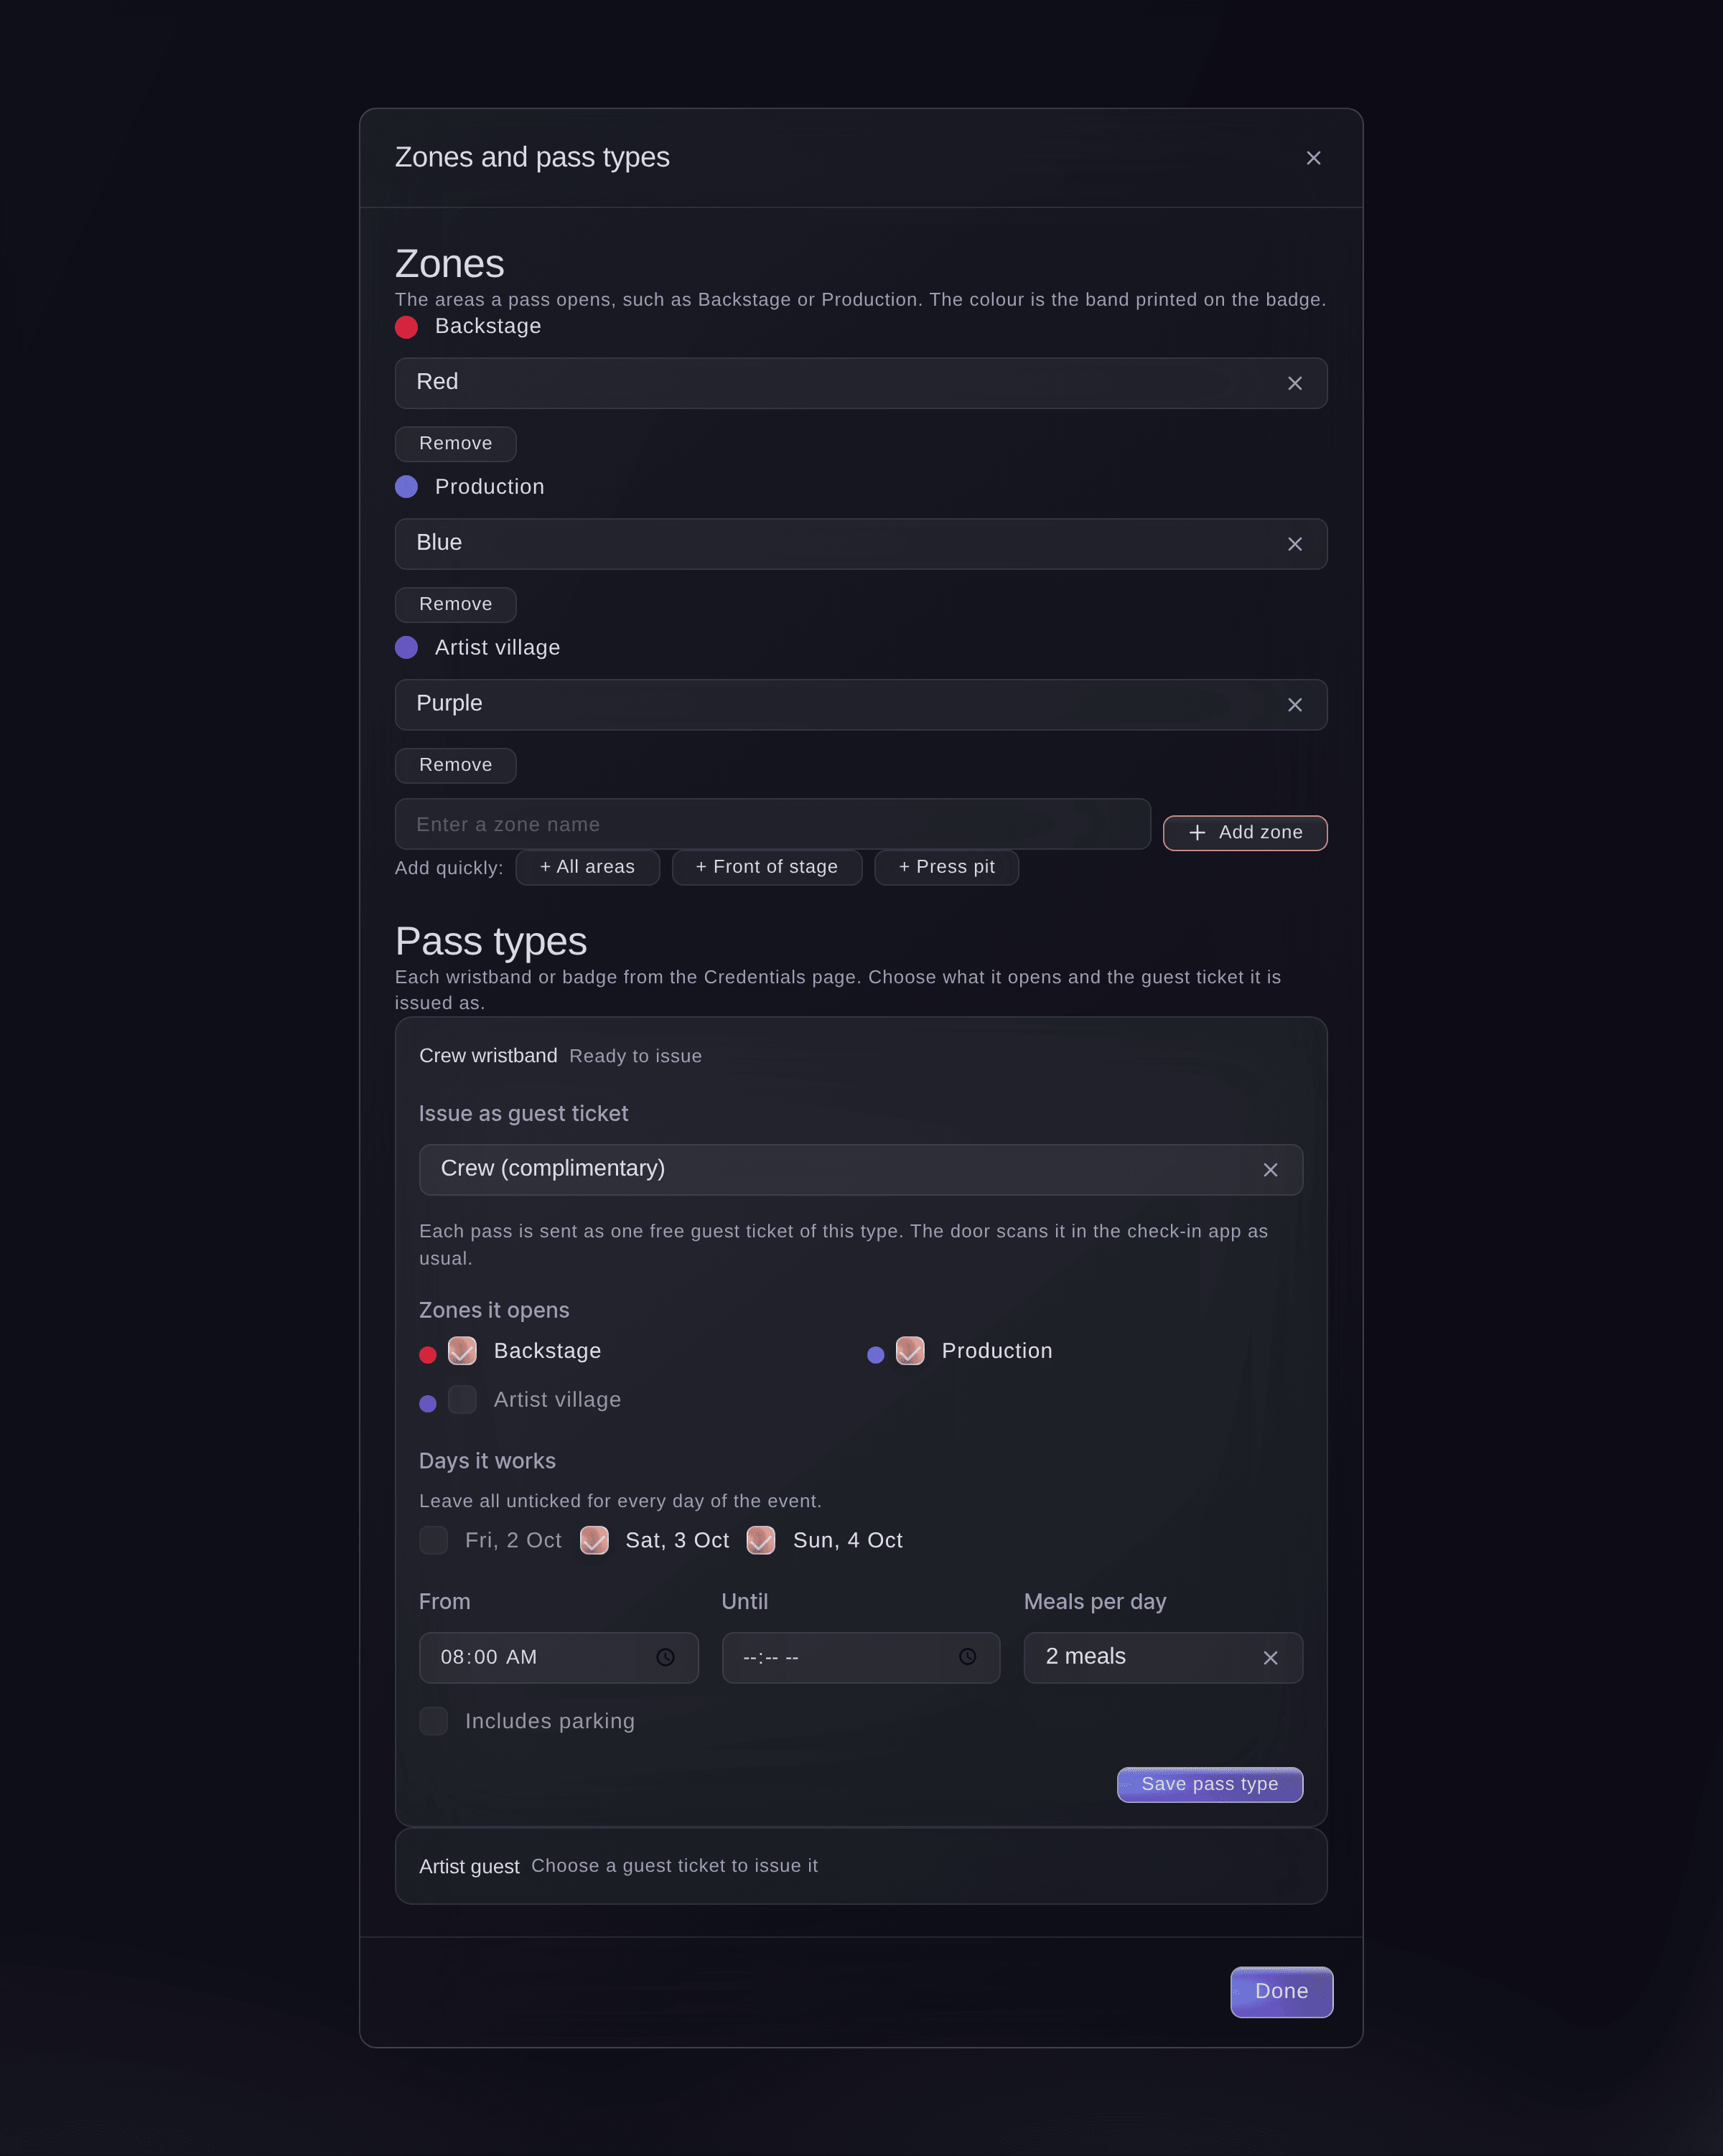
Zones and pass types. -
Choose what each pass type gives
Under Pass types, open a wristband or badge, choose Issue as guest ticket, tick the Zones it opens, then select Save pass type.
Note: Also set Days it works, the hours From and Until, Meals per day and Includes parking. Leave every day unticked for a pass that works on every day of the event.
Tip: A person on the rota gets one meal for each shift that starts that day, or two for a shift of 8 hours or more, up to the pass type's meals per day.
-
Let Fai bring in your people
Select Bring in people.
Note: Fai adds your crew, confirmed volunteers with a confirmed shift, each performer's travel party and guest list from their advance, approved traders' staff and approved press, and the list fills over the next minute or two. Each person waits for a pass, and nobody gets one until you issue it.
-
Add someone yourself
Optional: select Add someone, enter the Name, choose the Group, then select Add.
Note: Under More details, enter their email, role, organisation and pass type. Without an email address, the pass comes to you to hand on.
-
Set each group's allowance
Under Groups and allowances, select Edit on a group, enter Passes allowed and Names close, then select Save.
Note: Choose a Pass type for this group so everyone in it gets the same pass. Names added after the cut-off wait for your decision and are marked Added after the cut-off.
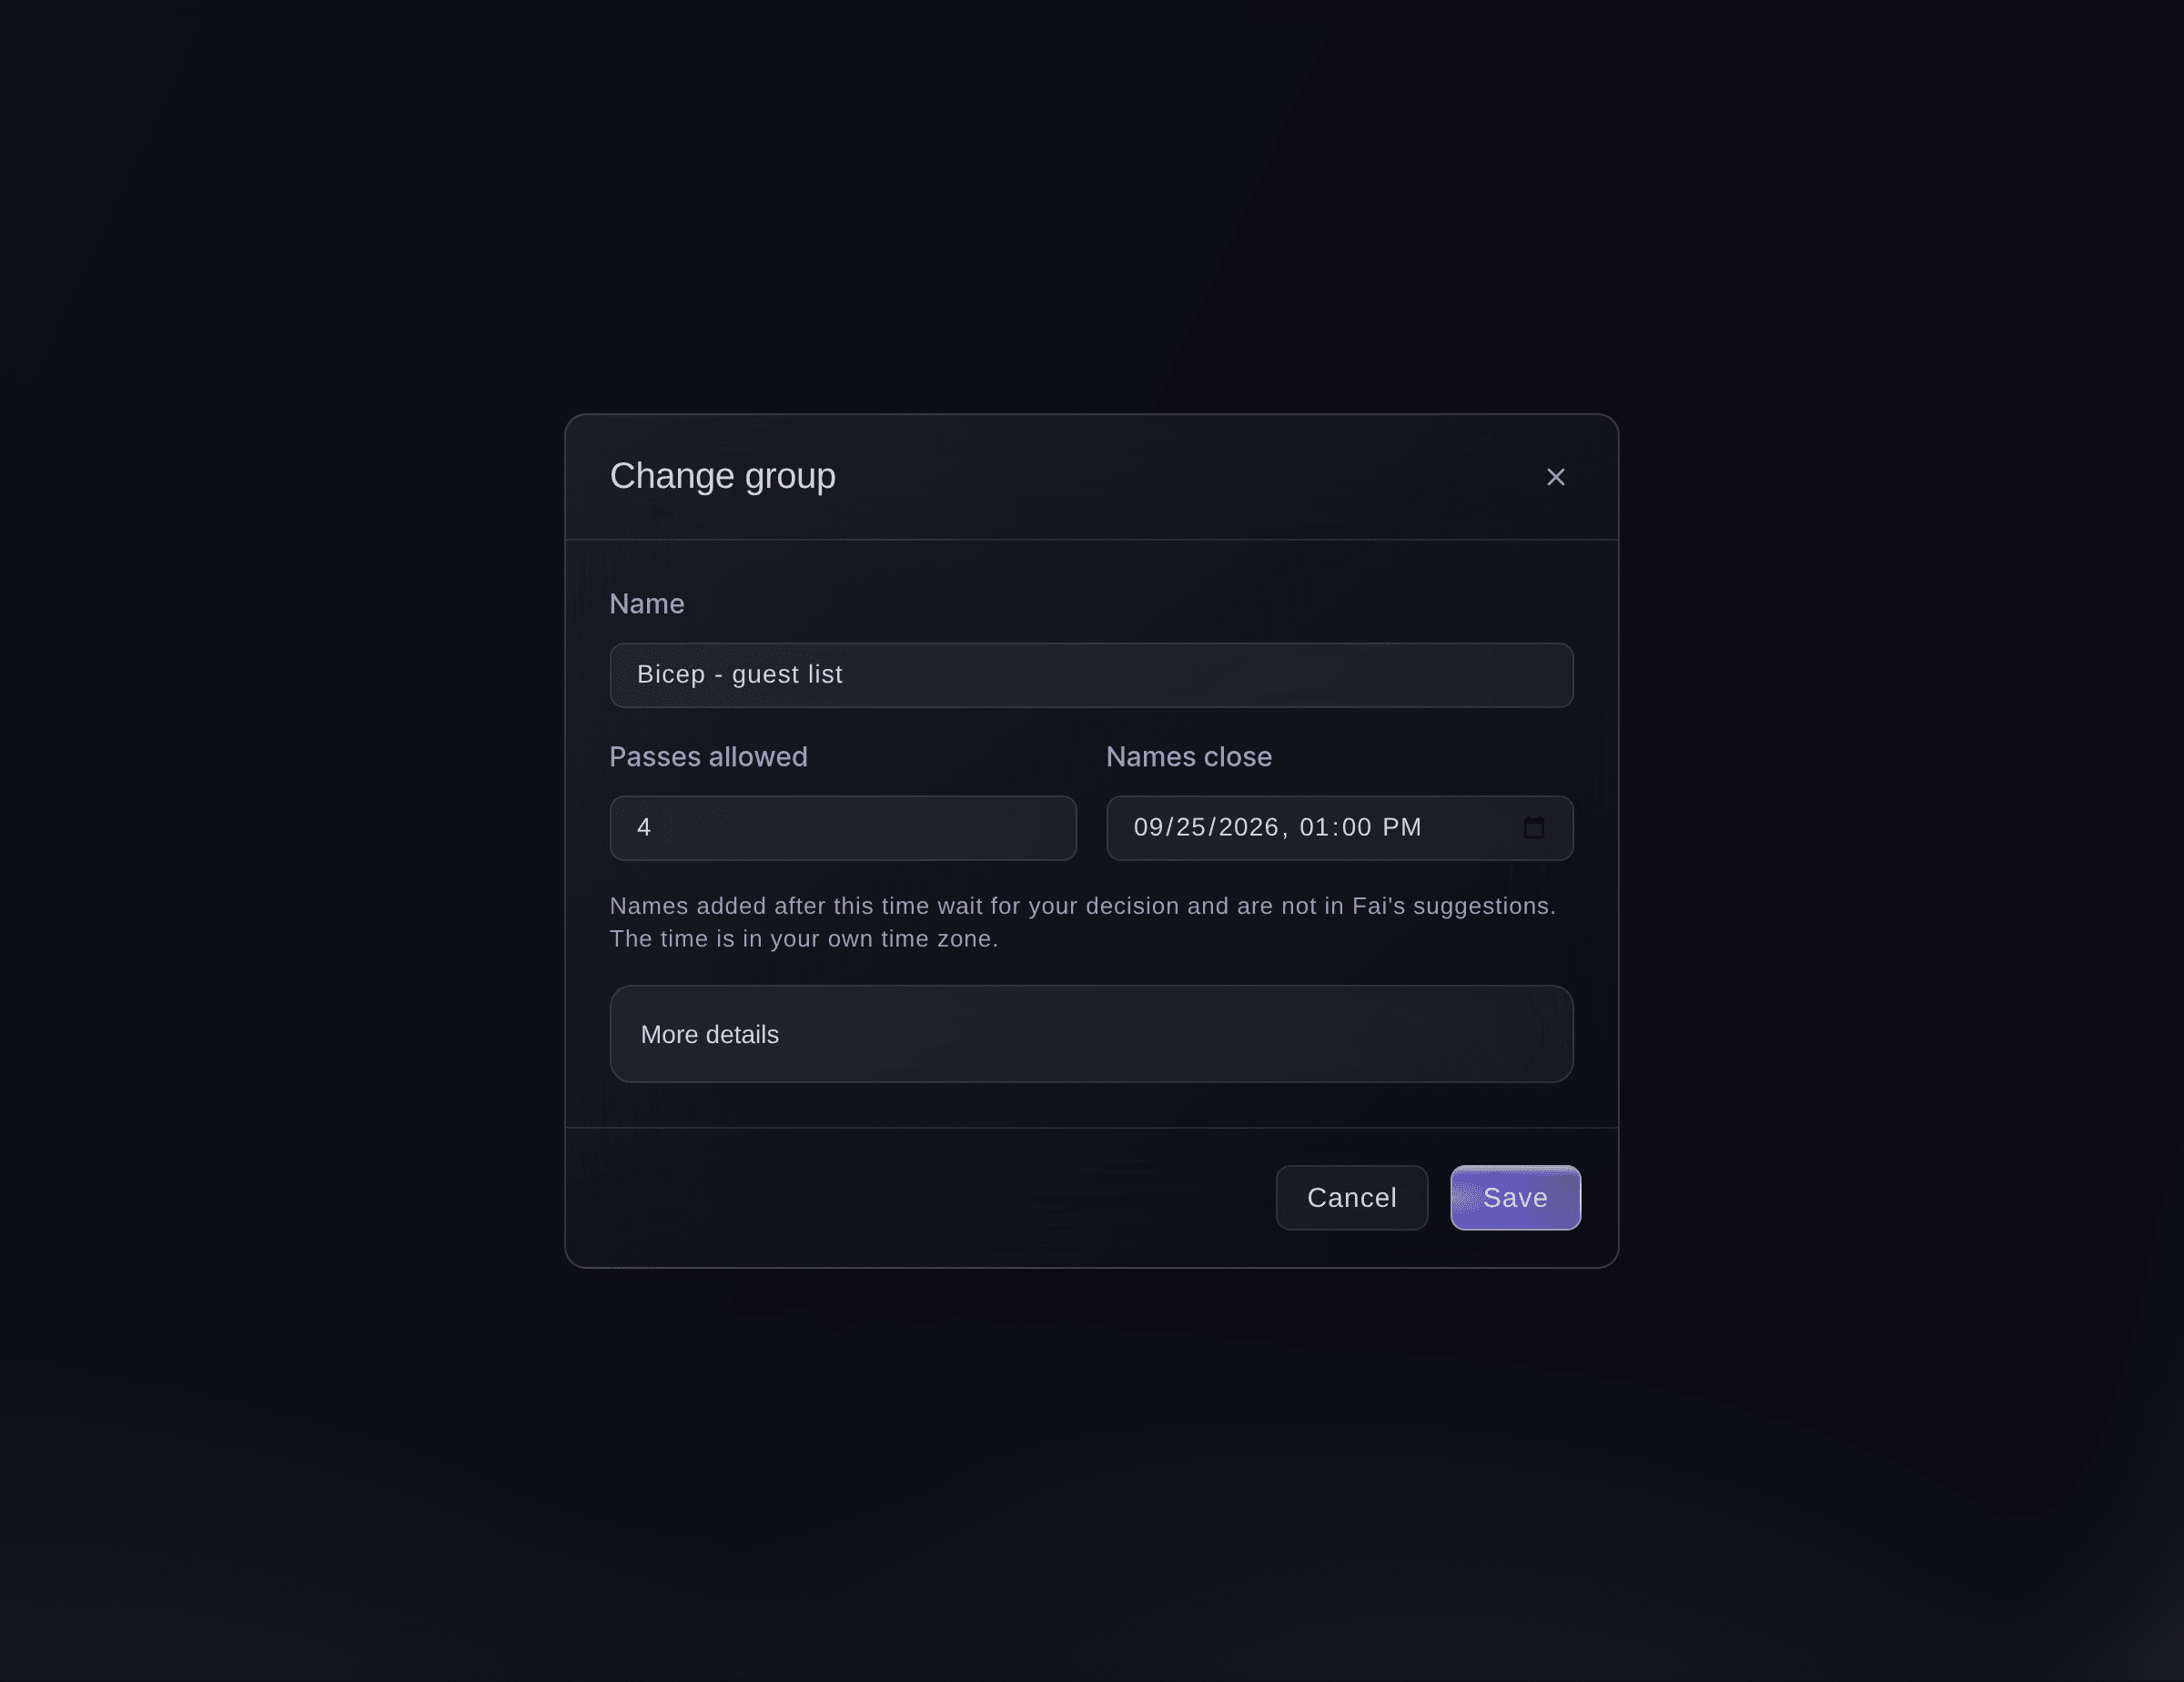
A group's allowance and cut-off. -
Issue the passes
Select the issue button at the top of Passes, which counts the passes that are ready, check how many people get a pass, then select the issue button in the dialog.
Note: Each person gets a free guest ticket of the pass type by email. To issue a few, or a pass added after its group's cut-off, tick them in the list and select the issue button above it.
Warning: The emails go as soon as you select the issue button.
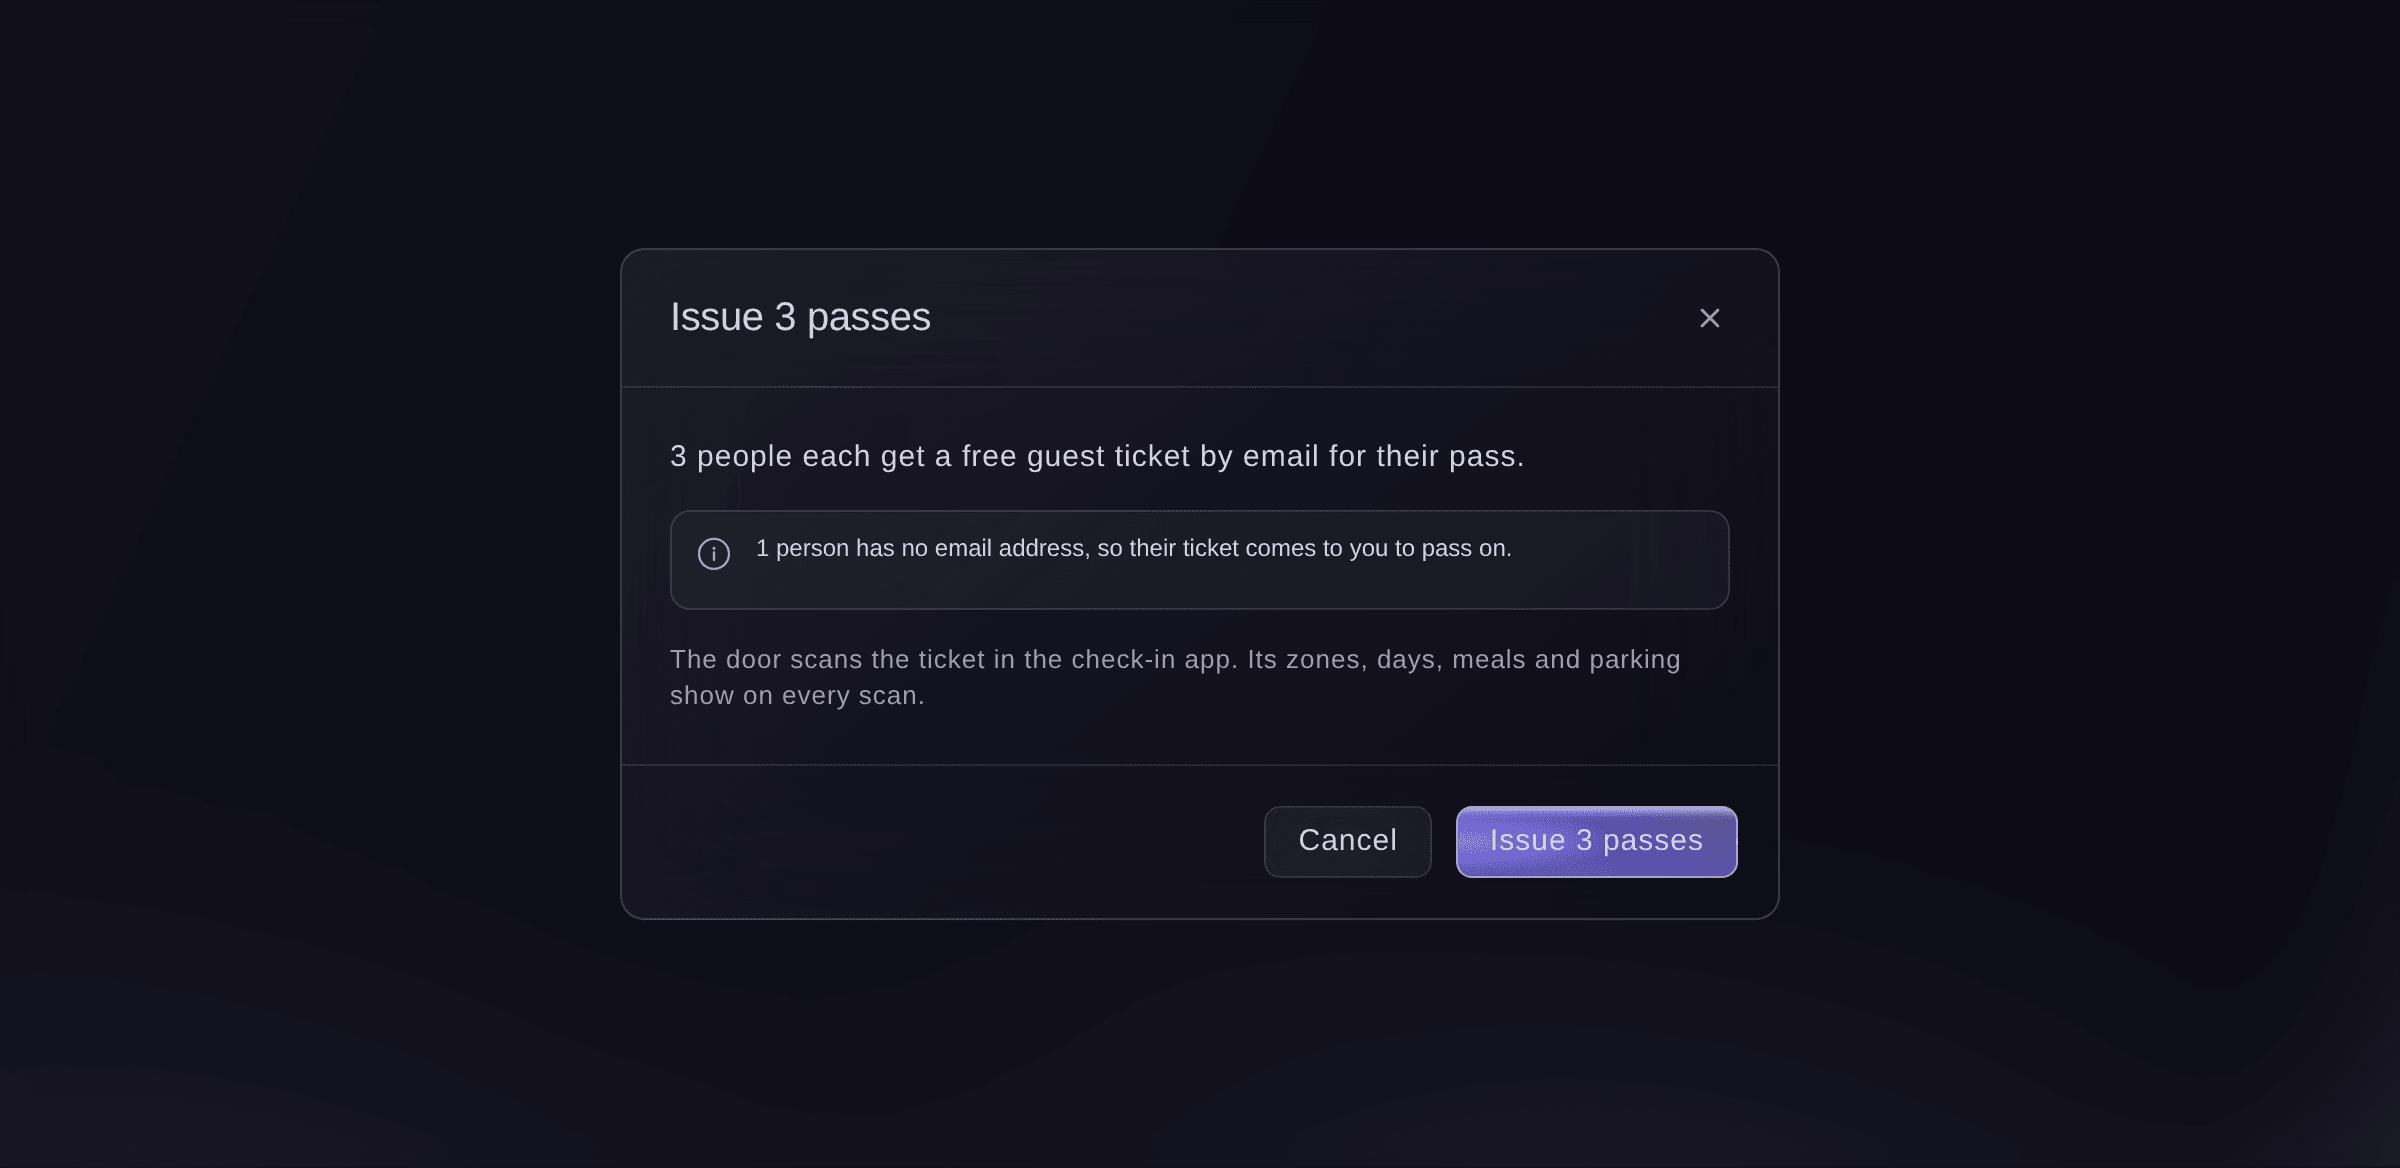
Issue passes.


A pass at the door
Your door team scans the pass in the check-in app like any ticket. Every scan shows the zones, days, hours, meals and parking on the pass, so your team can see where the holder can go. A pass shows Sending until its ticket is made, then Issued.
-
Add a badge photo
Select a pass, then select Upload a photo or Get a photo link.
Note: Upload a JPG, PNG or WebP of the face, at least 600 pixels wide for a sharp print. A photo link lets the person add their own photo without signing in, and works for 14 days.
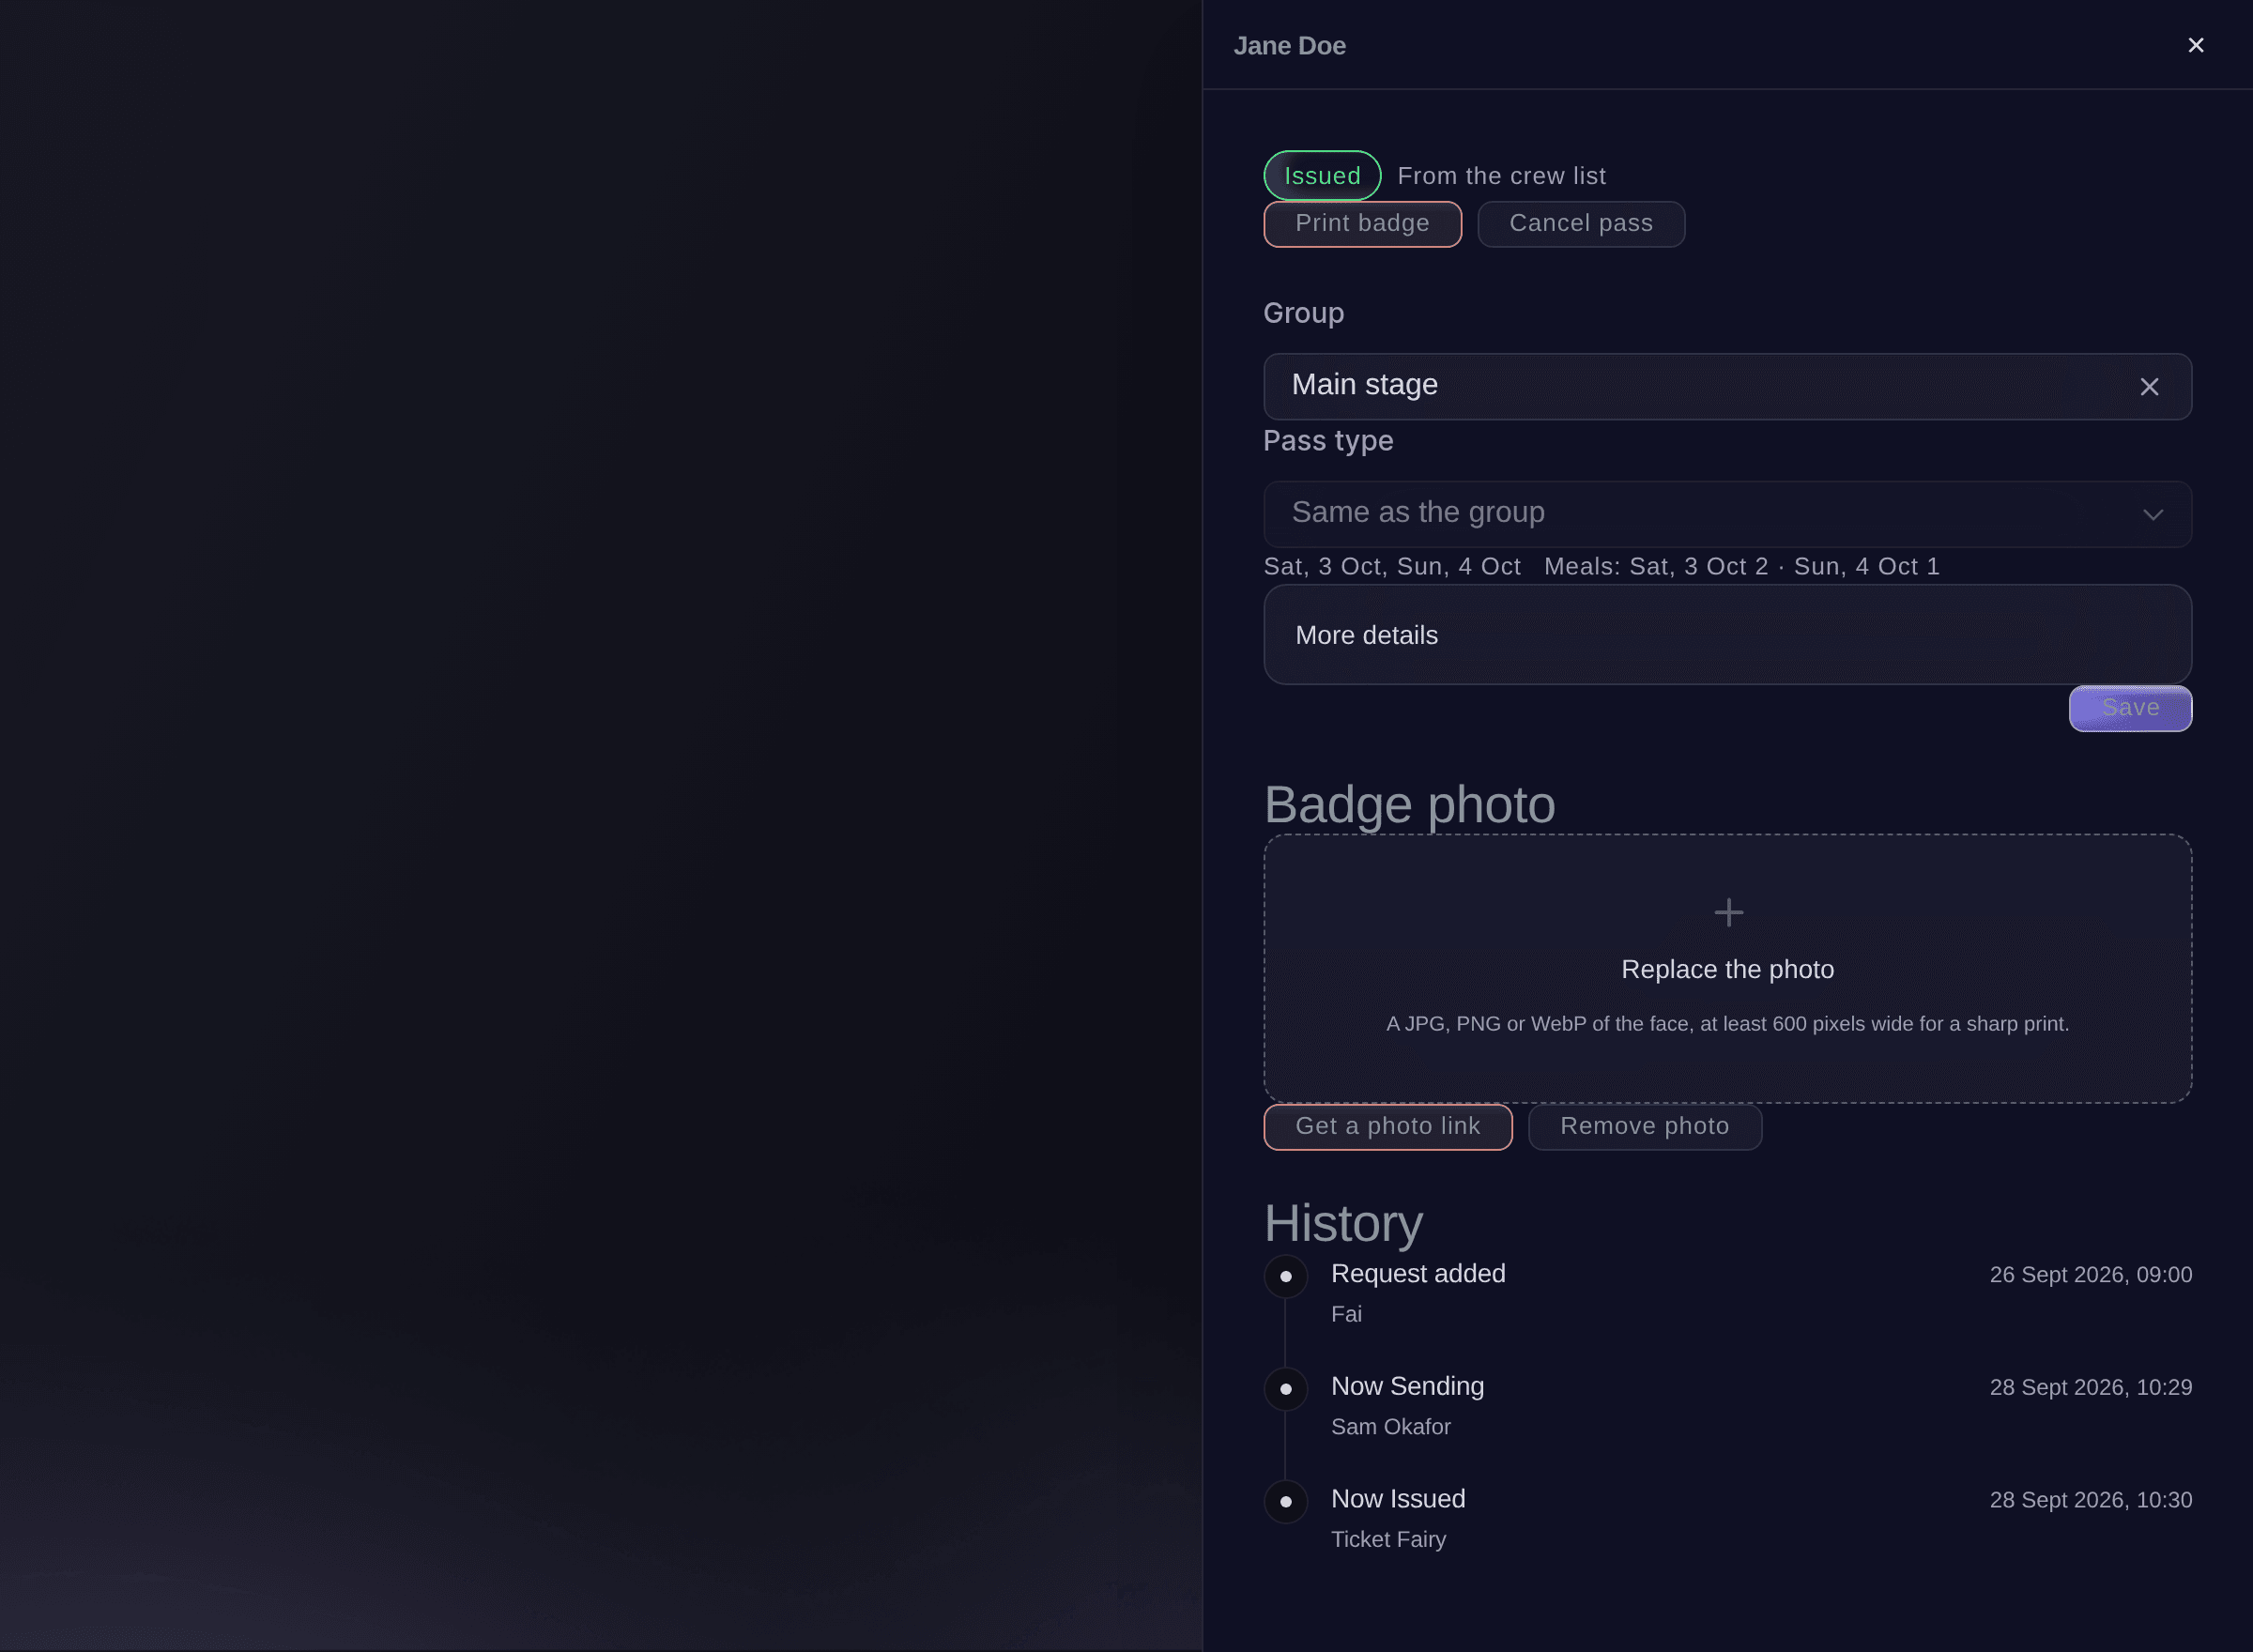
One pass. -
Print photo badges
Tick the passes in the list, select the print button above it, choose the Badge size, then select Print.
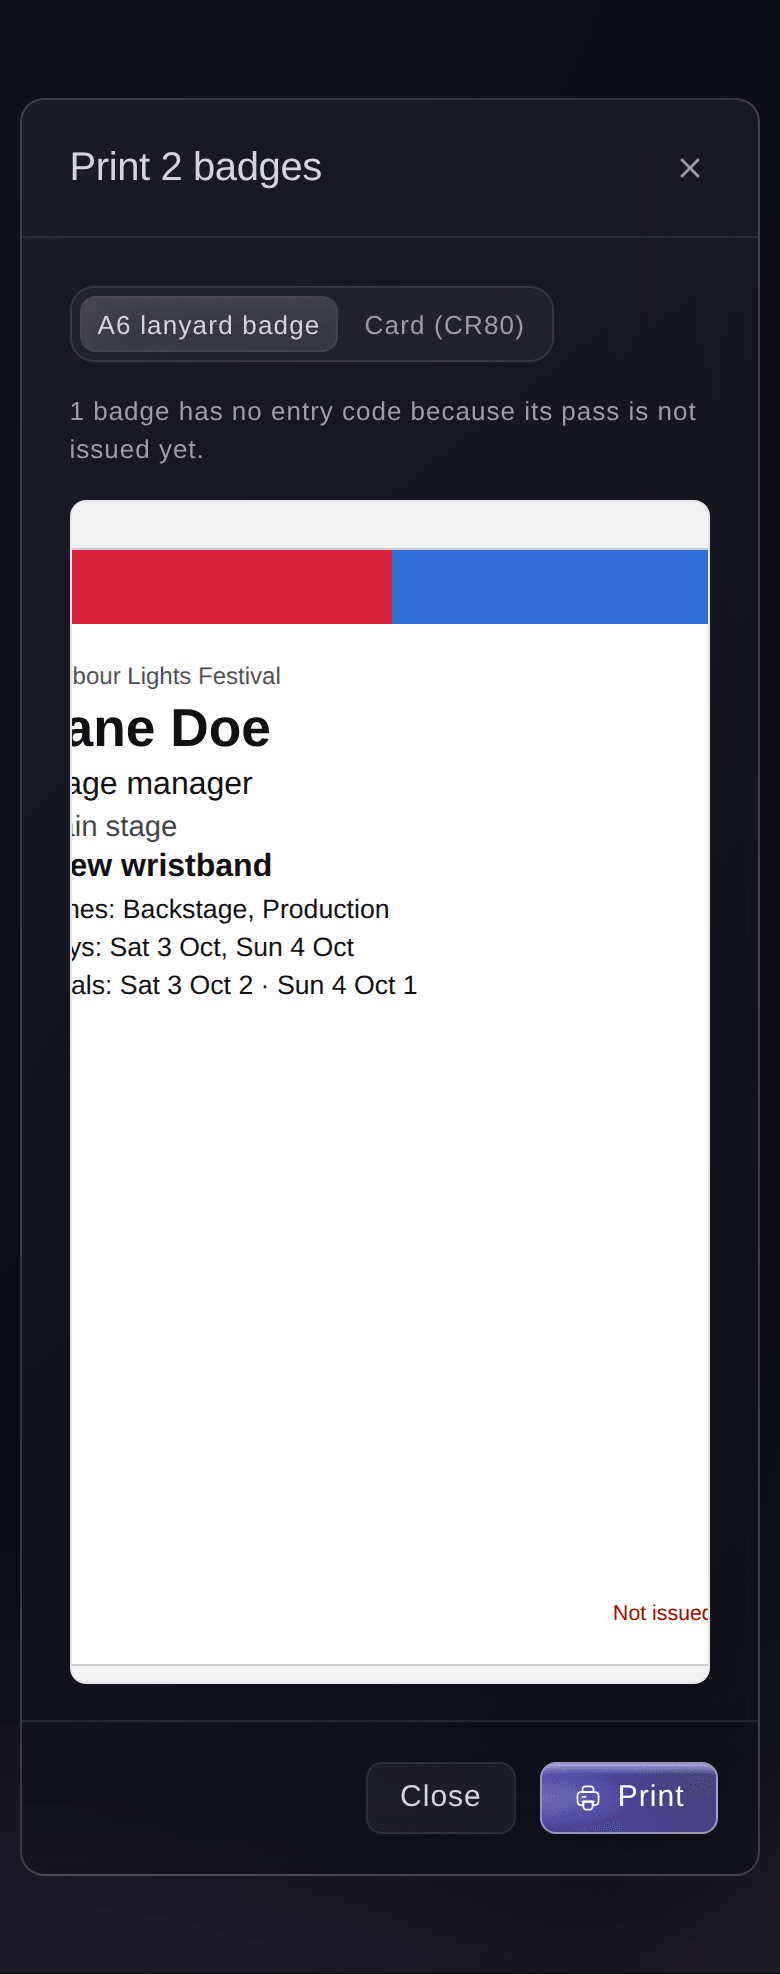
Note: Choose A6 lanyard badge or Card (CR80). Each badge carries the name, photo, zones, days, meals and entry code, and a pass that is not issued yet prints without an entry code.
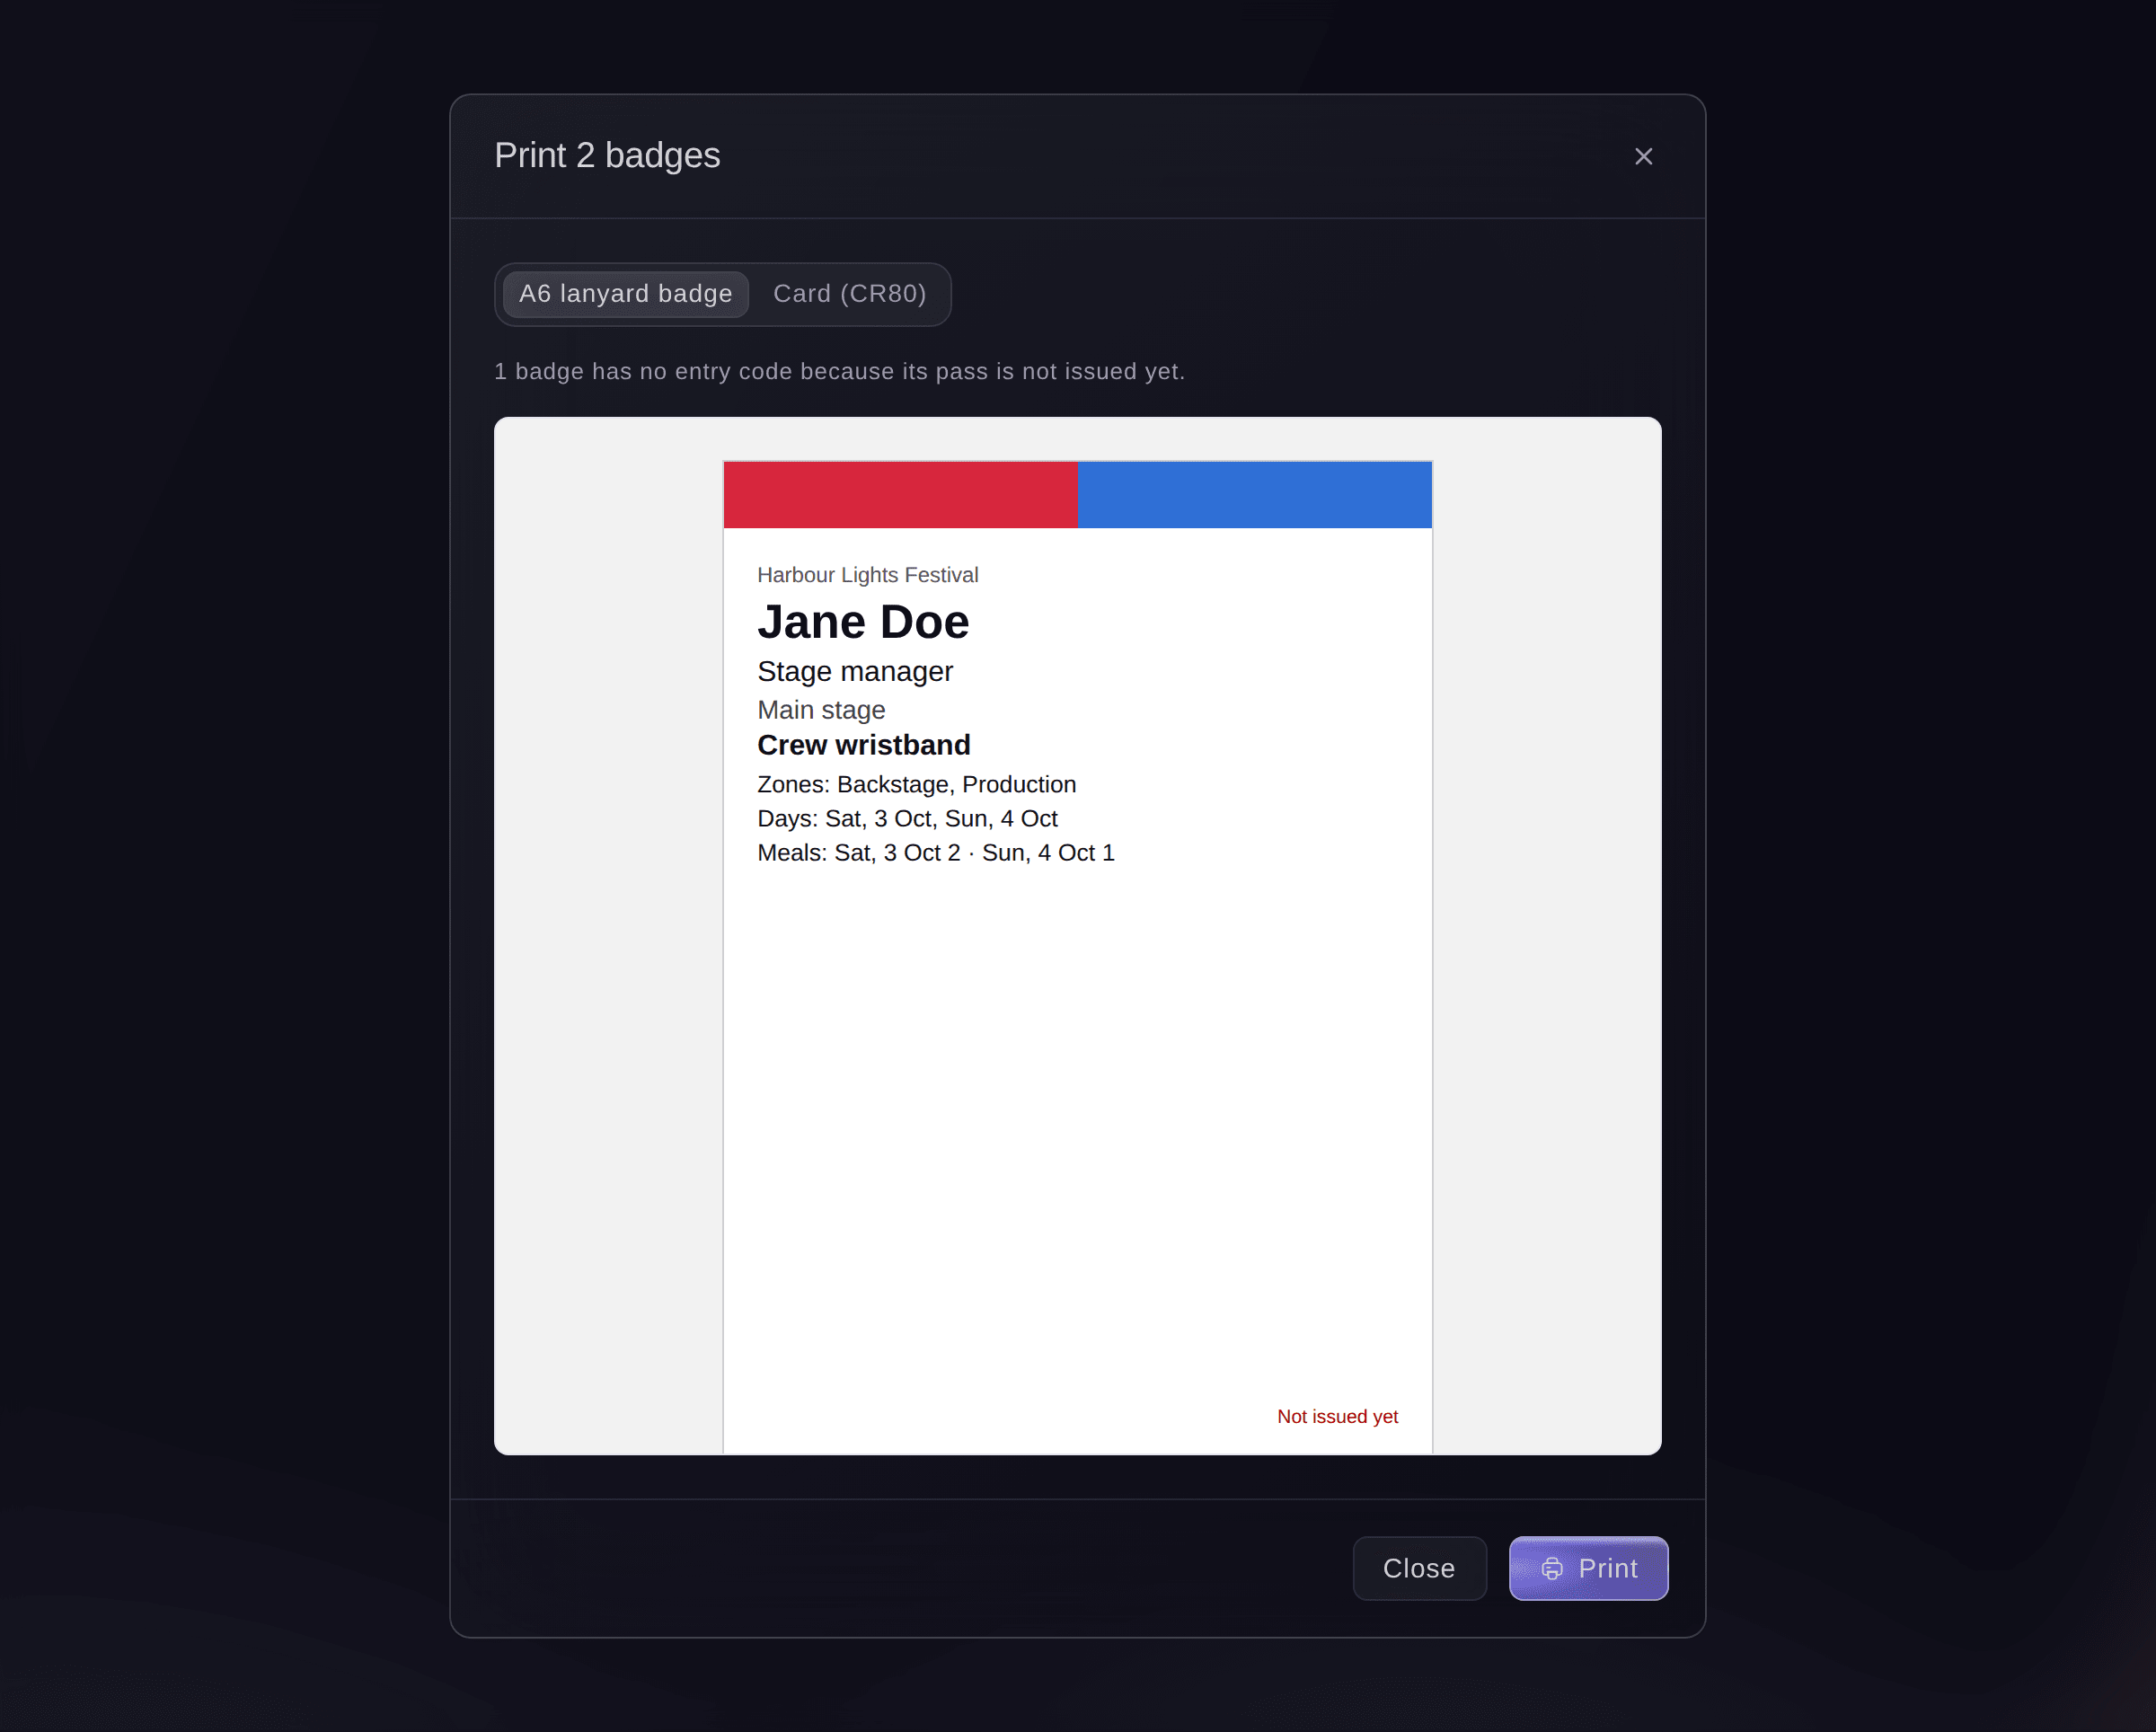
Print photo badges.

Try these steps on your own event
Create a free account, build your event and follow the steps above in your own dashboard. It takes a few minutes and you do not need to book a sales call.
No setup fees. No required monthly ticketing fee. No credit card required.
Or have it done for you
Fai reads your passes, groups, zones and pass types, brings in everyone confirmed elsewhere in the event, sets up zones, pass types and group allowances, adds or changes a pass, issues passes, cancels a pass or issues it again, and makes a photo link for a pass holder. She shows you each change and waits for your yes first. Issuing emails each person their pass, so Fai always asks before she issues anything. Badges are printed in the dashboard.
In your dashboard, with Fai
Bring in everyone for passes at <EVENT NAME>
Let Fai do it for you
Fai works inside your Ticket Fairy dashboard. Create your account, open Fai and paste the prompt above.
No setup fees. No required monthly ticketing fee. No credit card required.
Cancel a pass
-
Cancel it
Open the pass, select Cancel pass, optionally enter a reason, then confirm.
Note: The guest ticket is cancelled, so the door refuses it. Select Issue again to send the person a new pass later.
Fai cancels a pass and its ticket, or issues a cancelled pass again, when you ask, after you confirm.
In your dashboard, with Fai
Cancel the pass for Sam Lee at <EVENT NAME>, he is not coming
Decline a request
-
Decline it
Open the waiting pass, select Decline, optionally enter a reason, then confirm.
Note: Select Undo straight away, or Bring back later, to put the request back on the list.
Fai declines a pass request or brings one back when you ask, after you confirm.
In your dashboard, with Fai
Decline the late guest list name for Bicep at <EVENT NAME>
Questions you might have
- I selected Bring in people. Why is the list not complete yet?
- Fai adds people in the background, a few hundred at a time, so the list fills over a minute or two at a large event. You can keep working meanwhile. Nobody is added twice if you select it again. If someone could not be added, the activity log says how many, and you can add them with Add someone.
- Can I change a pass after it is issued?
- Yes, for the group, role, organisation, zones, days, parking and vehicle registration, and the door sees the change on the next scan. To change the name, email or pass type, cancel the pass and issue it again.
- What happens when a group has no passes left?
- Passes over the allowance are held back when you issue them, and the dialog says why. Select Issue anyway to issue them, or raise the group's Passes allowed.
- An artist corrected a name on their advance. Do I have to redo the pass?
- A waiting pass takes the new name by itself. An issued pass shows the new name with Use the new name, which cancels the old pass and sends a new one after you confirm.
- Why does a pass say Not issued?
- Its guest ticket could not be sent. Open the pass to see why, then select Try again. If it says the ticket was not confirmed, check the Guest Tickets page first so the person does not get two.
- Can I issue passes for a seated event?
- Issue them as guest tickets on the Guest Tickets page instead, where you can choose the seats.
- Where do I set zones from the Credentials page?
- On the Credentials page, open the menu on a wristband or badge and select Zones and entitlements. It shows the same settings as the pass type in Passes.
Still have a question?
Book a demo and we will answer it on a call, on your kind of event. Or create your account and see it for yourself.
No setup fees. No required monthly ticketing fee. No credit card required.
Related guides
Do this on your own event
Create your account, build your event and follow the steps in your own dashboard. You do not need to book a sales call.