
Setting up an event
Limit who can buy a ticket type
A high-demand ticket needs a clear limit so one buyer cannot take the allocation in one order or spread a large purchase across several orders. You may also list one ticket type on another ticketing page. The ticket type keeps its own quantity rules, while order approval and anti-scalping settings remain separate choices.
Limit how many tickets one order or customer account can buy, or send one ticket type to another ticketing page instead of selling it through Ticket Fairy.
- For
- Controlling ticket quantities and where buyers complete a purchase
- Takes
- 6 minutes
- Open the ticket type
- Choosing the right limit
- Set the maximum per order
- Set the maximum per account
- Send one ticket type to another ticketing page
- Use approval or anti-scalping settings separately
- Save the change
- Check the order limit
- Check the account limit across orders
- Try one more ticket
- Release the test capacity
- Check the external sales link
Before you start
- You're an owner or admin for the event.
- The ticket type already exists. These limits apply to one ticket type, so repeat the change for each ticket type that needs a different rule.
- You know the maximum number one order and one customer account should be able to buy.
- You have an existing customer account for the account-limit test; a first purchase may not be stopped by the account limit.
- If you are sending buyers to another ticketing page, you have its complete web address and understand that Ticket Fairy will not complete that ticket type's sale.
-
Open the ticket type
Open your event, select Tickets, then select Edit on the ticket type you want to change.
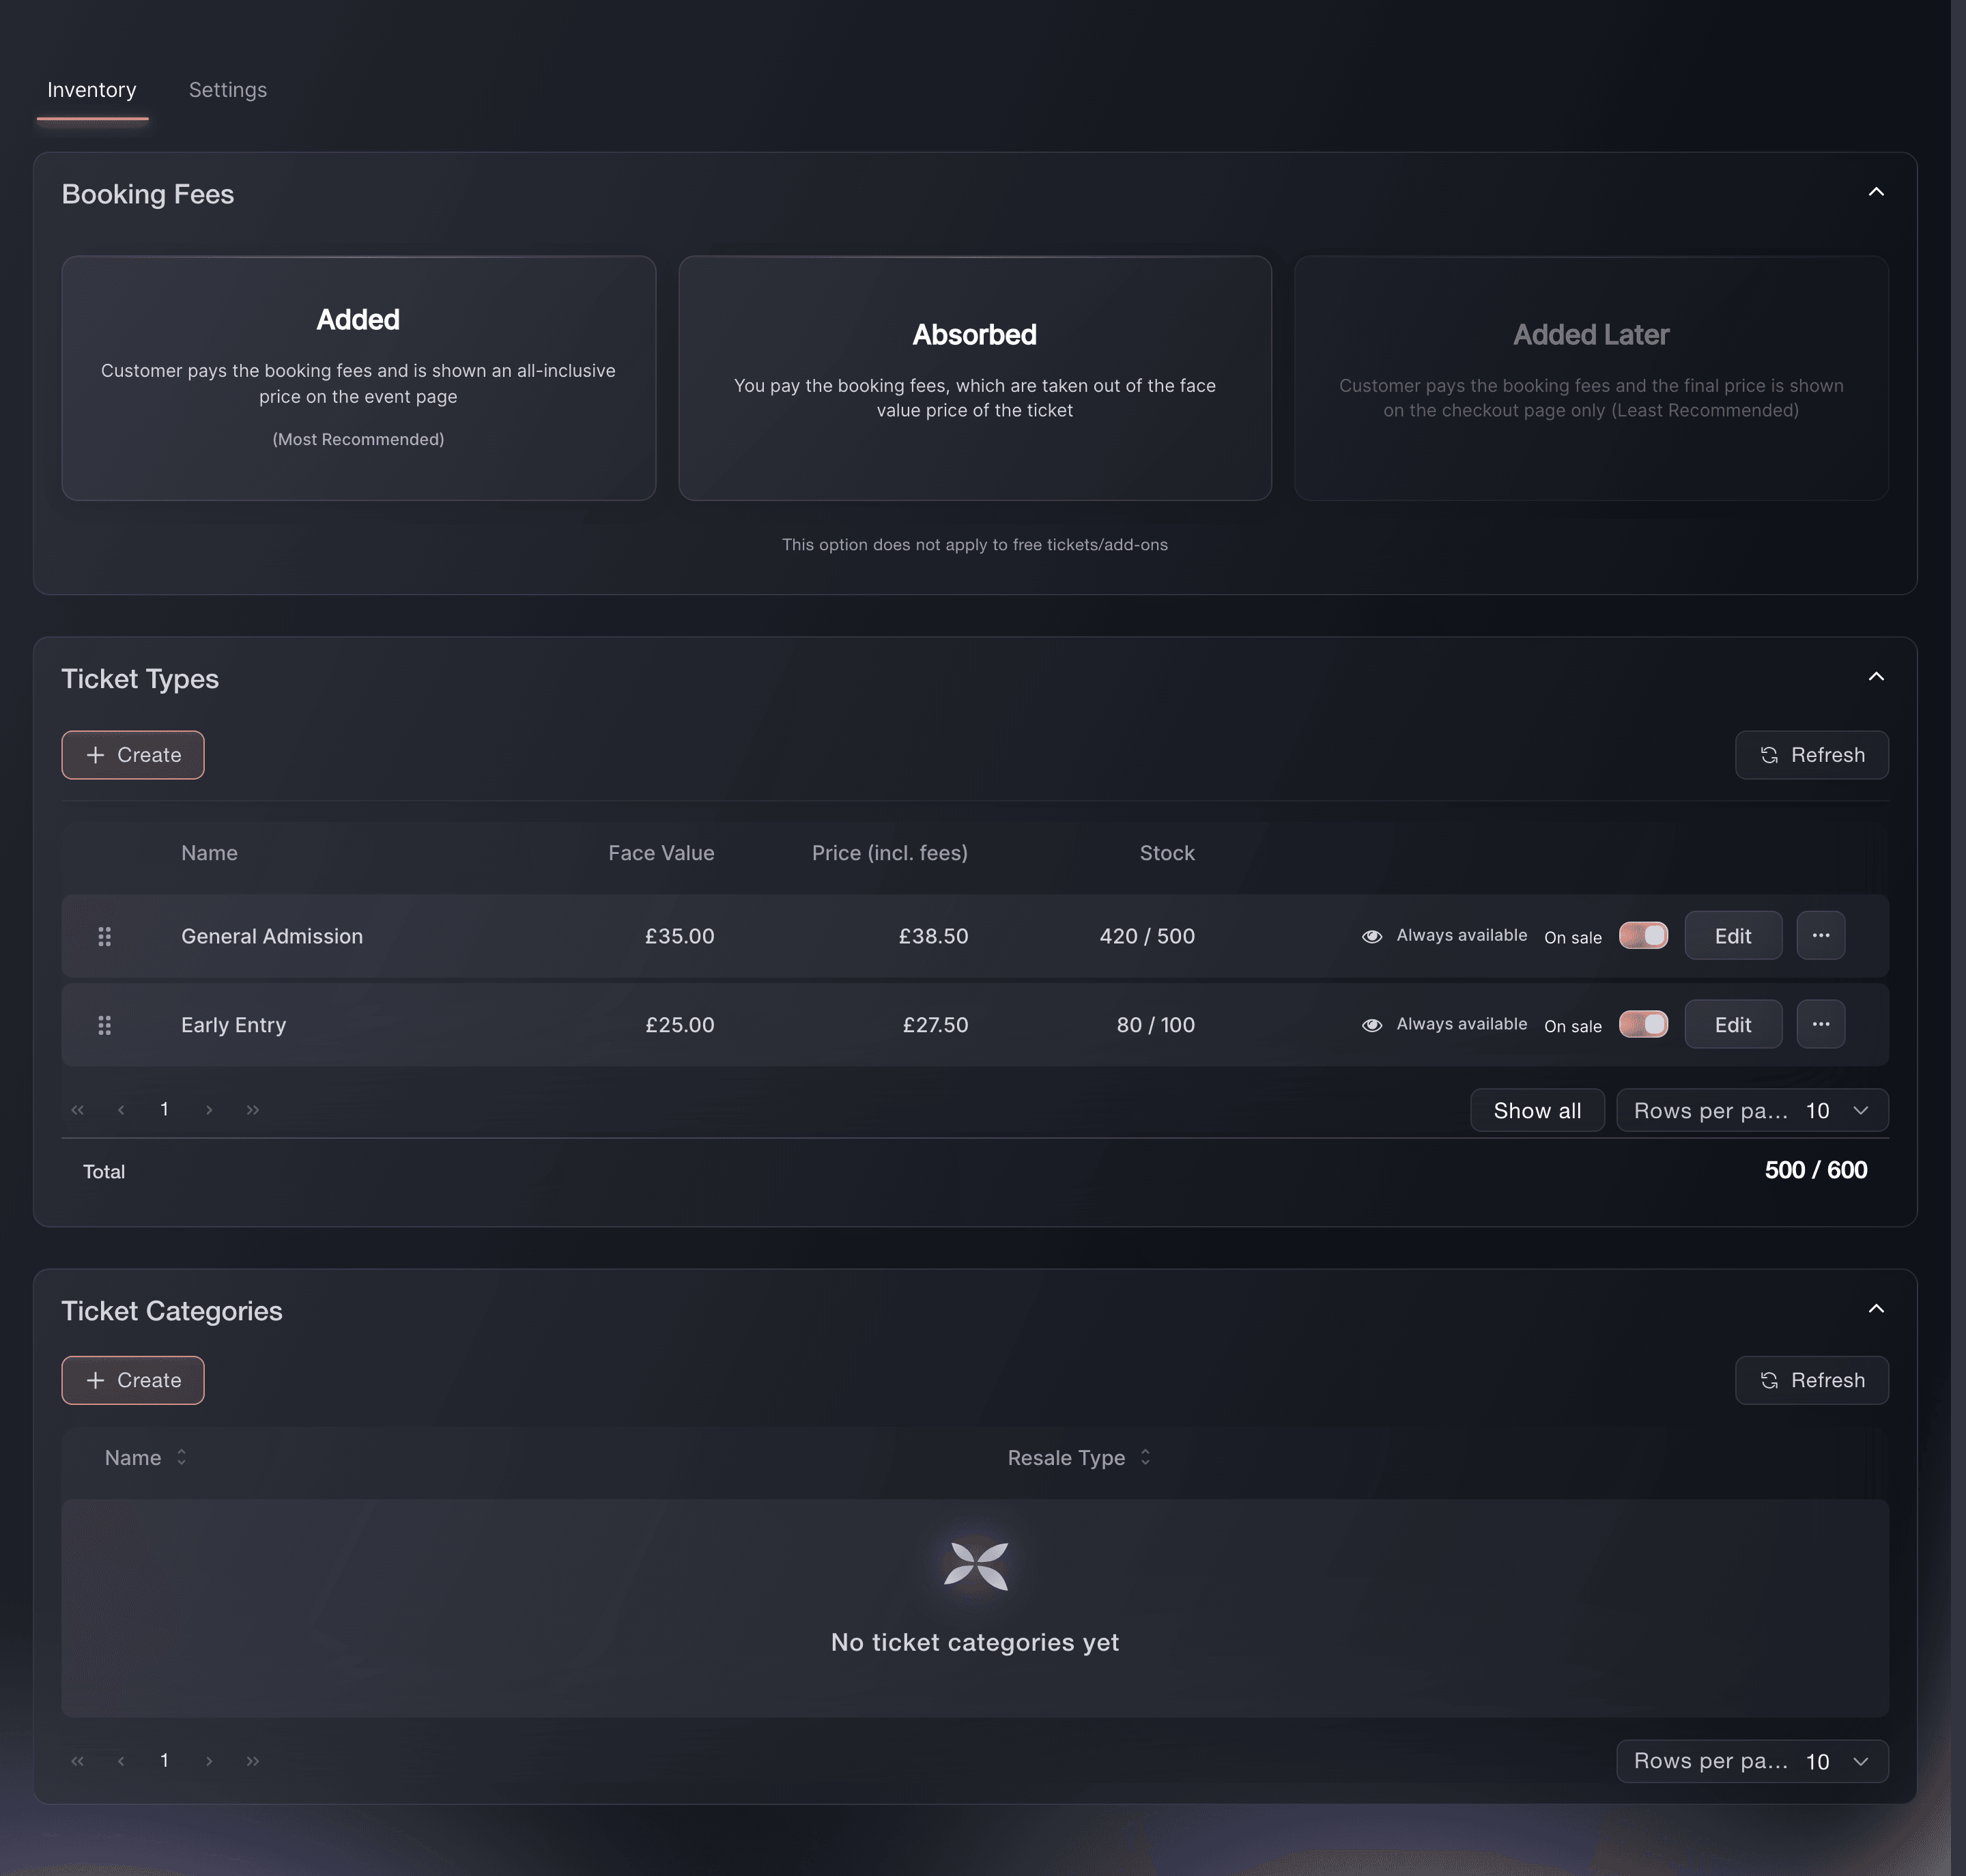
Event, Tickets, Inventory, Ticket Types.

Choosing the right limit
The per-order limit caps one basket. The per-account limit caps the total one customer account can buy across all its orders. Use both when a buyer should take only a small number in one order and across the whole release.
Note: The account limit is for this ticket type, not every ticket type in the event. A buyer can still buy another ticket type unless you set a limit on that type too.
-
Set the maximum per order
Turn on Set custom maximum quantity per order, then enter the number in Maximum ticket quantity per order.
Note: Your event page never offers more than the event's own per-order limit, so use this to set a lower limit for one ticket type. Leave the switch off when the event's limit is enough.
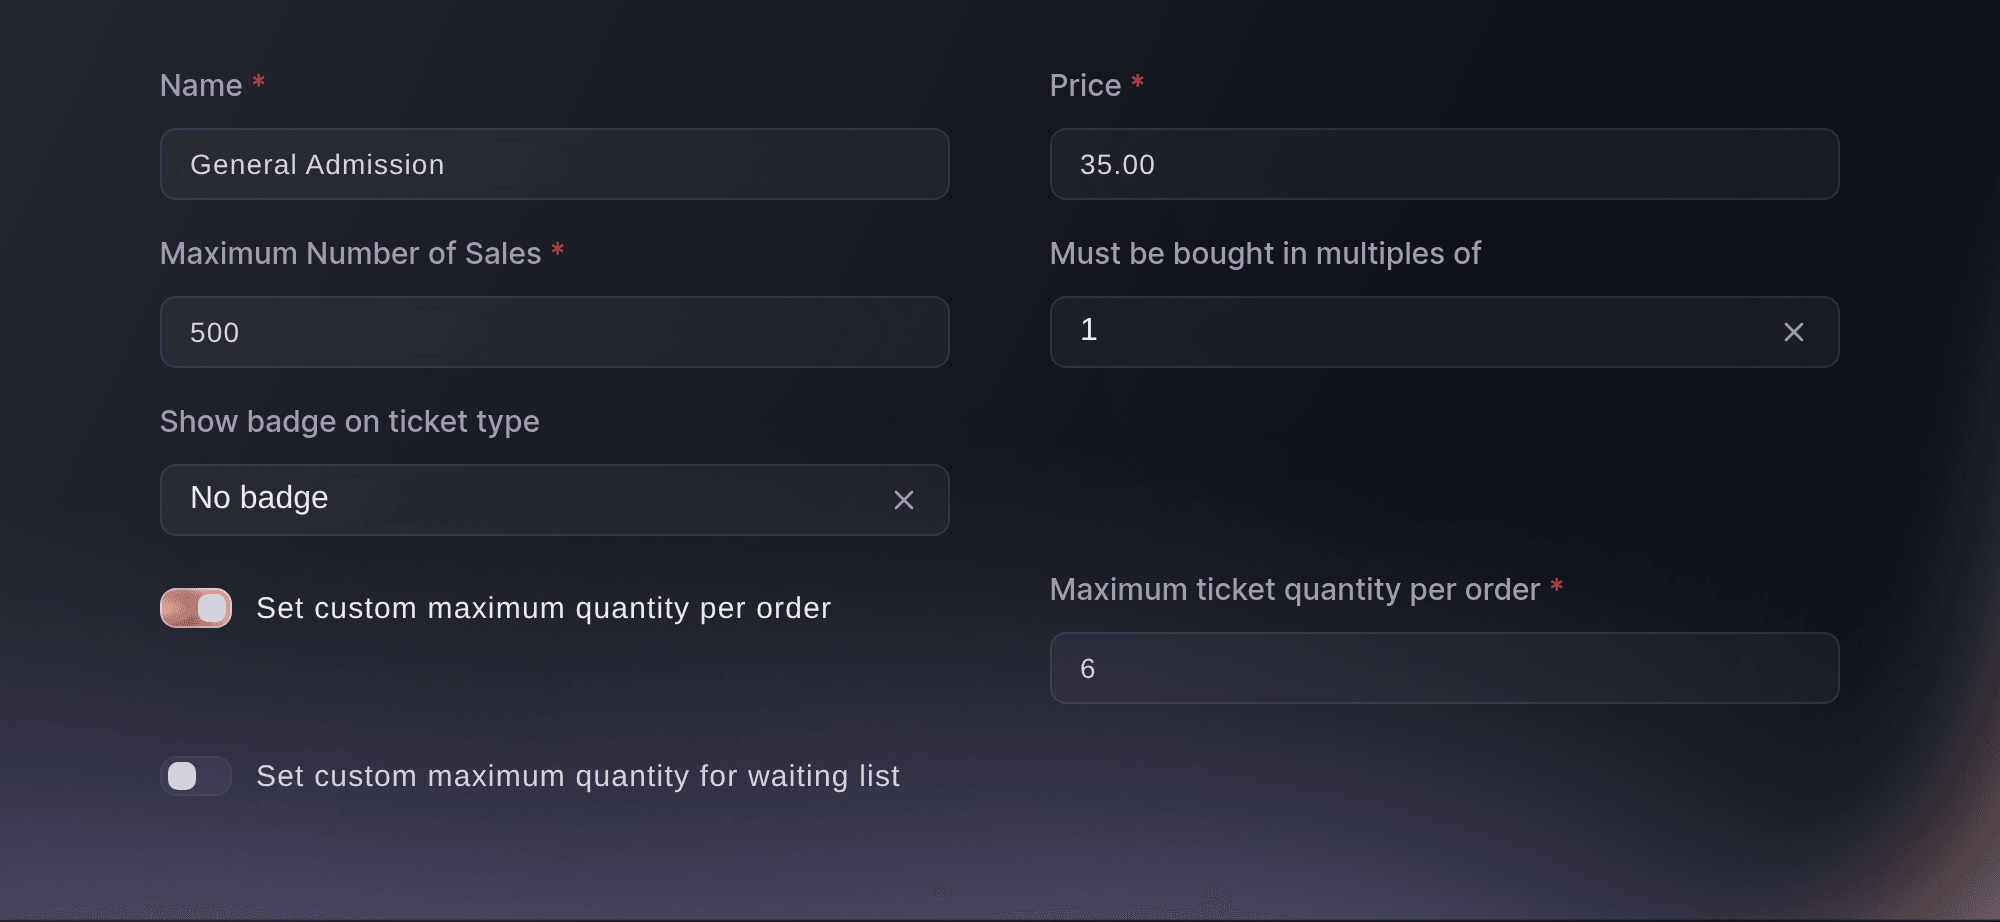
Event, Tickets, Inventory, Edit, ticket type window. -
Set the maximum per account
Turn on Set maximum number per customer account, then use the arrows or enter a number from 1 to 20 in Maximum ticket type quantity per account.
Note: Ticket Fairy counts the active tickets of this type across the customer account's orders when a signed-in buyer adds tickets, and again at checkout when the buyer is signed in or enters an email that already has a customer account. Cancelled and refunded tickets do not count, and a buyer whose email has no customer account yet is not held to this limit on a first purchase, so use the per-order limit when first-order protection matters.
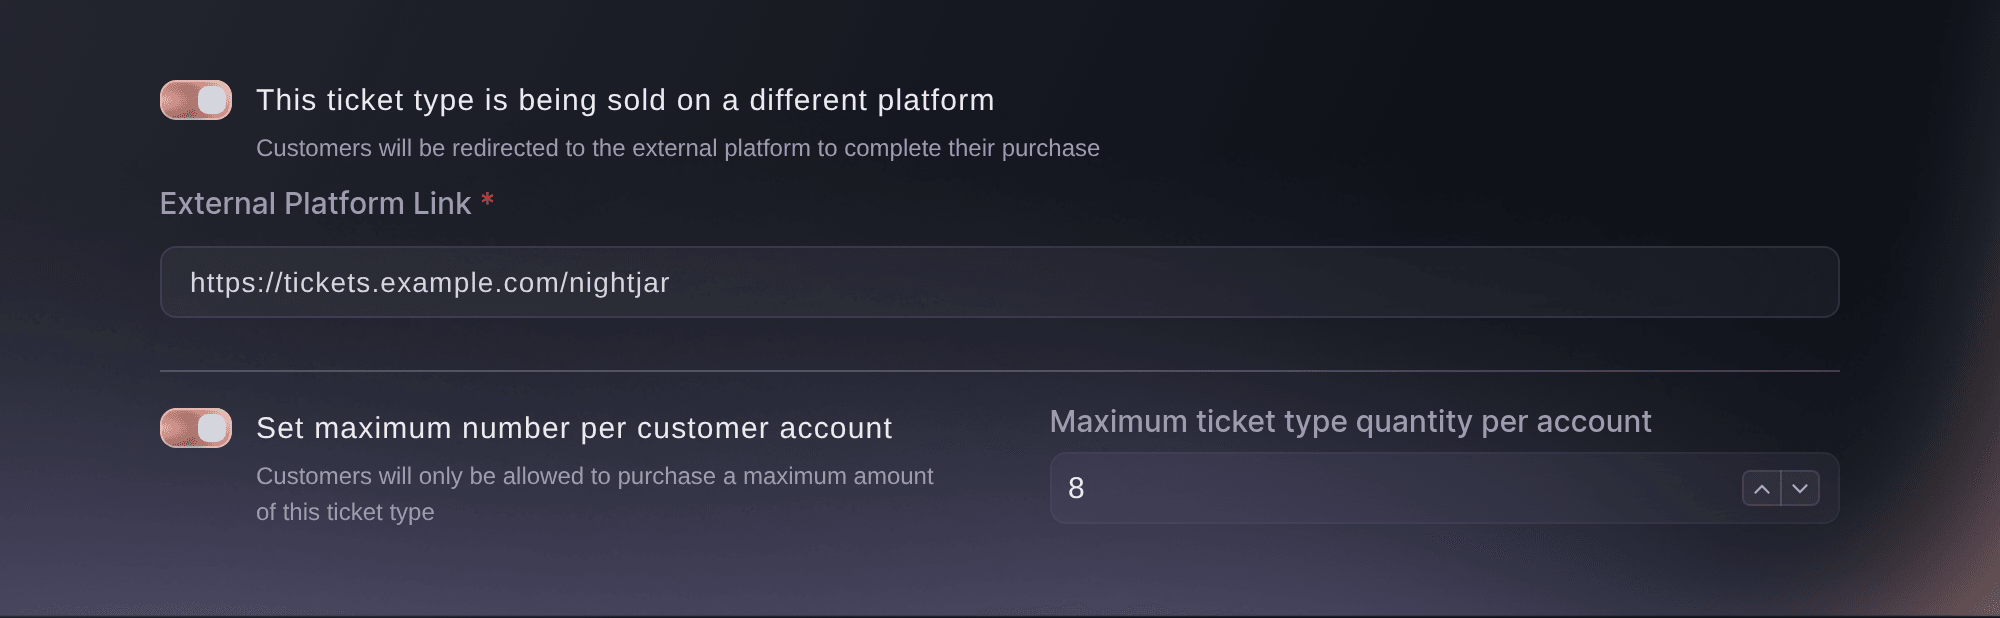
Event, Tickets, Inventory, Edit, ticket type options. -
Send one ticket type to another ticketing page
If another service sells this ticket type, turn on This ticket type is being sold on a different platform, then enter the complete address in External Platform Link.
Note: Your event page then shows a button for this ticket type that opens that address, so buyers complete the purchase there and Ticket Fairy does not sell this ticket type. Enter the whole address, including https://, and check that the page opens before you save.


Use approval or anti-scalping settings separately
Use Require order approval when a buyer may request a ticket but you decide after checkout. Use Names required, Name checks, ID required or Ticket resale when you need identity and resale controls for the event. Those settings have different effects and are explained in the guides beside this one.
Note: Hold payment until approved is part of order approval. It does not replace a quantity limit and should be chosen in the order approval guide.
-
Save the change
Select Save.
Note: The new rules apply to later purchases. Orders already placed keep the ticket details they had when the buyer placed them.
-
Check the order limit
Open the public event page in a private browser window and check that you cannot choose more than the limit for this ticket type in one order.
-
Check the account limit across orders
Using an existing customer account, place smaller test orders on the public event page in a private browser window until the account reaches the limit.
Note: Sign in as the test customer so Ticket Fairy checks the limit when you add tickets as well as at checkout. A cancelled or refunded ticket is not part of the active count.
-
Try one more ticket
Try to add one more ticket after the account reaches the limit.
-
Release the test capacity
Cancel the test orders afterwards so the capacity returns.
-
Check the external sales link
Follow the ticket type's sales link from the public event page.
Try these steps on your own event
Create a free account, build your event and follow the steps above in your own dashboard. It takes a few minutes and you do not need to book a sales call.
No setup fees. No required monthly ticketing fee. No credit card required.
Or have it done for you
Fai can set the per-order limit, the per-account limit and the external sales address on a ticket type. She shows you the ticket type and the change and asks for your approval before saving it. MCP and the CLI can set the two limits after approval.
In your dashboard, with Fai
On <EVENT NAME>, limit <TICKET TYPE> to <NUMBER> per order and <NUMBER> per customer account. Show me the ticket type and the change, and ask before saving it
From your own assistant, over MCP
Connect your assistant to our MCP server and ask it:
The copied MCP configuration includes --read-only. Remove --read-only only when you want your assistant to make changes. Routine changes run when requested; destructive actions ask you in a compatible client. If your client cannot ask, make the change in your dashboard.
Find the event <EVENT NAME>, list its ticket types, find <TICKET TYPE>, then ask before setting maxQuantity to <NUMBER> and maxQuantityPerAccount to <NUMBER>
From your terminal
Install the CLI from our CLI page, sign in with ticketfairy auth login, and choose the brand you are working on with ticketfairy brand use <BRAND_ID>. ticketfairy brand list and ticketfairy event list show the IDs the other commands use.
You need an owner or admin login for the event. List the ticket types to find the ID, then set the limits. Set the external sales address on the dashboard or ask Fai.
Find every ticket type and its ID
ticketfairy ticket list <EVENT_ID> --all
Limit one order to 6 tickets and one customer account to 8
ticketfairy ticket update <EVENT_ID> <TICKET_ID> --max-per-order 6 --max-per-account 8
Let Fai do it for you
Fai works inside your Ticket Fairy dashboard. Create your account, open Fai and paste the prompt above.
No setup fees. No required monthly ticketing fee. No credit card required.
Questions you might have
- What is the difference between the per-order and per-account limits?
- The per-order limit caps one basket. The per-account limit caps the total one customer account can buy of this ticket type across all its orders. Use both when you need both limits.
- Can I set one limit for every ticket type?
- No. The limits here belong to one ticket type. Repeat the change for each type that needs the same rule. Event-wide approval and anti-scalping settings are separate controls.
- Does the account limit protect a buyer's first purchase?
- Not for a buyer who is new to Ticket Fairy. The limit counts purchases on an existing customer account, so a buyer whose email has no customer account yet can buy up to the per-order limit in a first order. Use the per-order limit when first-order protection matters, and use the account limit to control later purchases across that customer account.
- What happens when I enter an External Platform Link?
- Your event page shows a button for that ticket type that opens the address you entered, so buyers complete their purchase there and Ticket Fairy does not sell that ticket type. Turn off This ticket type is being sold on a different platform and save when you want Ticket Fairy to sell it again.
- Can I require approval for this ticket type?
- Yes. Require order approval lets a buyer place a request while you decide after checkout. Use Approve orders before buyers receive tickets for the approval setting and pending-order steps.
- How do I add name, ID and resale checks?
- Open Anti-Scalping/Fraud Settings and choose Settings. The Names required, Name checks, ID required and Ticket resale choices are event settings. Use How do you keep touts and bots off your tickets? for the full anti-scalping path.
Still have a question?
Book a demo and we will answer it on a call, on your kind of event. Or create your account and see it for yourself.
No setup fees. No required monthly ticketing fee. No credit card required.
Related guides
Do this on your own event
Create your account, build your event and follow the steps in your own dashboard. You do not need to book a sales call.