
Playbooks by event type
Run ticketing for a concert
Concert promoters and live music venues sell one show to a room of a known size, with a VIP ticket above general admission and merchandise beside both. With the releases, holds and merch ready before you announce, the on-sale opens on the minute you promised. On show day your guests, band and crew have their tickets and passes, and you can watch the room fill.
Build the show from the Concert template, sell general admission and VIP in releases, hold tickets back for partners, sell merchandise with the ticket, schedule the on-sale, and get comps, crew passes and the door ready for show day.
- For
- Selling a single concert or gig from announcement to show day
- Takes
- 20 minutes
- Start from the Concert template
- Choose how you want to sell
- Add the VIP ticket and select Use this template
- Group general admission and VIP into categories
- Set when each release goes on sale
- Hold tickets back for your partners
- Sell the merchandise with the ticket
- Put a name on every ticket and keep resale on your page
- Schedule the on-sale for the minute you announced
- Turn on the waiting list for a sell-out
- Make a tracking link for each announcement
- Send comps to press and the artist's guests
- Give the band and crew a pass
- Let VIP in before the doors open
- Put the scanning app on the door team's phones
- Follow arrivals while the room fills
Before you start
- You're a brand owner or admin. You can create events, change tickets, add-ons and passes, and publish.
- You know the room's capacity, the general admission and VIP prices, how many releases you want and what VIP gets that general admission does not.
- You know how many tickets the label and your partners need held back, how many comps the artist's guests need, which merchandise you sell at what price, and who on the band and crew needs a pass.
-
Start from the Concert template
Create an event and choose Concert. The template builds General admission and Advance tickets and an Event merchandise add-on, and turns on door and last-entry times.
Note: The tickets, add-on and settings it builds are yours to rename and reprice.
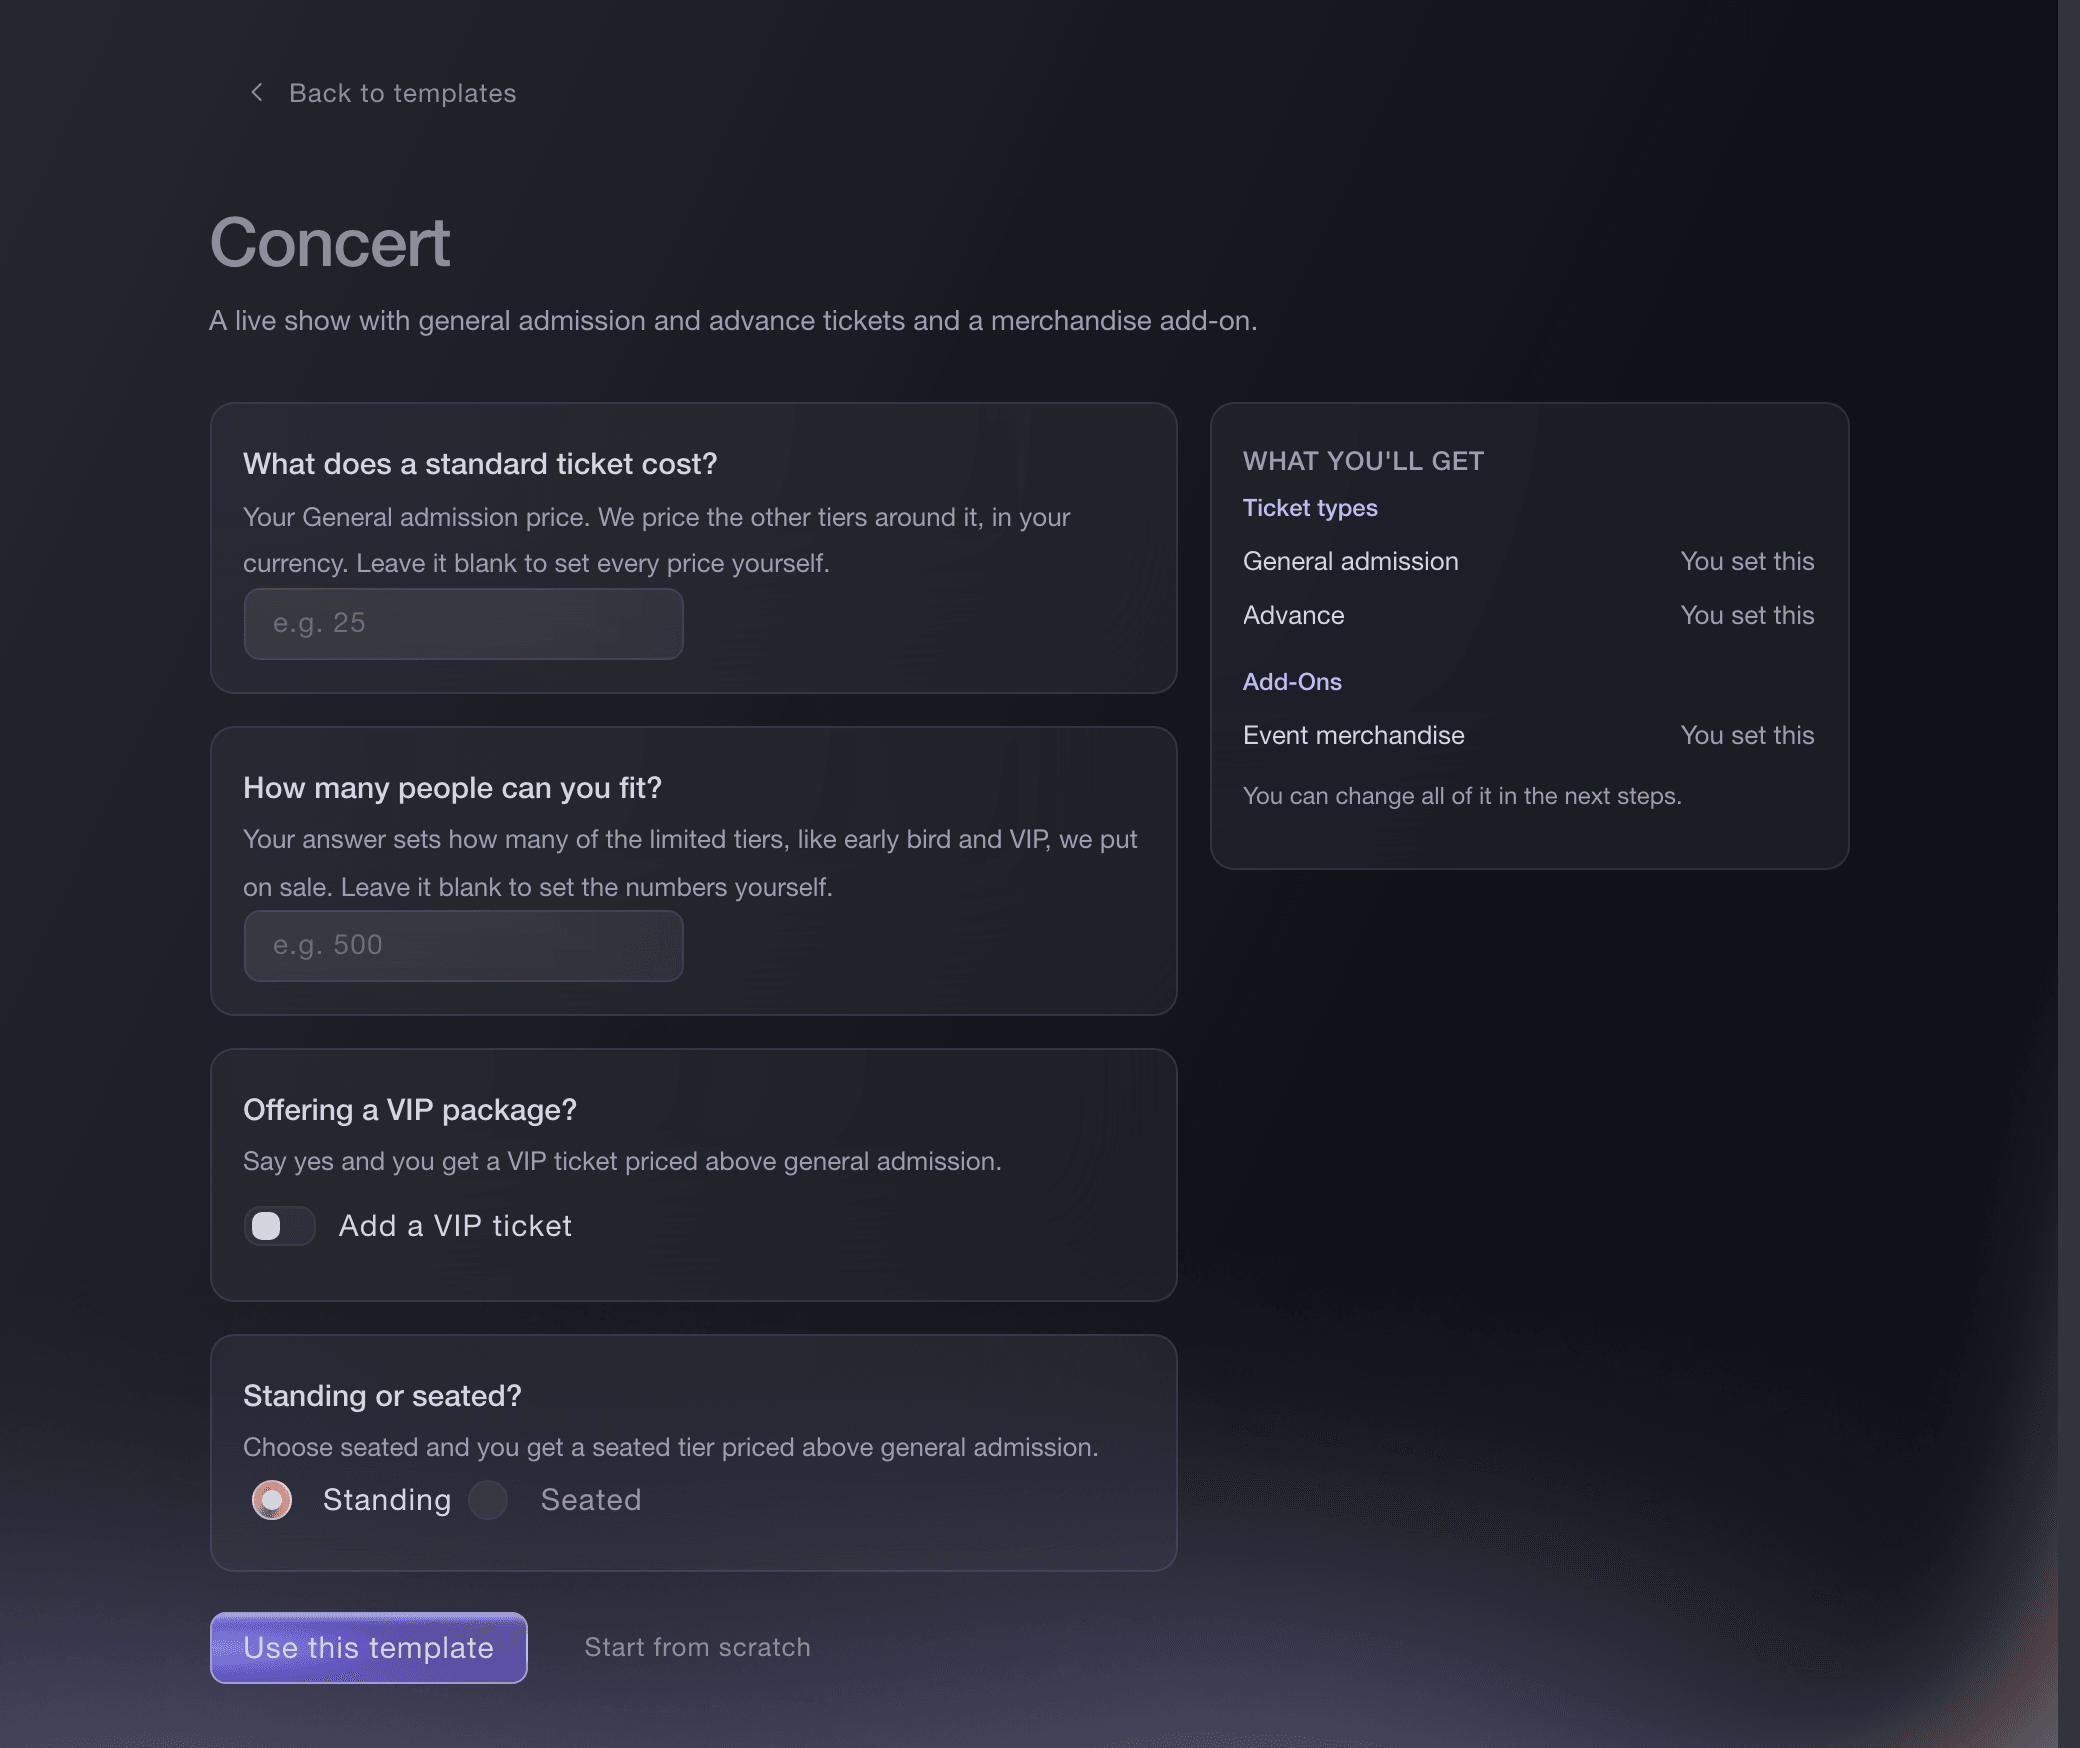
Events, Create Event, Concert. -
Choose how you want to sell
Under How do you want to sell?, choose the set of releases that fits the room.
-
Add the VIP ticket and select Use this template
Turn on Add a VIP ticket, enter your general admission price and the room's capacity, then select Use this template. The template prices the VIP package above general admission and sizes the limited releases from your capacity.
Note: Seated adds a seated ticket priced above general admission, for a room with seats as well as a floor. It sells a place in the seated area rather than a numbered seat.
-
Group general admission and VIP into categories
On Tickets, create a ticket category for each kind of admission, entering General admission or VIP in Category Name. Buyers then choose general admission or VIP first and see the releases inside it.
Group your tickets into categories
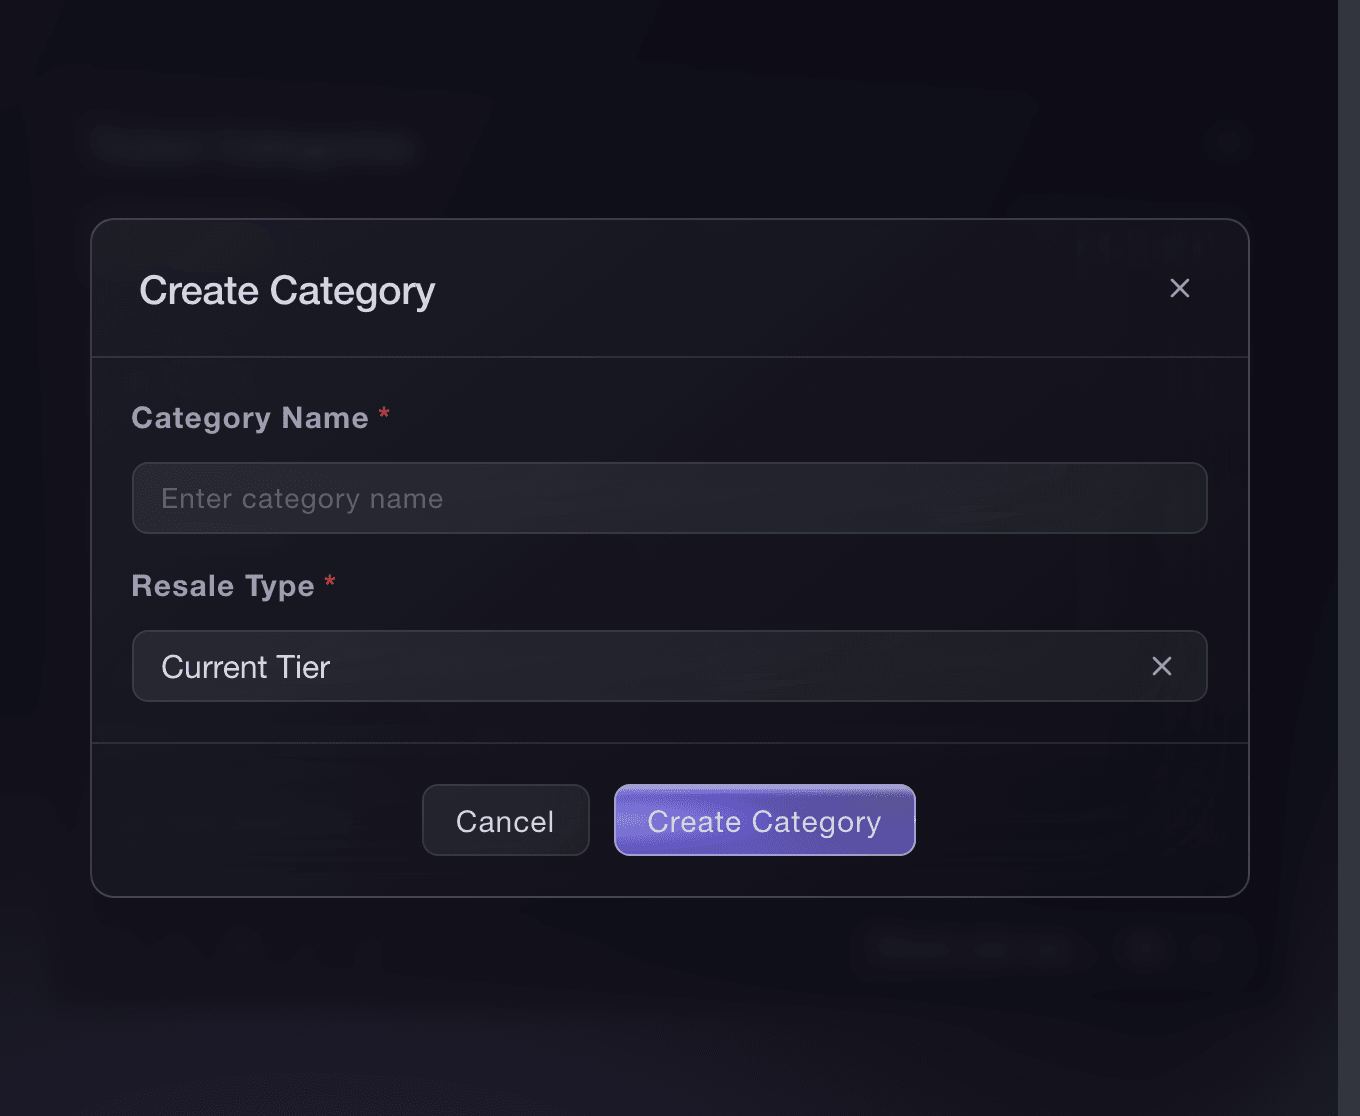
Tickets, Ticket Categories, Create Category. -
Set when each release goes on sale
Open each release and, under This ticket type should be available:, choose when it goes on sale.
Note: A release waiting on the one above it depends on the order of your list.
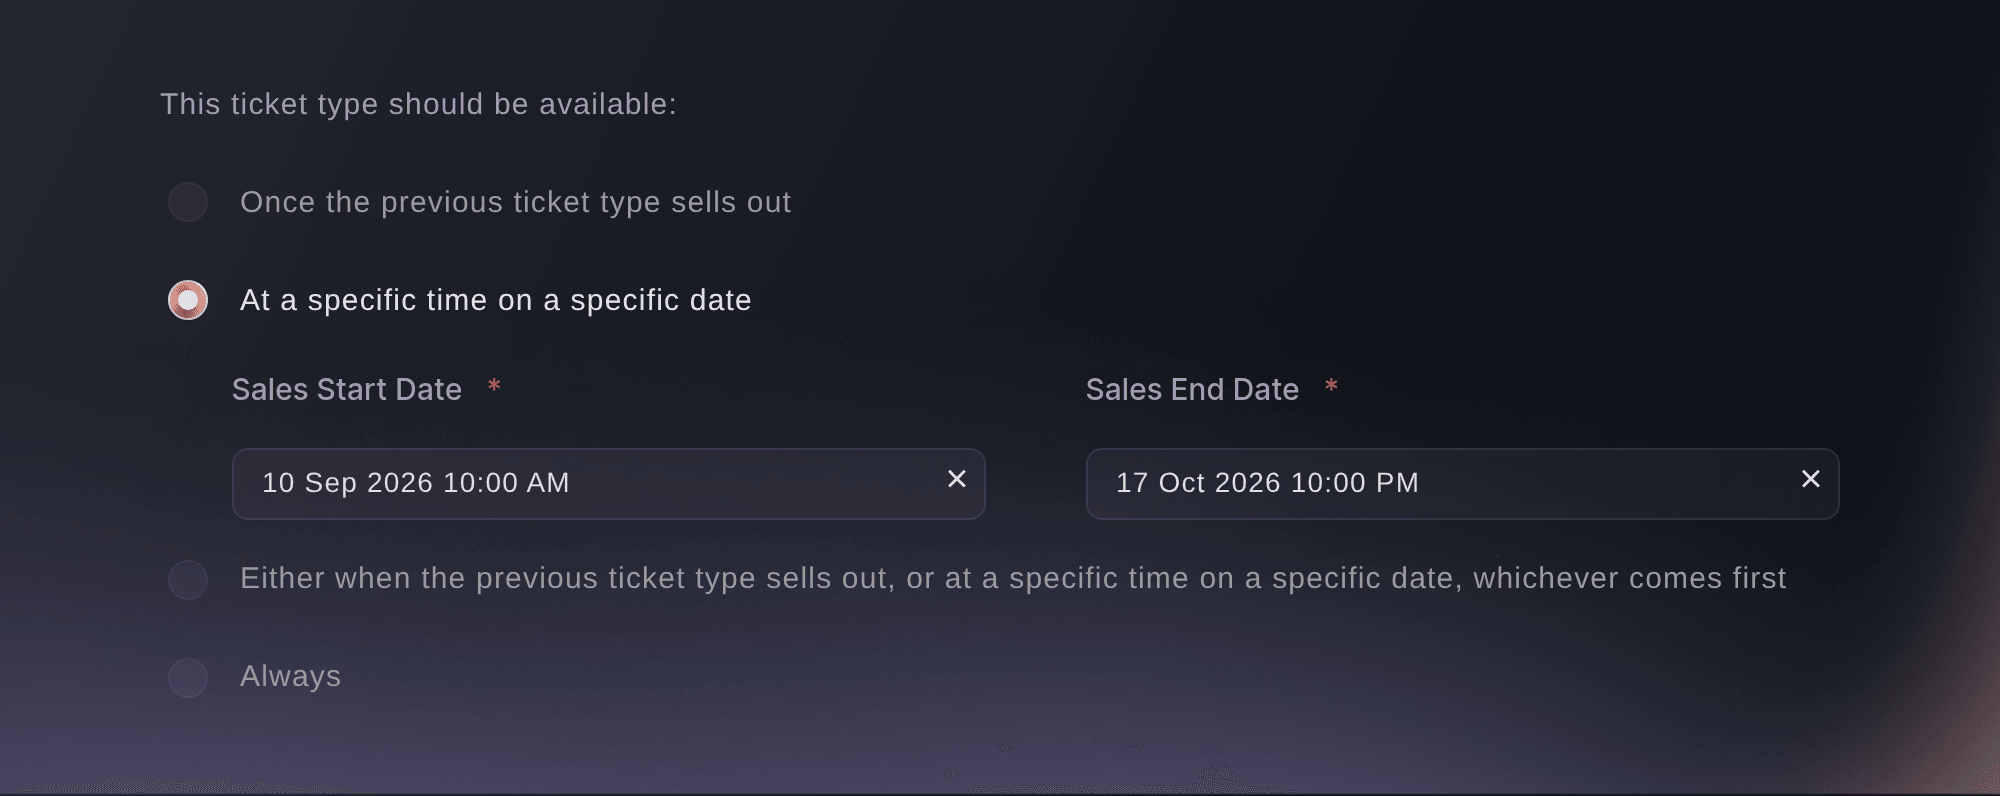
Tickets, Edit Ticket Type, This ticket type should be available. -
Hold tickets back for your partners
On the general admission release, turn on Hold tickets, then enter who they are for in Hold for, such as the label or a radio competition, and the number in Quantity of tickets. Those tickets stay out of the public on-sale, and buyers see fewer left from the moment you save.
Note: You give a hold out through Invitations, where the people you invite buy from it. The artist's free guest list goes out through Guest Tickets, in a later step.
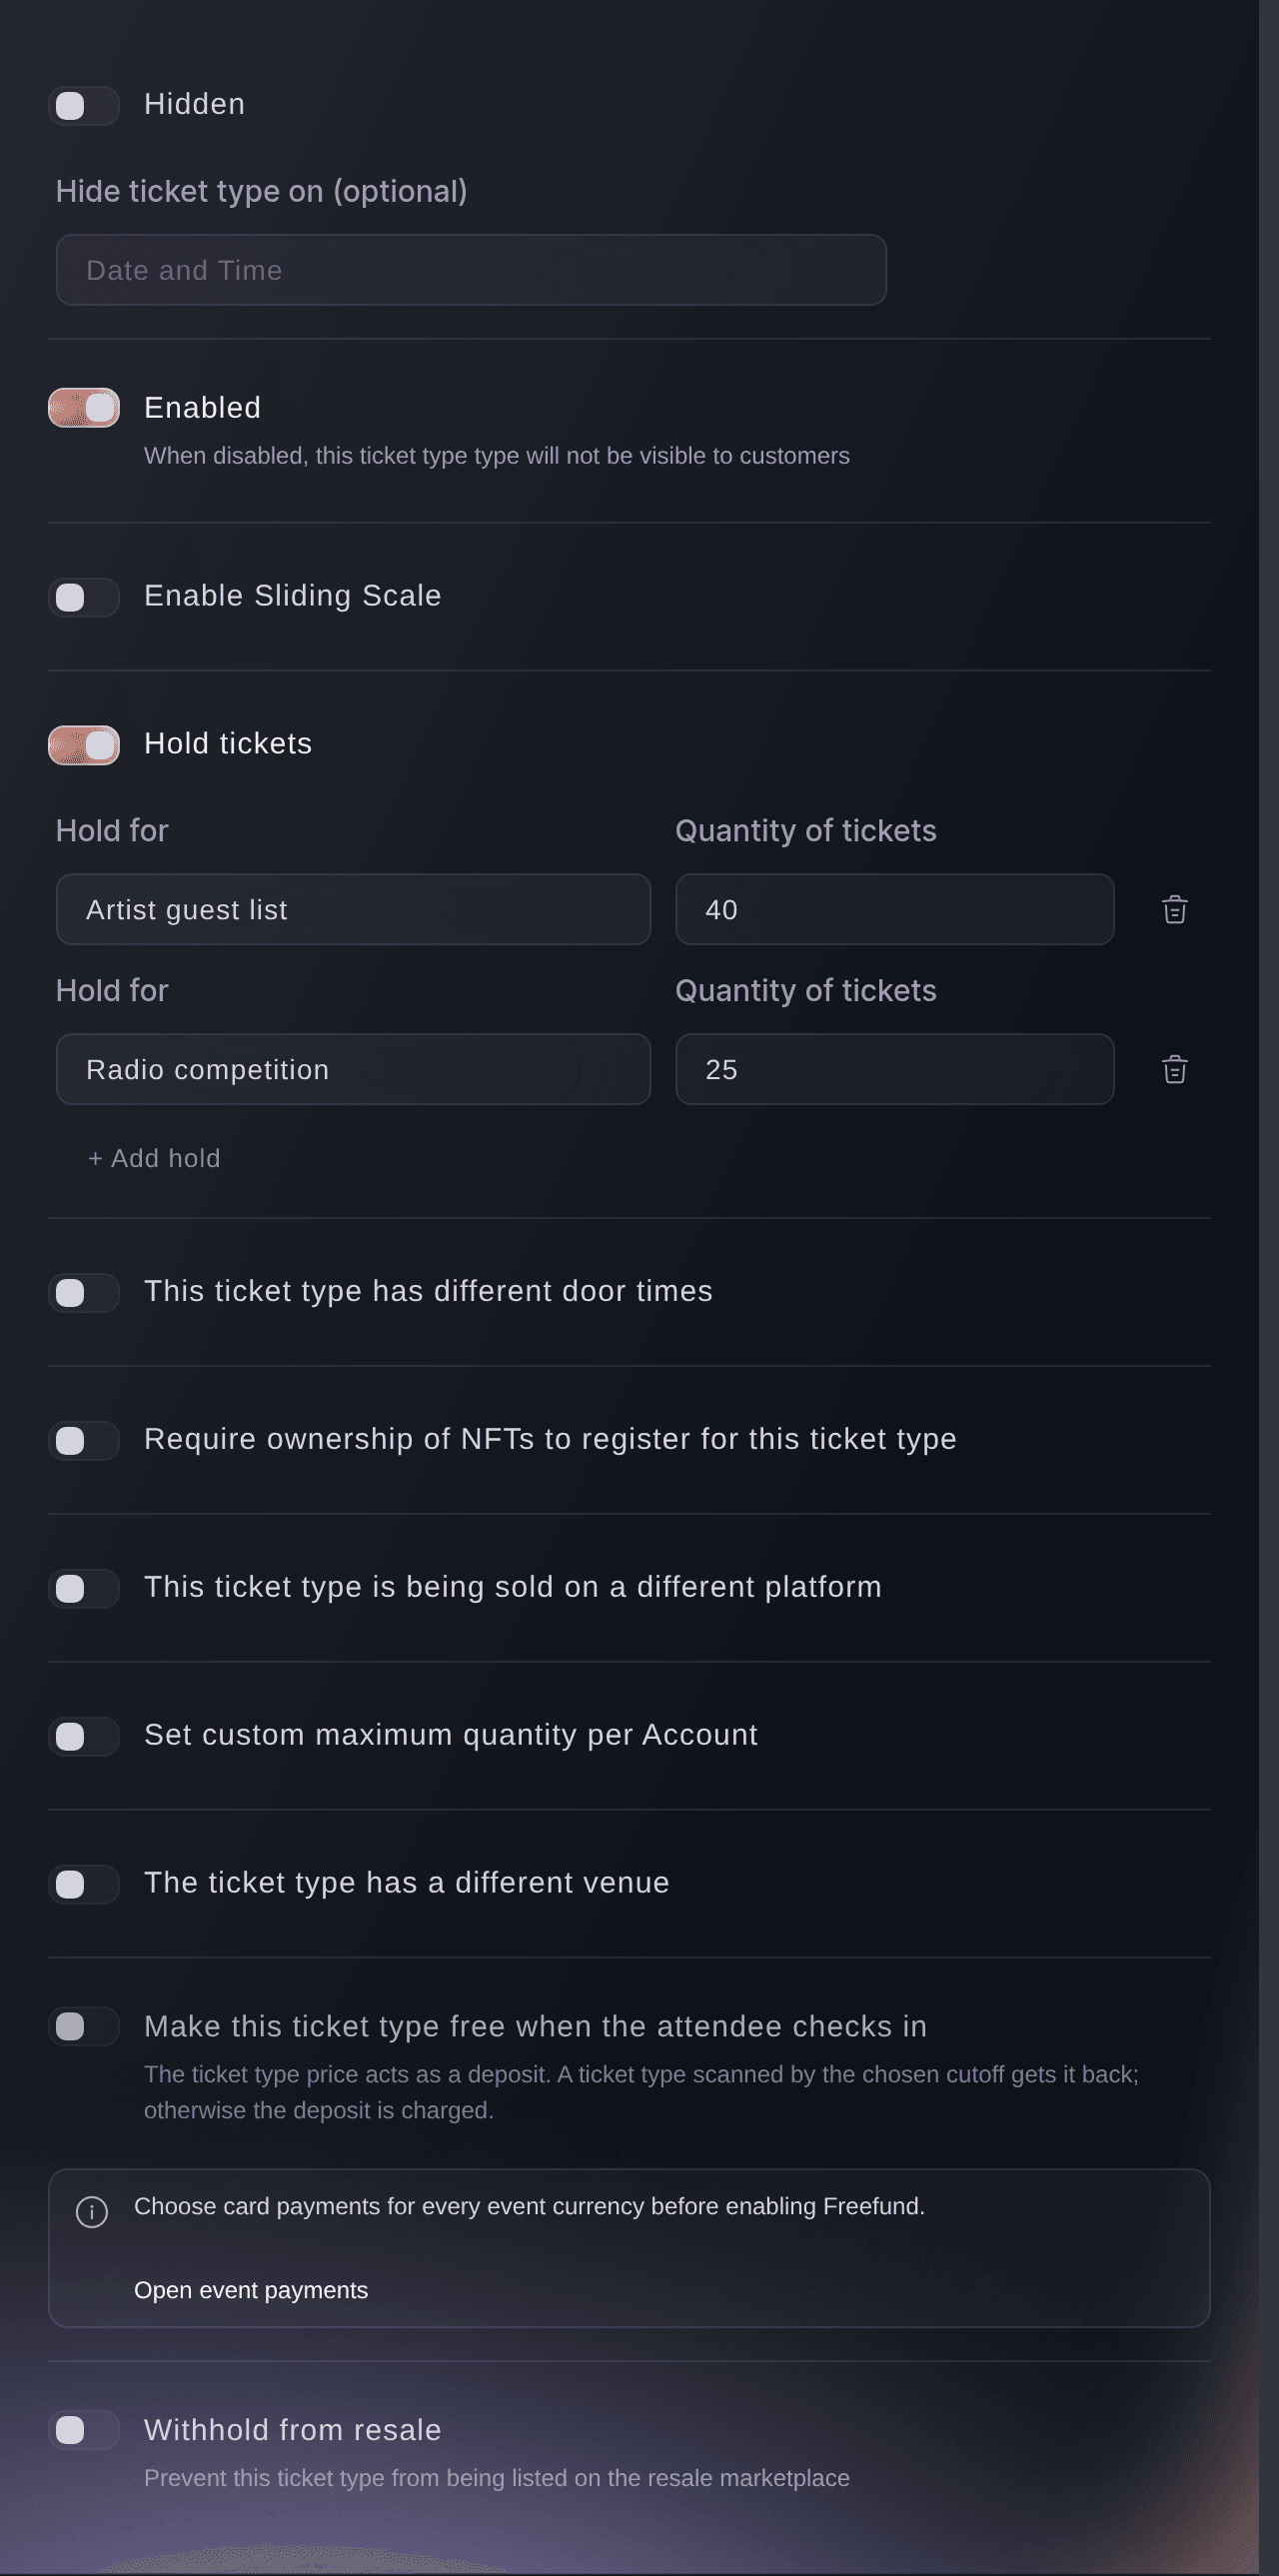
Tickets, ticket type, Hold tickets. -
Sell the merchandise with the ticket
Open Add-Ons and select Create Add-On for each item you sell, such as a tour T-shirt or a signed poster, with its price and Stock. Fans add it in the same checkout as their ticket.
Note: The template's Event merchandise add-on is already on the list for you to price or rename. Turn on Limit to Certain Ticket Types Only for a bundle that goes with VIP alone.
Sell parking, camping and merchandise with your tickets
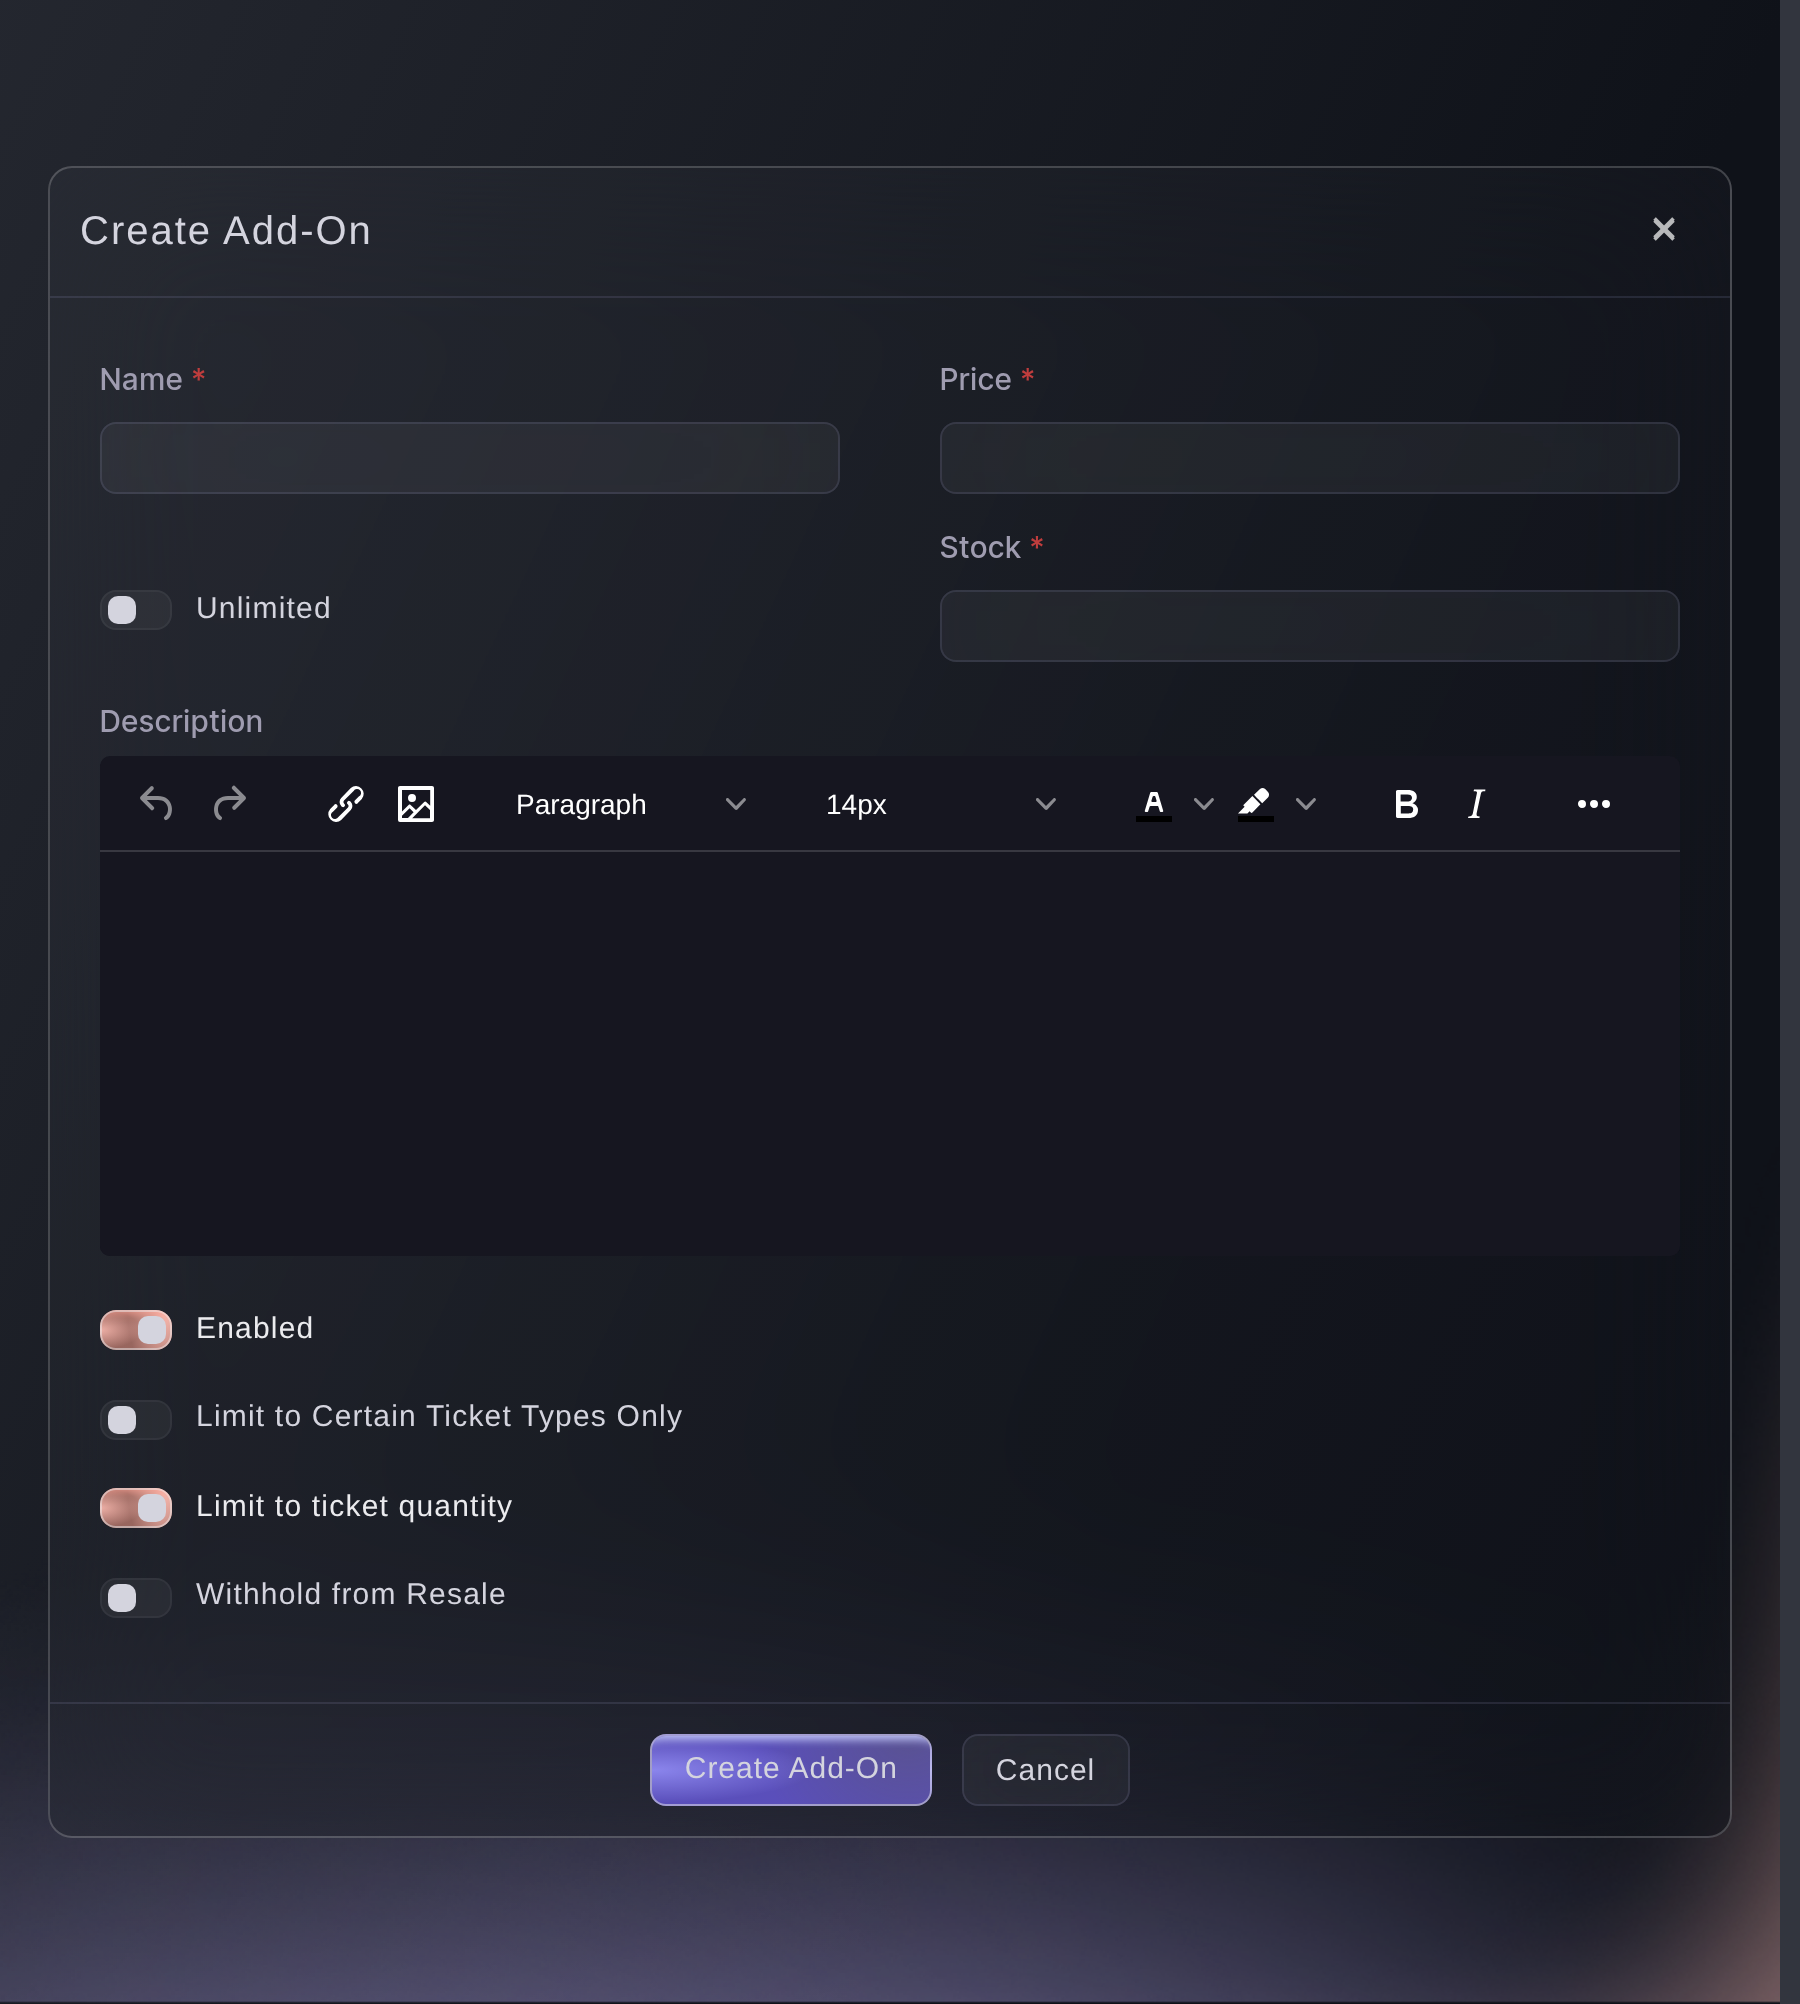
Tickets, Add-Ons, Create Add-On. -
Put a name on every ticket and keep resale on your page
Under Anti-Scalping/Fraud Settings in your ticket settings, turn on Names required and Ticket resale, then save. Each ticket then carries its holder's name, and a fan who can no longer come passes the ticket on through your event page.
Note: The caps on tickets per order and per account are on the same page.
How do you keep touts and bots off your tickets?
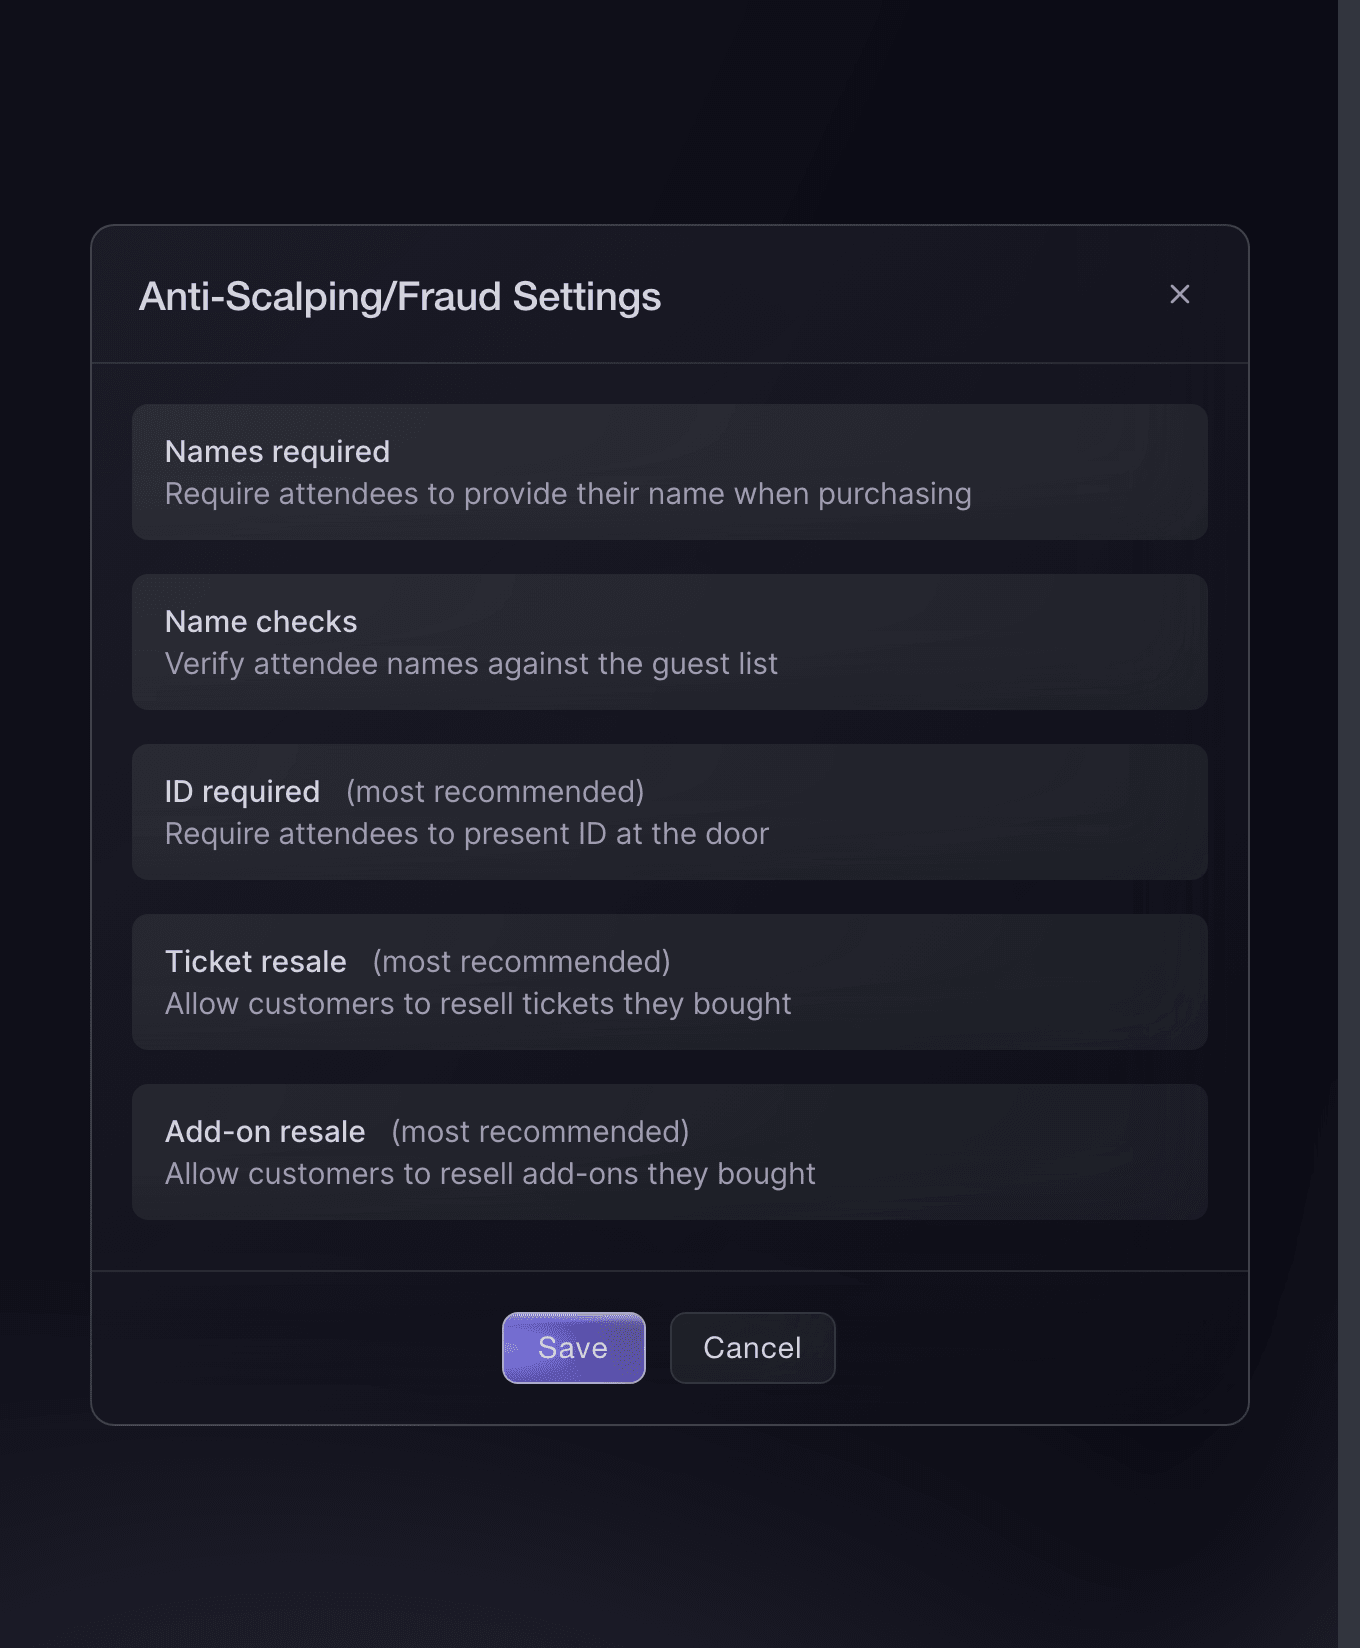
Tickets, Settings, Anti-Scalping/Fraud Settings. -
Schedule the on-sale for the minute you announced
Select Publish, then Schedule Publish, and choose the date and time your announcement names. The event page goes public at that minute, and each release opens on the rule you gave it.
Note: A scheduled publish does not send promoter links, so send those separately.
Schedule when your event goes live
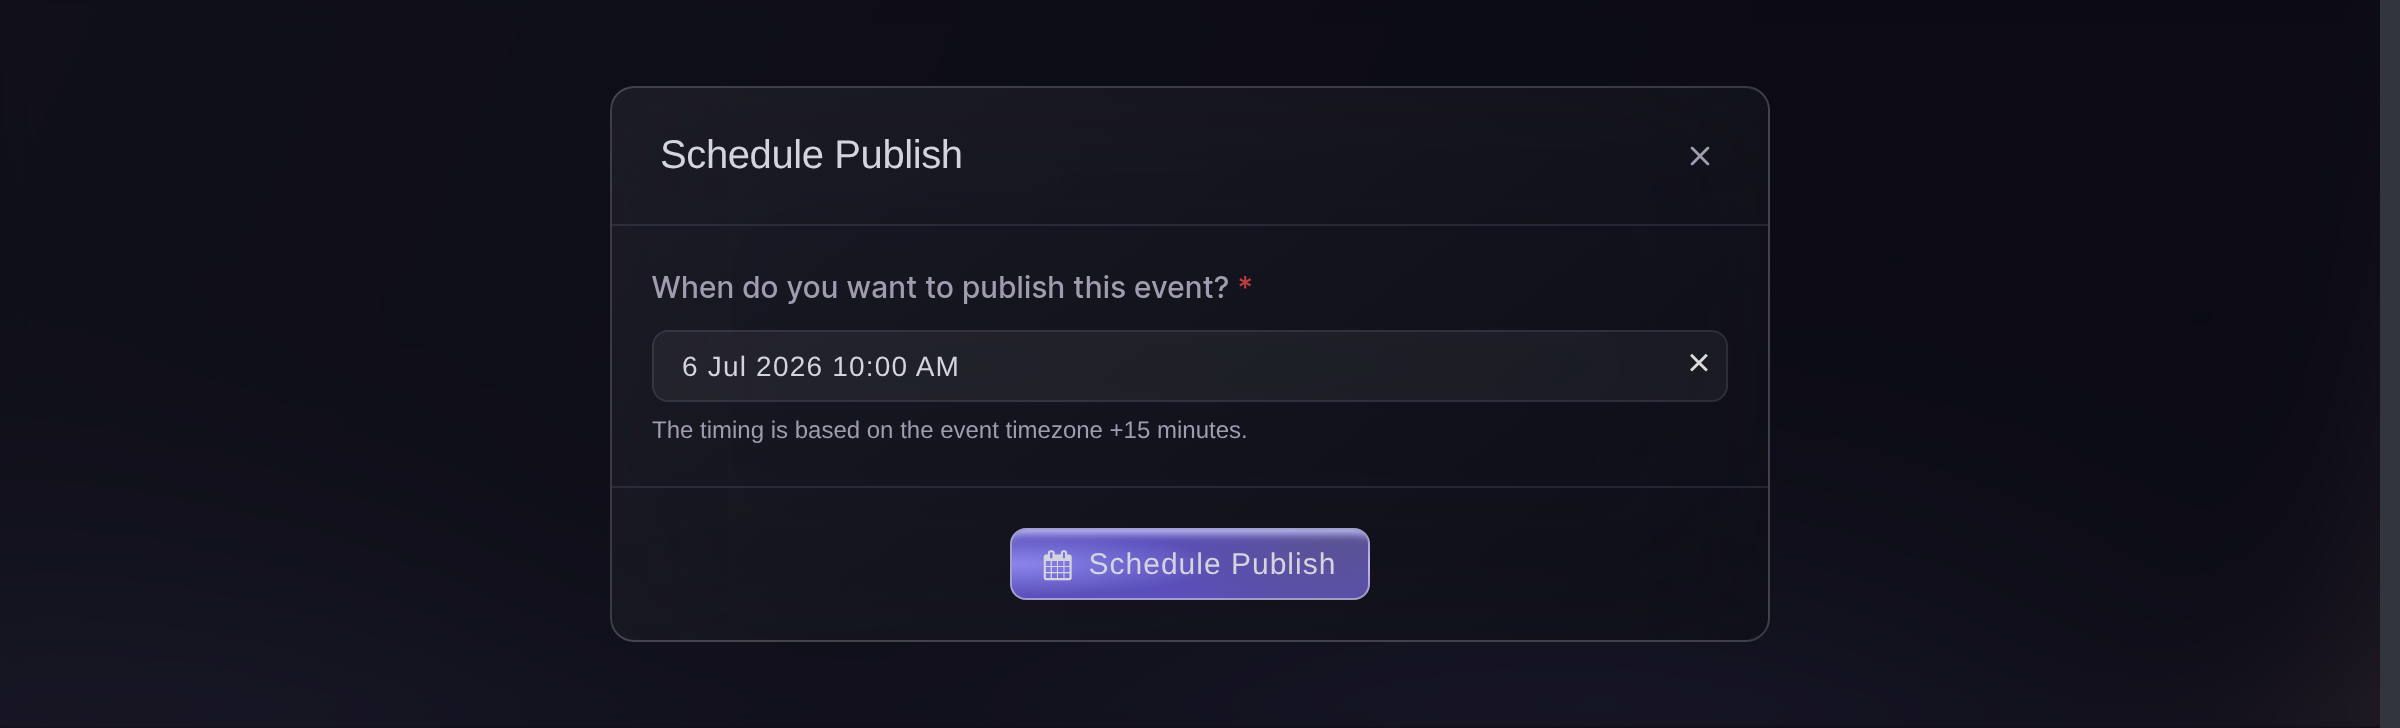
Publish, Schedule Publish. -
Turn on the waiting list for a sell-out
In your ticket settings, turn on Enable waiting list after ticket sell-out and select Save Ticket Settings. Once a release sells out, fans join the list from your event page, and each ticket that comes back is offered to the next person waiting.
Note: A release you add later is not offered to the list on its own, so email the list when you add tickets.
Run a waiting list for a sold-out event
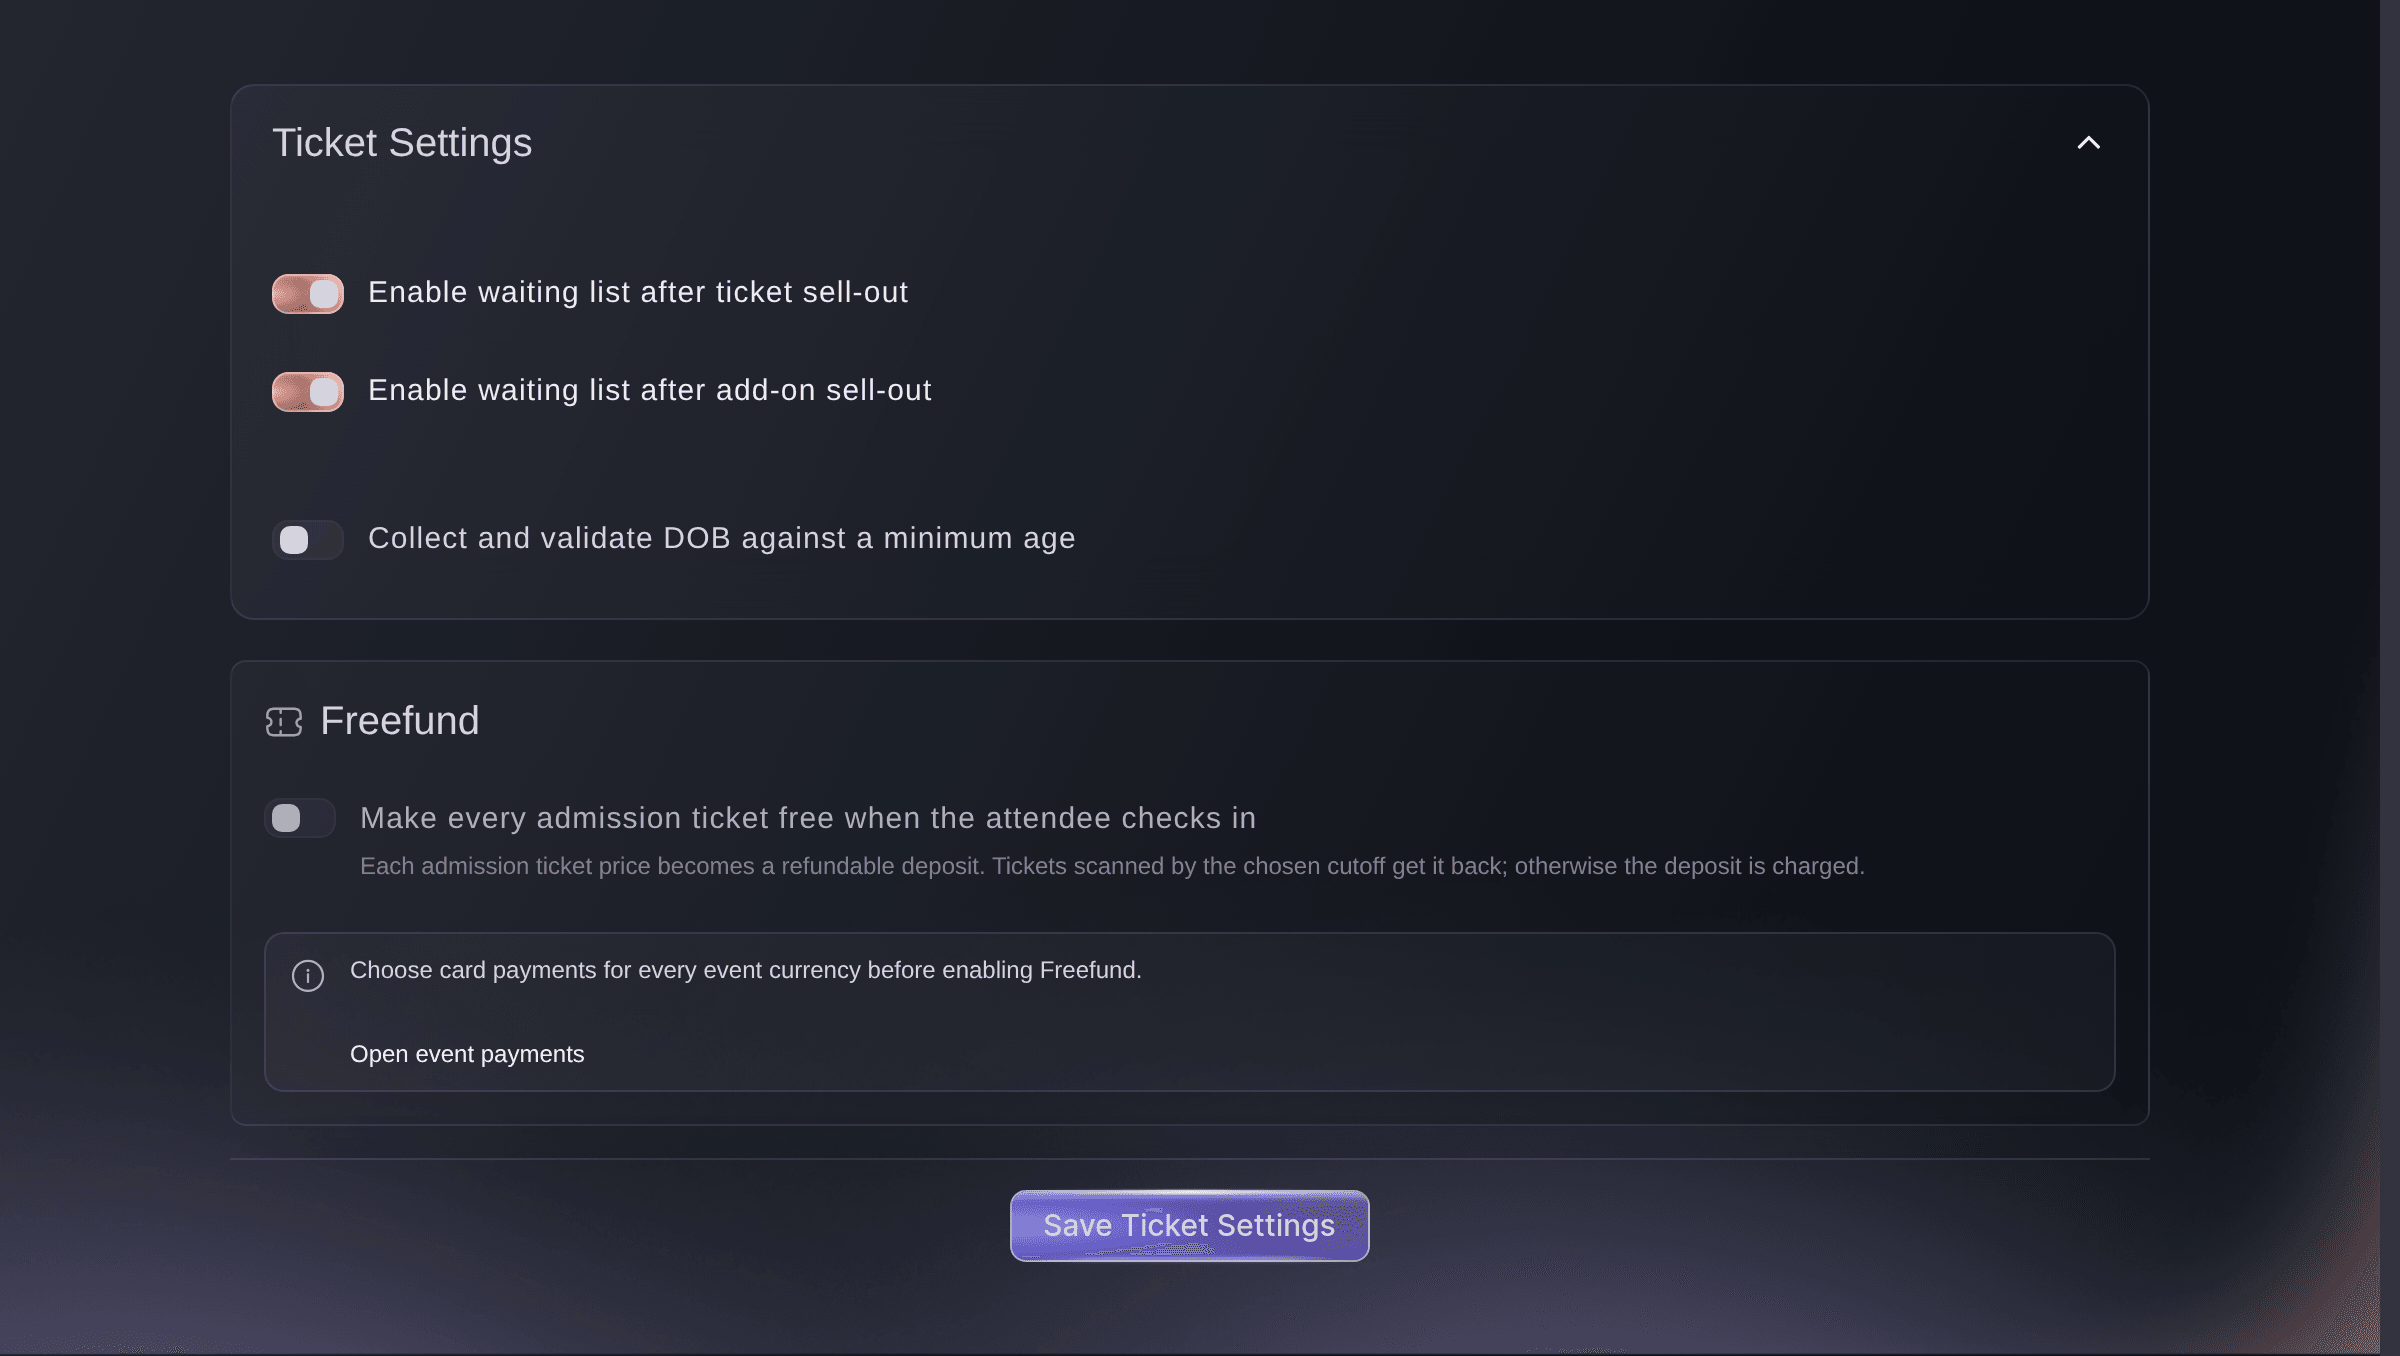
Tickets, Settings, Ticket Settings. -
Make a tracking link for each announcement
Open Tracking Links under Marketing and select Create Tracking Link for each post, newsletter, poster and partner site. The table shows the clicks, orders and ticket revenue each one brought in.
Note: A tracking link measures a placement and does not include a reward. A promoter link belongs to a team member and counts their sales.
Track which promotion sells your tickets
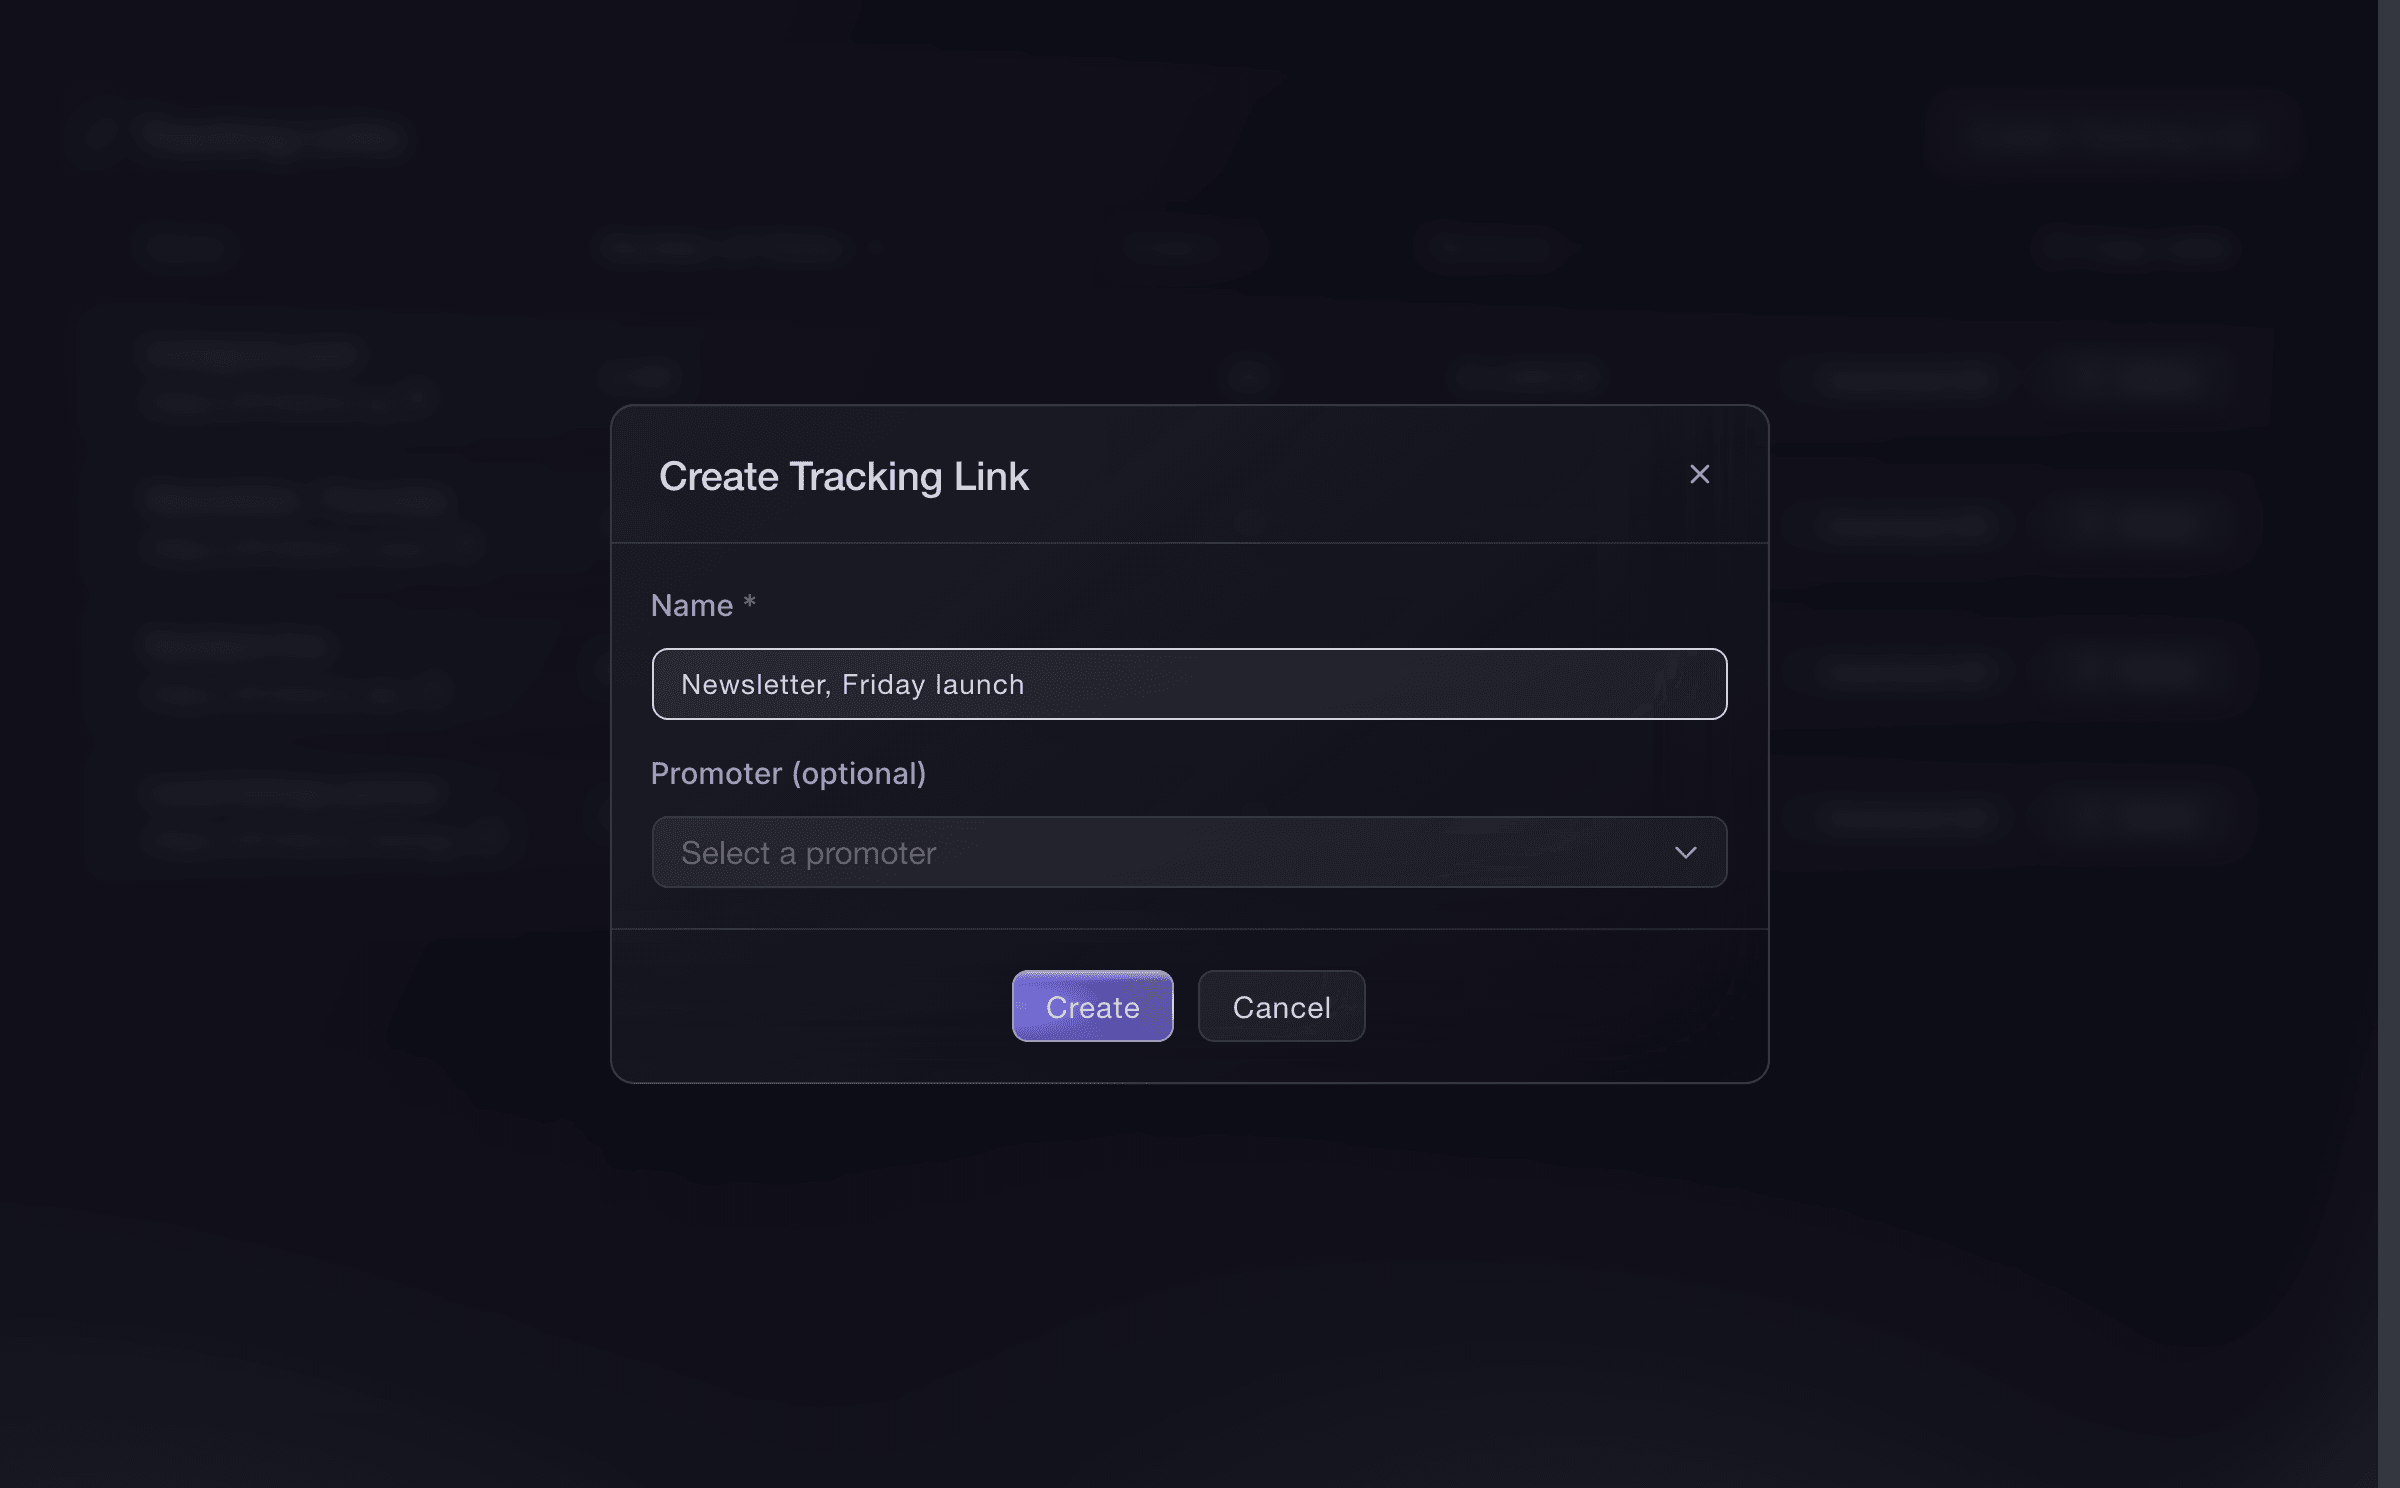
Event, Marketing, Tracking Links. -
Send comps to press and the artist's guests
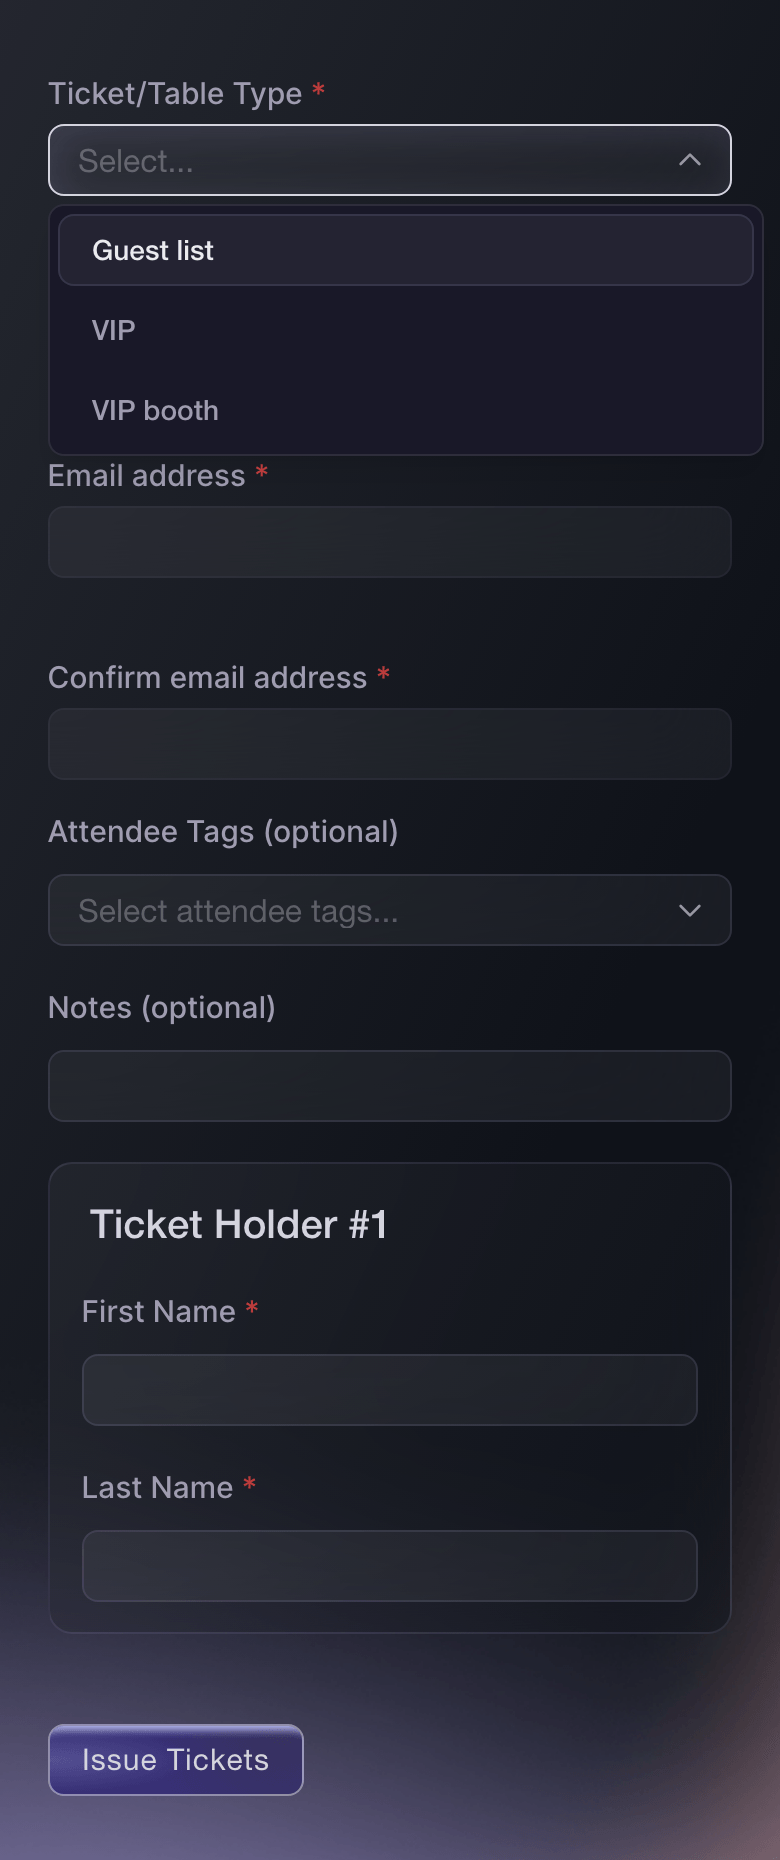
Open Guest Tickets, select Send Guest Tickets, then choose the ticket type and enter each guest's name and email address. Each guest receives a ticket with a barcode, and the list on the page records who sent it.
Note: A guest ticket comes out of the chosen ticket type's stock and is recorded at zero. A Guest list ticket type with its own allocation keeps comps out of your paid releases.
Send free tickets to your guest list
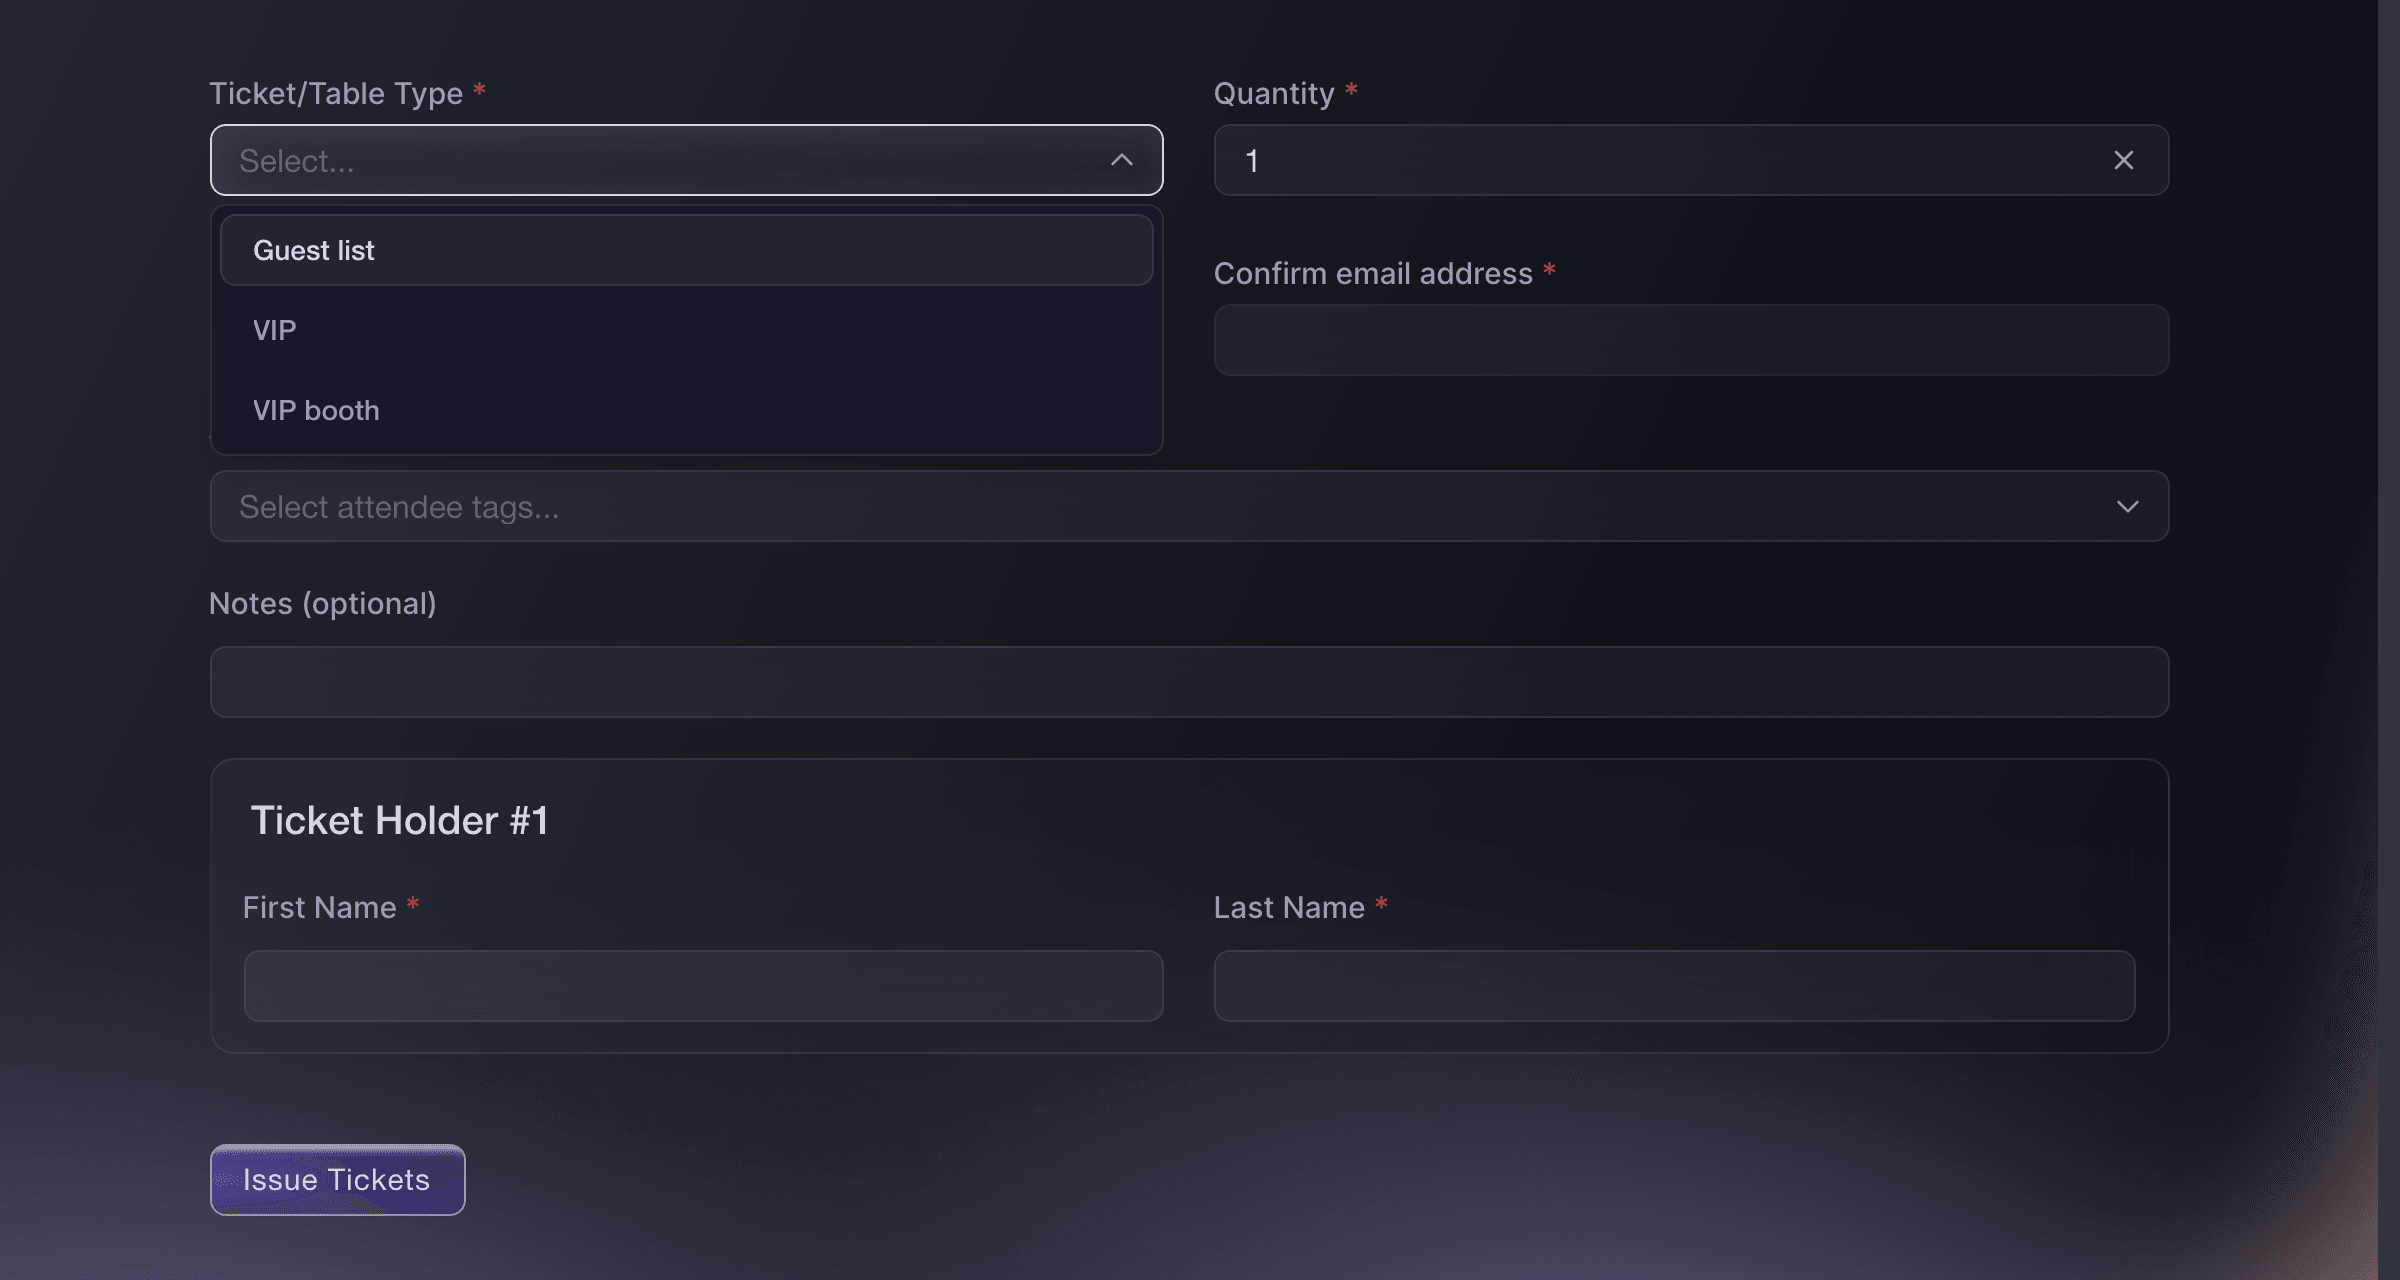
Event, Guest Tickets, Send Guest Tickets. -
Give the band and crew a pass
Open Multi-Entry Passes on your brand, create a pass type such as Band, Crew or Production, then add each person under Enter Recipient. Each pass scans at the door in the same app as a ticket, and it takes nothing from your ticket stock.
Note: The maximum number of uses covers the whole show, so allow for load-in, the show and every trip out to the bus. We turn passes on for a brand, so ask us if the page is not in your menu.
Issue reusable event passes to crew and artists

Brand, Multi-Entry Passes, Create New Pass. -
Let VIP in before the doors open
On the VIP ticket type, turn on This ticket type has different door times, then enter an earlier Doors Open Time and the Last Entry Time. The scanner admits VIP holders from that time, while general admission keeps the event's own door times.
Note: A ticket scanned outside its window is refused as not valid yet or no longer valid. Use the same setting for a guest list that closes before the headline set.
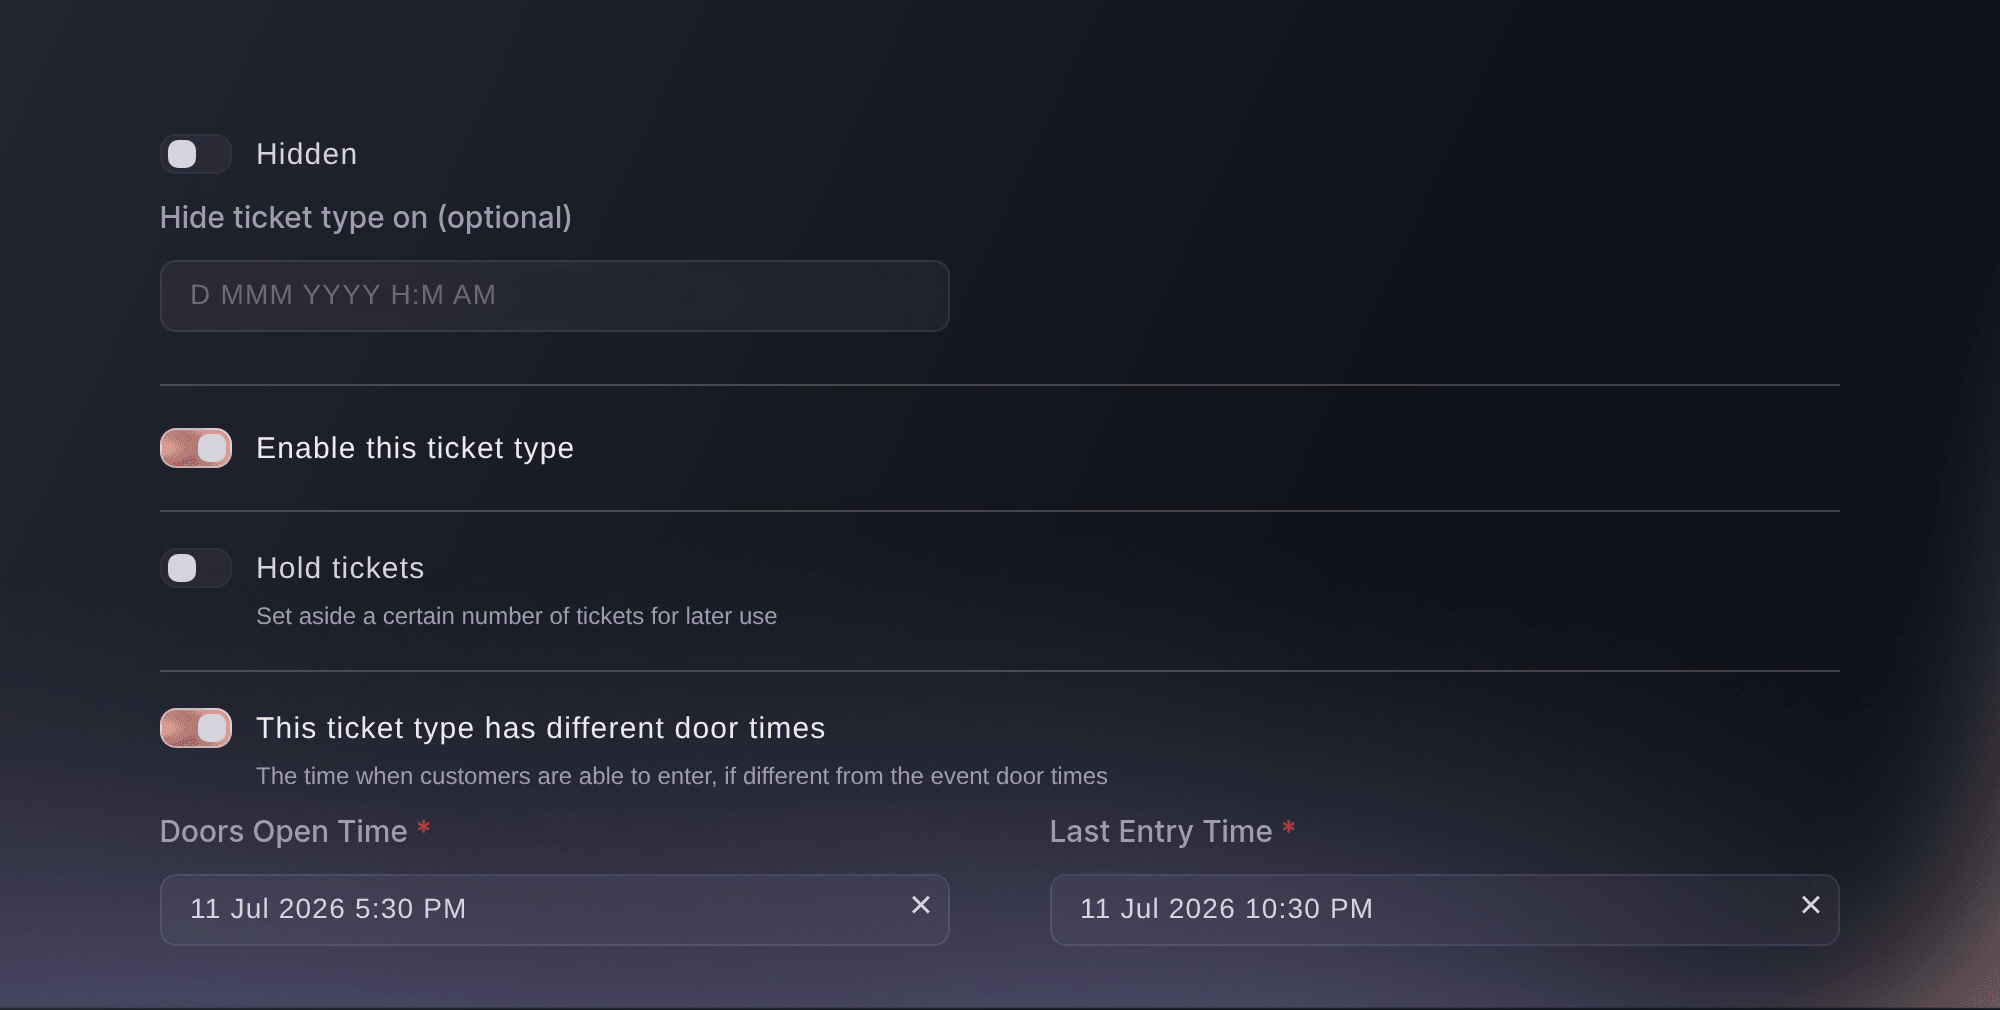
Tickets, Edit Ticket Type, ticket type options. -
Put the scanning app on the door team's phones
Open Check-In and select Download App for the Entry Fairy links on both app stores. Each member of your door team signs in with their own Door Staff login, so every admission carries a name.
Note: The app needs an internet connection at each entrance.
Event, Check-In, Download App. -
Follow arrivals while the room fills
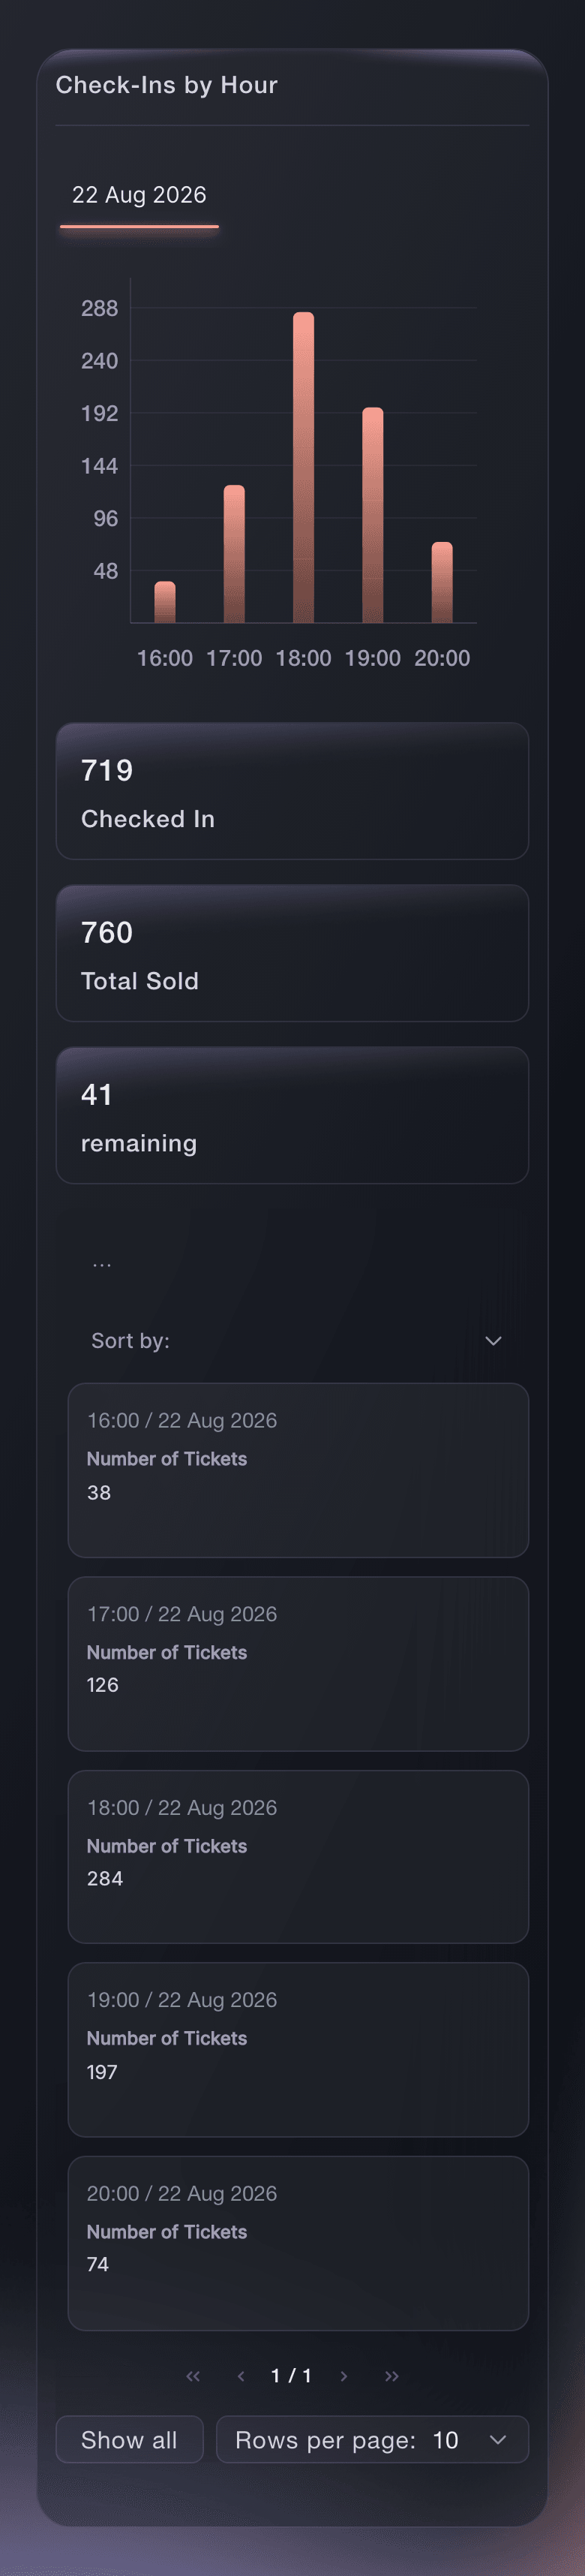
Open Check-In and select Hourly while your door team scans. The report shows arrivals by hour against the tickets sold, so you can see when the queue builds and when the last rush has passed.
Tip: Use Individual Tickets to find one fan who is told they are already inside.
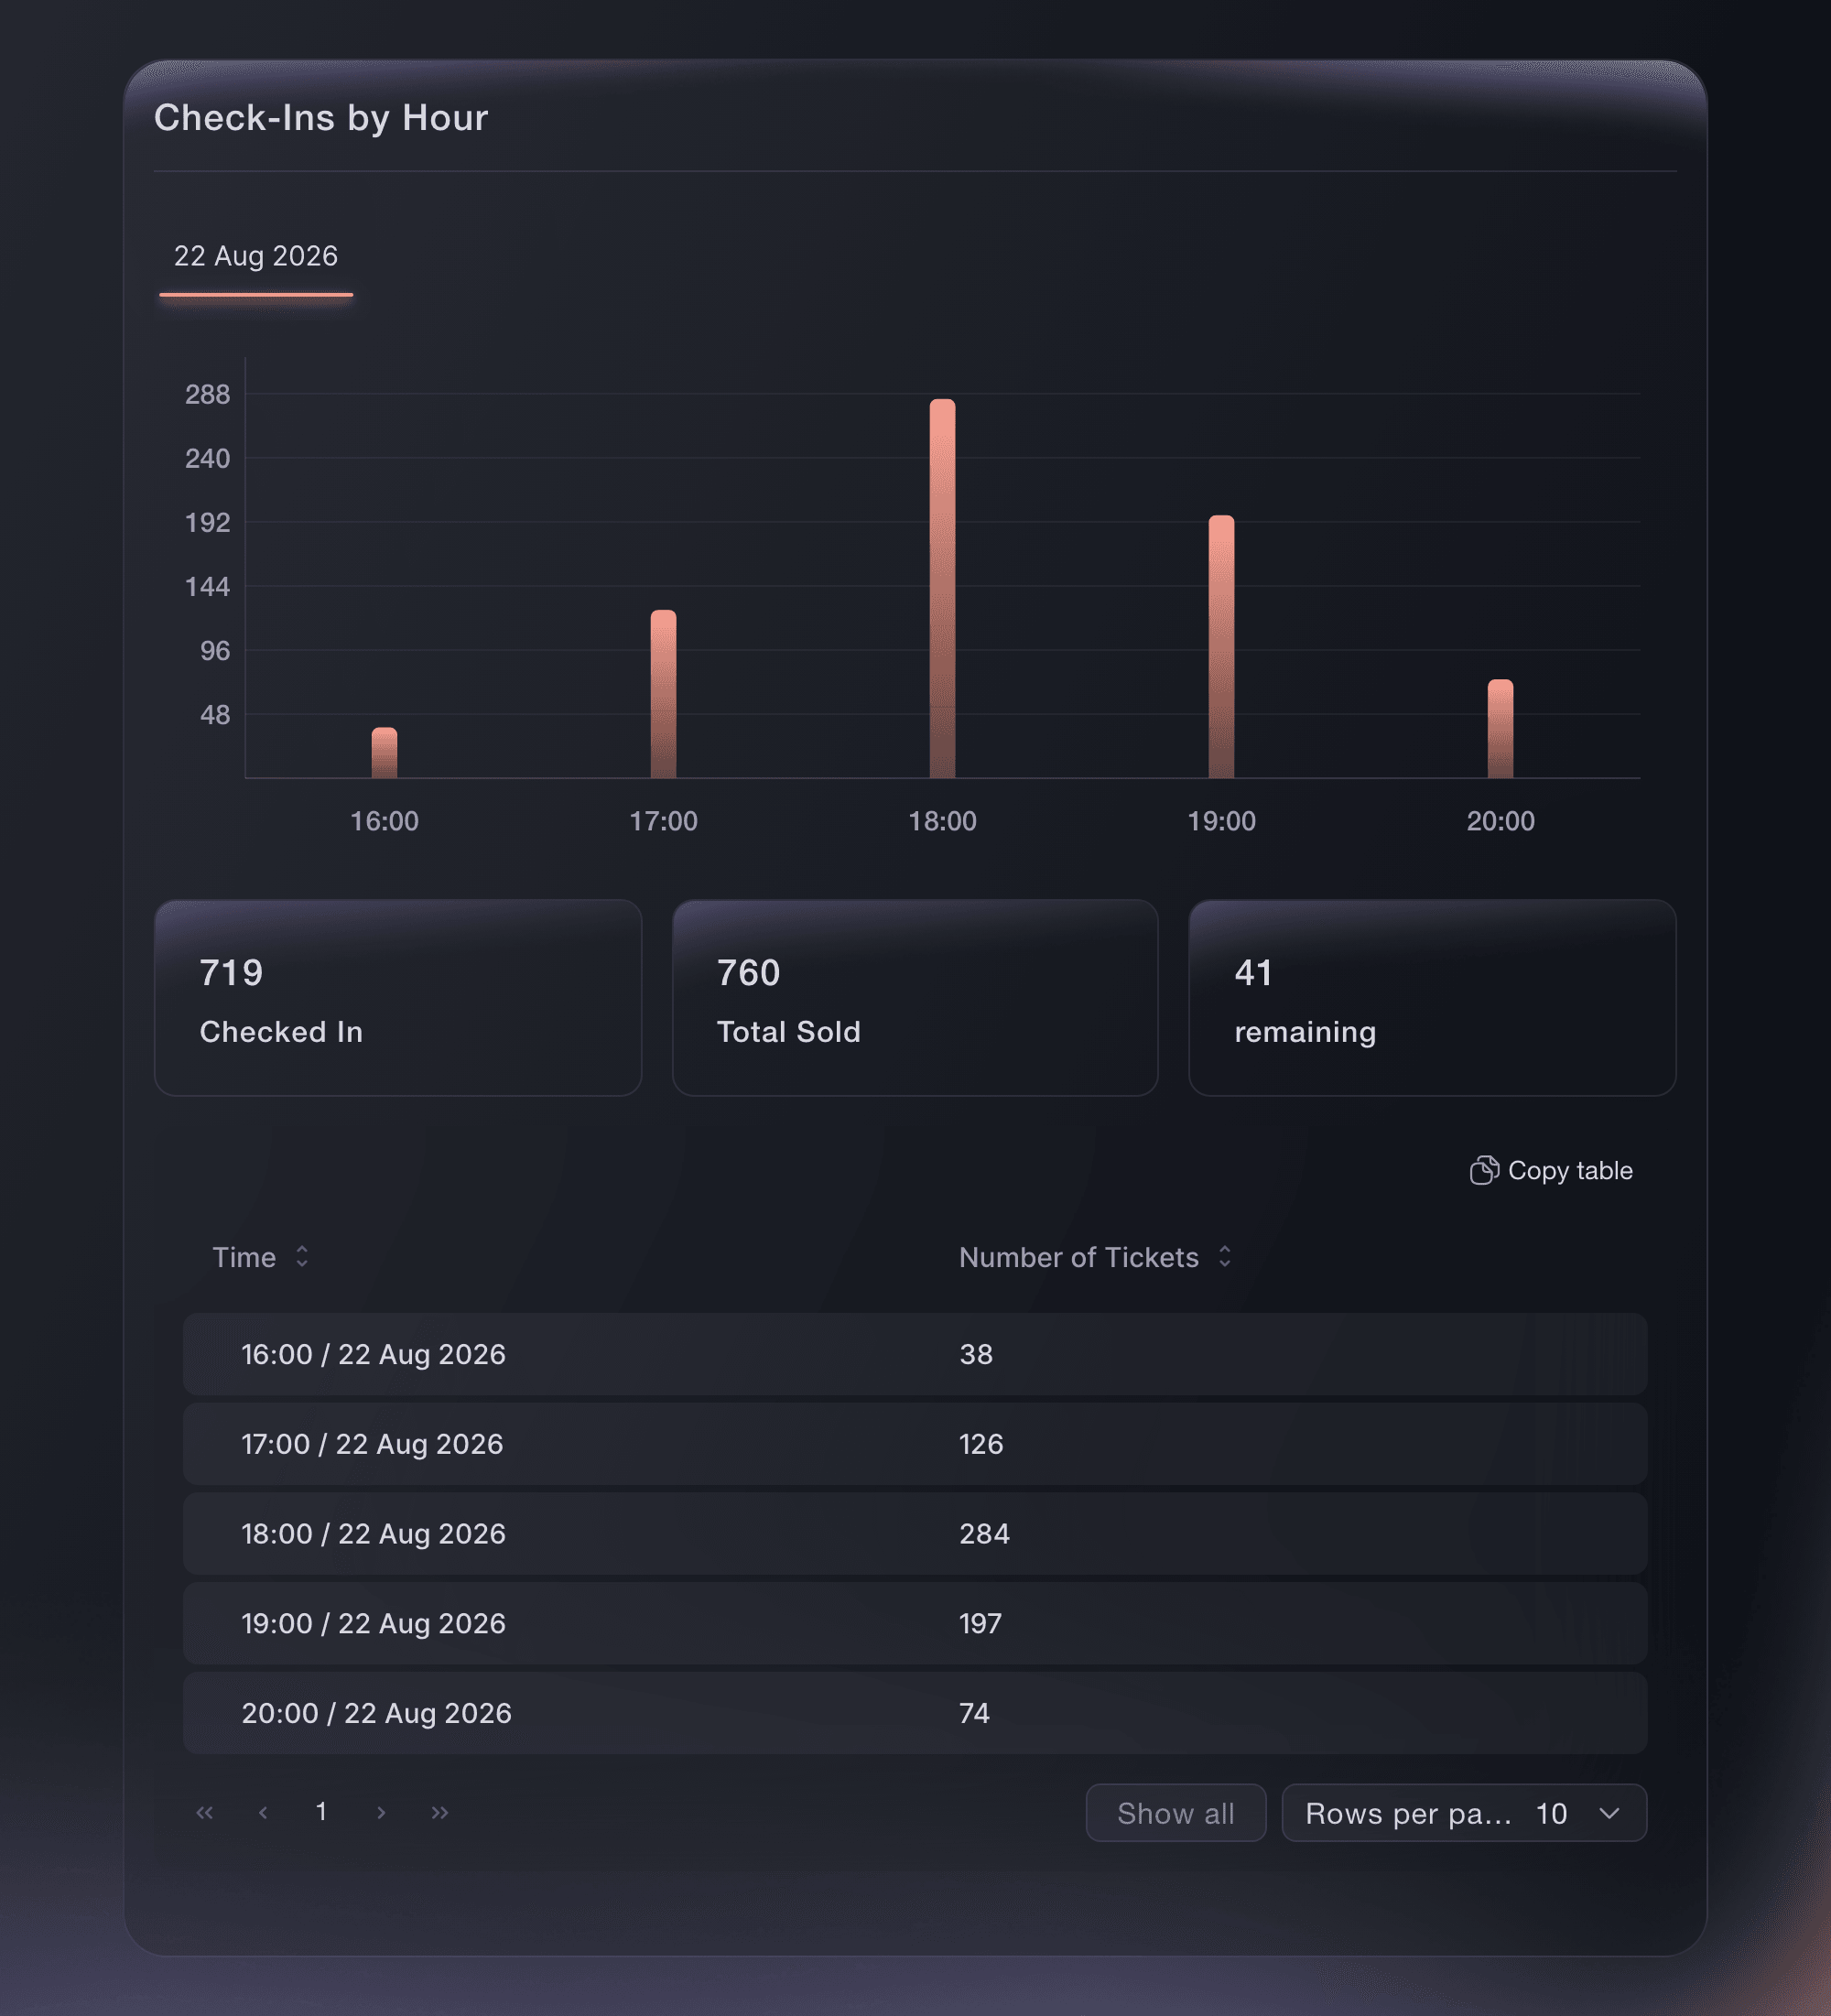
Event, Check-In, Hourly.




Try these steps on your own event
Create a free account, build your event and follow the steps above in your own dashboard. It takes a few minutes and you do not need to book a sales call.
No setup fees. No required monthly ticketing fee. No credit card required.
Or have it done for you
Fai can build the show from the Concert template, create the categories and releases with their holds and door times, add the merchandise, switch on names, resale and the waiting list, publish on a schedule, create tracking links, send guest tickets and crew passes, and report arrivals. She shows you the setup before she creates anything and asks you to approve each change.
In your dashboard, with Fai
Help me set up ticketing for our concert <SHOW NAME> on <DATE>; start from the Concert template, ask me about the capacity, general admission and VIP prices, releases, holds for the label and partners, merch, comps for the artist's guests, crew passes and our on-sale time, then show me the proposed setup before changing anything
From your terminal
Install the CLI from our CLI page, sign in with ticketfairy auth login, and choose the brand you are working on with ticketfairy brand use <BRAND_ID>. ticketfairy brand list and ticketfairy event list show the IDs the other commands use.
Use the CLI to create each release with its hold, the VIP ticket and the merchandise, publish the show and read arrivals. The template, categories, anti-scalping settings, guest tickets and crew passes are set up in the dashboard.
Create the general admission release with 40 tickets held for the label.
ticketfairy ticket create <EVENT_ID> --name "General admission" --price 35 --max-inventory 1200 --holds-enabled --hold "40:Label allocation"
Create the VIP ticket.
ticketfairy ticket create <EVENT_ID> --name "VIP package" --price 85 --max-inventory 120
Create the merchandise add-on.
ticketfairy addon create <EVENT_ID> --name "Tour T-shirt" --price 25 --quantity 300
Publish the show.
ticketfairy event publish <EVENT_ID>
Read arrivals while the doors are open.
ticketfairy checkin status <EVENT_ID> --output json
Let Fai do it for you
Fai works inside your Ticket Fairy dashboard. Create your account, open Fai and paste the prompt above.
No setup fees. No required monthly ticketing fee. No credit card required.
Tell ticket holders the set times or a change
Email everyone holding a ticket from Messaging with the door time, the set times or a change to the line-up. The email guide covers choosing who receives it and sending yourself a test first.
Fai can email the ticket holders of the show after showing you the message and asking you to approve it, because a sent email cannot be recalled.
In your dashboard, with Fai
Email everyone with a ticket for <SHOW NAME> that <THE NEWS>, and show me the message before sending
Questions you might have
- Should VIP be a ticket type or an add-on?
- Make VIP a ticket type when it changes how the holder gets in, such as early entry or a separate area, because door times belong to the ticket type. Make it an add-on when it is an extra on top of a general admission ticket, such as a merch bundle or a drinks package.
- How do I run a fan presale before the general on-sale?
- Choose Presale and releases in the Concert template, then hide the Presale ticket type behind an access code that you send to your fan list. The presale closes at its sales end, and the next release opens on its own rule.
- Can I sell reserved seats for a seated concert?
- Yes. Reserved seating with a seat map is turned on for your event by your Ticket Fairy contact, who sets the map up with you. The Seated choice in the template sells a place in a seated area and needs no map.
- How do fans collect merchandise at the show?
- Scanning the ticket at the door checks in the ticket and the add-ons on it. At a merch stand, scan the add-on's own code instead, so the fan's ticket is still ready for entry.
- Can the band get back in after they leave the venue?
- Yes. A multi-entry pass lets its holder in as many times as its maximum number of uses allows, so a pass with a high number covers every trip out and back during the show.
Still have a question?
Book a demo and we will answer it on a call, on your kind of event. Or create your account and see it for yourself.
No setup fees. No required monthly ticketing fee. No credit card required.
Related guides
Do this on your own event
Create your account, build your event and follow the steps in your own dashboard. You do not need to book a sales call.