
Advertising your event
Track ticket sales with your X pixel
Which X ad got the click and which one sold the ticket are two different questions. A promoter adds one X pixel for their brand, and X records ViewContent when a visitor opens the event page, InitiateCheckout when they start buying and Purchase when the sale completes, for every event under that brand.
Add your X pixel once for your brand, and see which campaigns sold tickets.
- For
- Running X ads for an event
- Takes
- 5 minutes
Before you start
- You're an owner, an admin or on the marketing team for this brand. If you can't open Integrations, ask an owner or an admin to do this part or to give you access.
- You have the complete X tracking snippet. If you only have the pixel ID, ask Fai to add it instead.
-
Copy your X pixel code
Open the pixel in your X ads account and copy its complete base code, not only the ID.
Note: The complete snippet lets Ticket Fairy identify X and import the correct pixel ID.
-
Import it in your brand settings
Open Network Conversion Tracking Pixels and select Import Tracking Pixel. Under Paste complete pixel code, paste the full X snippet, check that the dialog detects X and the right ID, then select Import Pixel.
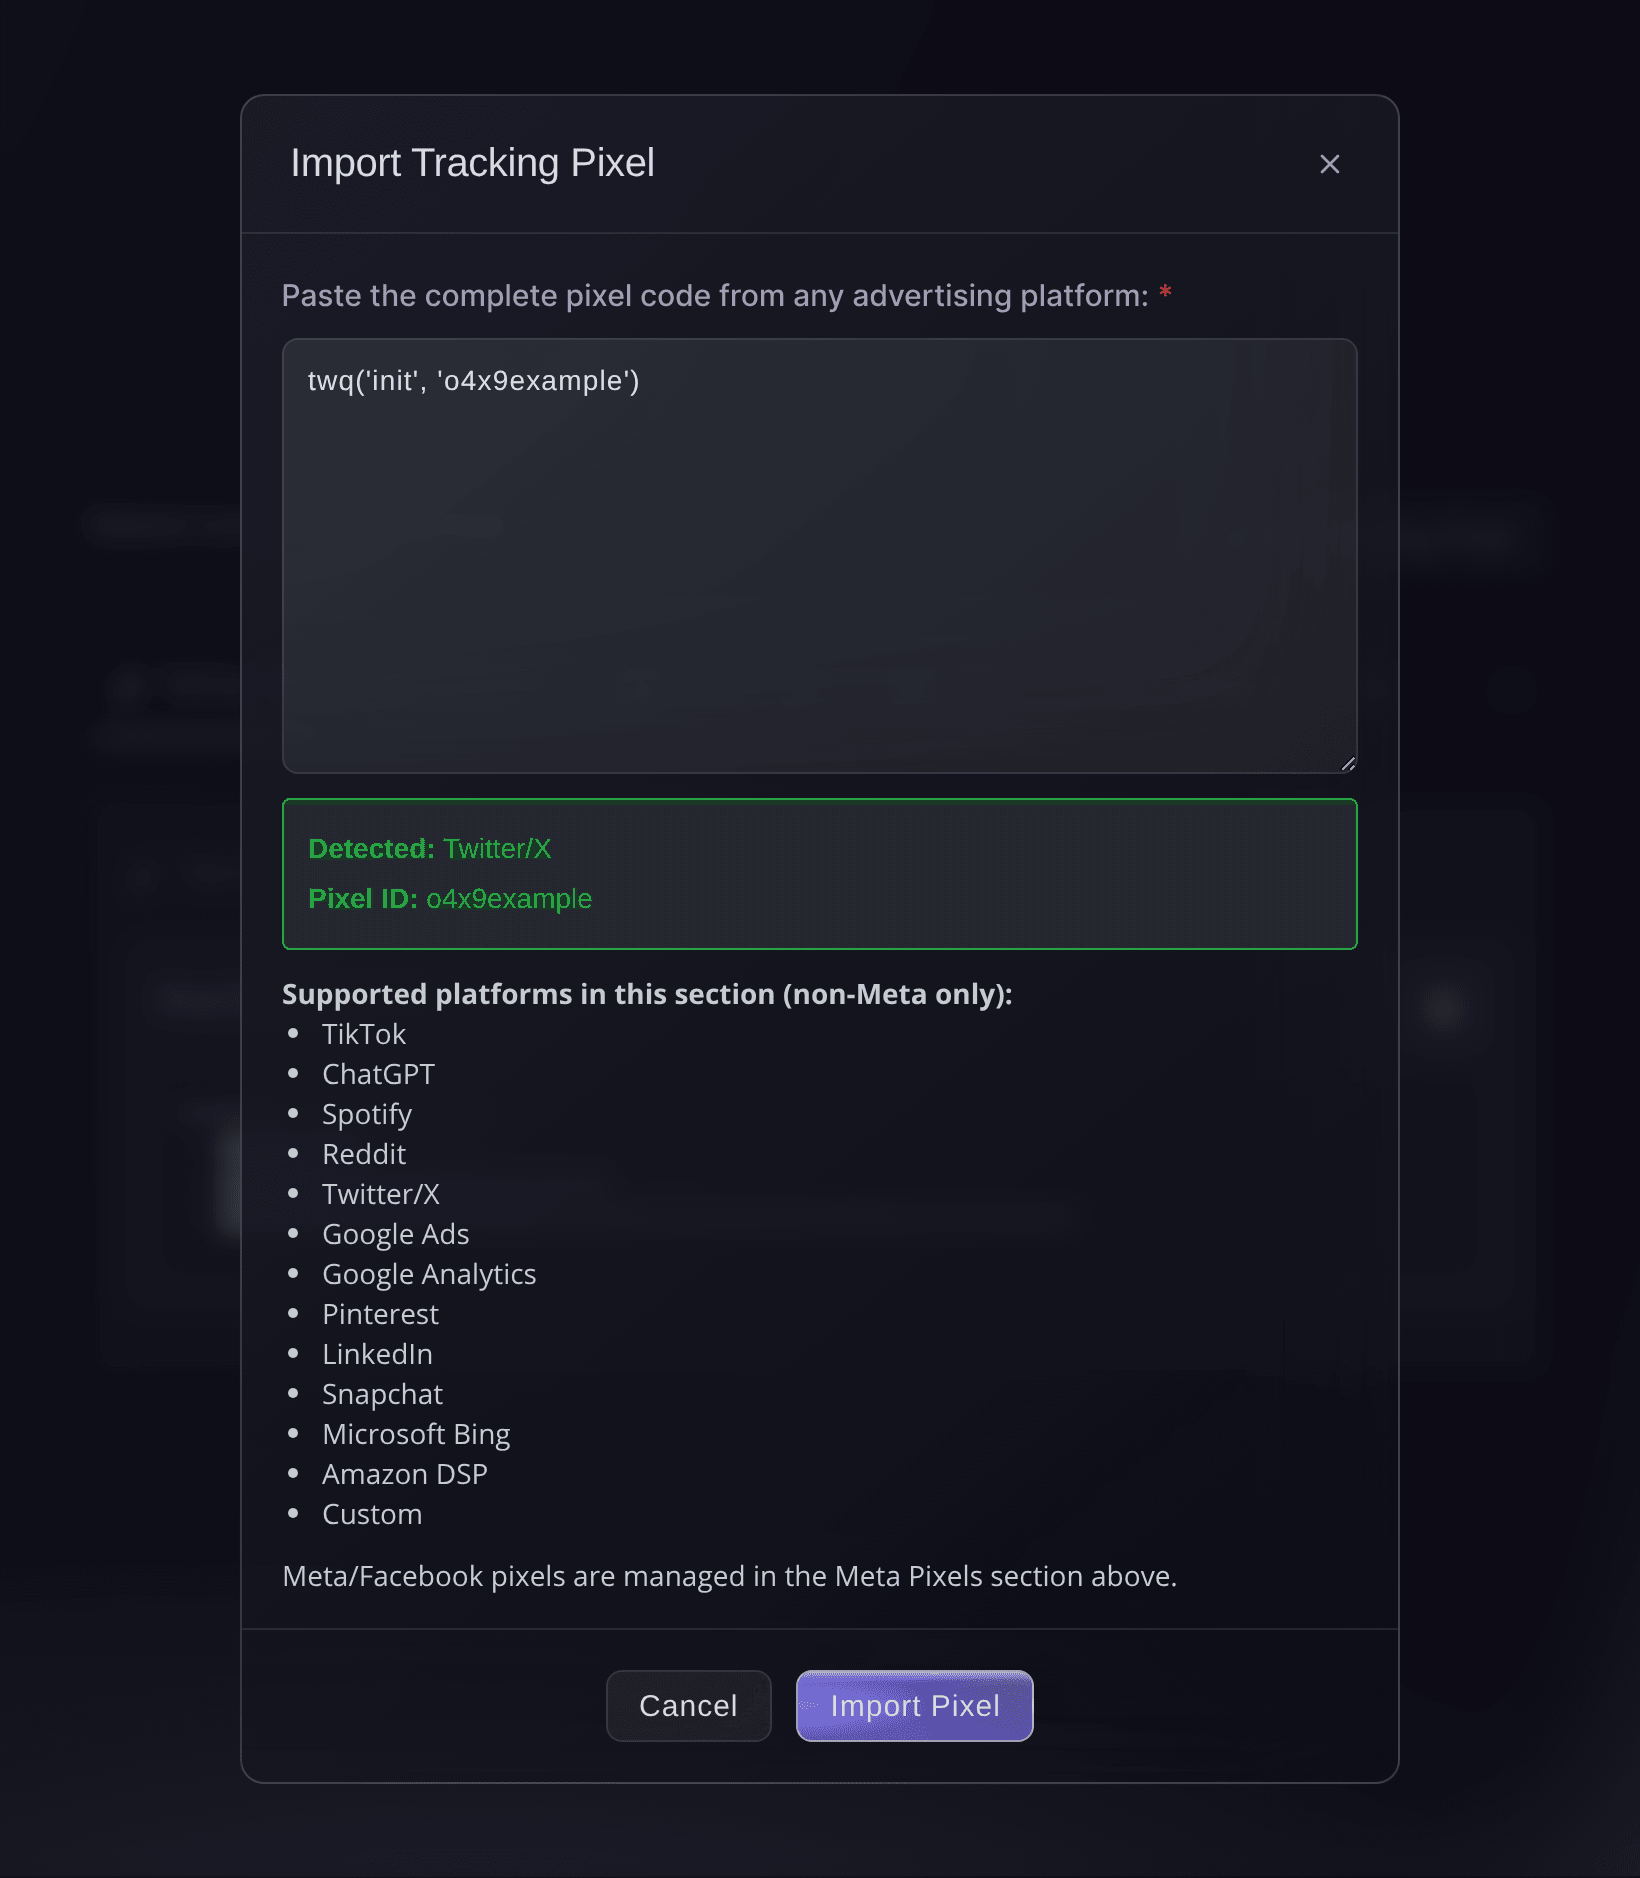
Brand settings, Integrations, Import Tracking Pixel. -
Check it appears under X
Open the X tab. It shows the imported ID and the events Ticket Fairy reports to X.
Note: You can import more than one. If you advertise the same event from two X accounts, you can import both pixels.
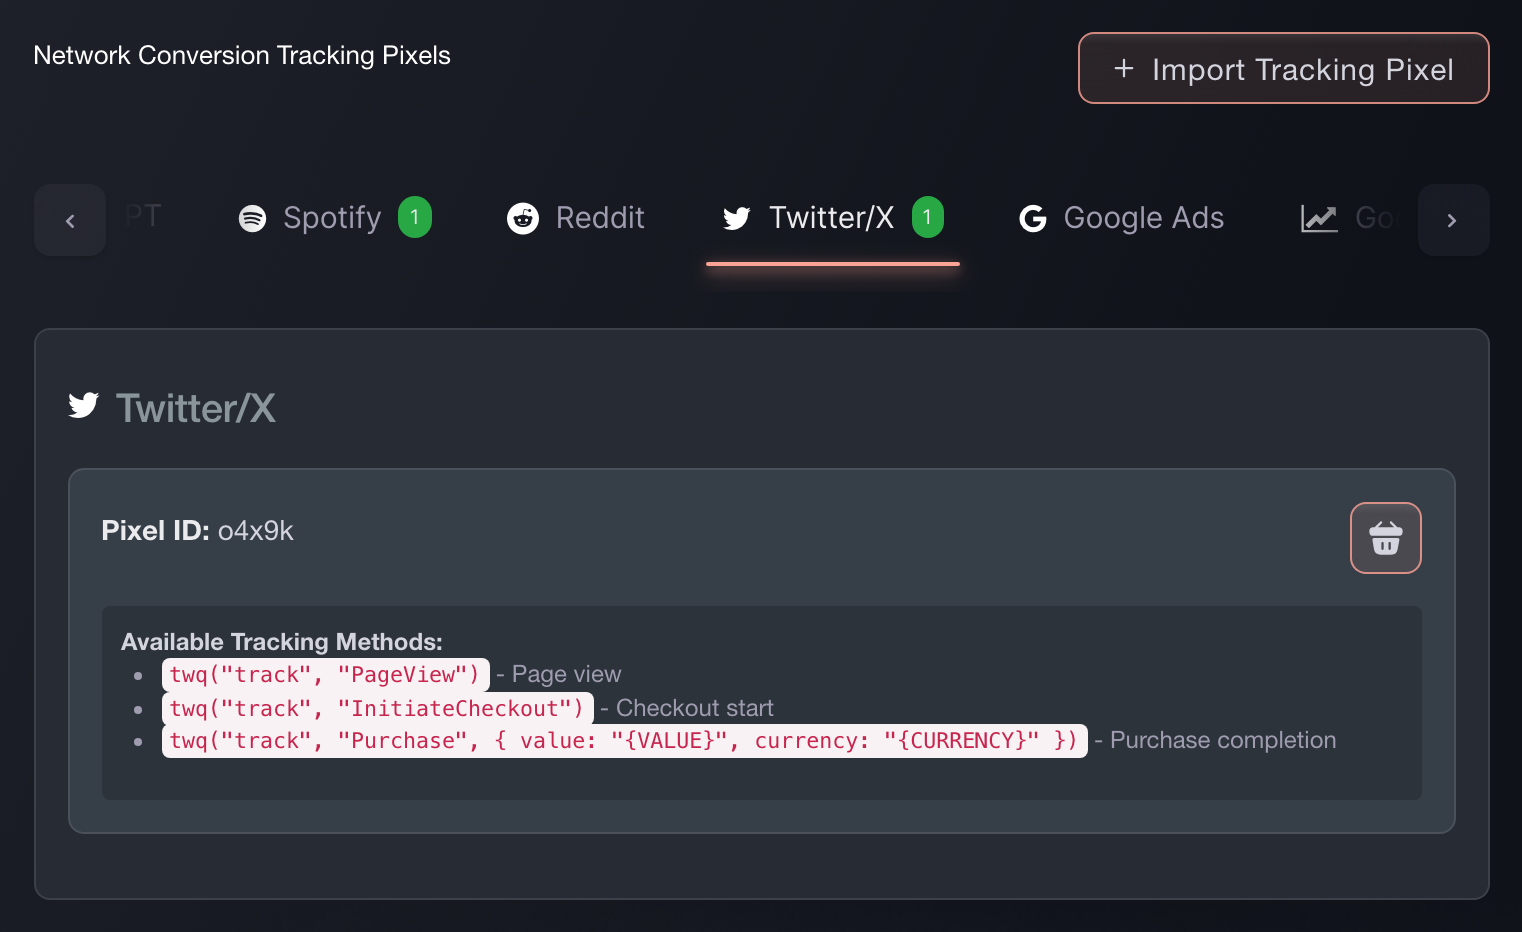
Brand settings, Integrations, Tracking pixels. -
Confirm X receives a sale
Buy a ticket on your own event, or use a test order. The purchase event then appears in X.
Note: Tracking is working when X shows the purchase with the completed order value.


Try these steps on your own event
Create a free account, build your event and follow the steps above in your own dashboard. It takes a few minutes and you do not need to book a sales call.
No setup fees. No required monthly ticketing fee. No credit card required.
Or have it done for you
Fai can add this pixel after asking you to approve the change. You still need the pixel ID from X. You can also add it in the dashboard.
In your dashboard, with Fai
Add an X tracking pixel to this brand with ID <your X pixel ID>
Let Fai do it for you
Fai works inside your Ticket Fairy dashboard. Create your account, open Fai and paste the prompt above.
No setup fees. No required monthly ticketing fee. No credit card required.
Questions you might have
- How do I add an X pixel to my event page?
- Open Network Conversion Tracking Pixels and select Import Tracking Pixel. Under Paste complete pixel code, paste the full X snippet, check that the dialog detects X and the right ID, then select Import Pixel. The X pixel then runs on every event page under this brand and through checkout. You only need to set it up once for the brand.
- Which X events does Ticket Fairy send?
- Your X tag runs twq('track', 'PageView') when it loads. Ticket Fairy sends ViewContent when a visitor opens your event page, InitiateCheckout when they start checkout, and Purchase when the sale completes. The Purchase event includes the order value and currency, so X can report the value of each ticket sale.
- Can I enter only the pixel ID?
- Use the complete snippet in Import Tracking Pixel so Ticket Fairy can recognise the network and extract the ID. If you only have the ID, ask Fai to add it and approve the change.
- Will my X pixel record sales if buyers check out on my own website?
- Yes. The embedded checkout sends the same events at the same points as the hosted checkout, so X records a sale on your own site the same way.
Still have a question?
Book a demo and we will answer it on a call, on your kind of event. Or create your account and see it for yourself.
No setup fees. No required monthly ticketing fee. No credit card required.
Related guides
Do this on your own event
Create your account, build your event and follow the steps in your own dashboard. You do not need to book a sales call.