Introduction
A dedicated roots music stage at a festival brings unique technical challenges. Unlike a rock stage loaded with electric guitars and massive speaker stacks, roots and Americana festival stages feature fiddles, banjos, upright basses, and acoustic guitars. These instruments demand a thoughtful backline setup to sound their best. Seasoned festival producers around the world – from Appalachian folk gatherings in the USA to Celtic music festivals in Europe, from bluegrass jamborees in Australia to world music events in Asia – have learned that success lies in the details. By strategically preparing the backline and stage logistics, festival organizers can ensure smooth artist changeovers, pristine sound quality, and happy performers and audiences.
This backline blueprint distills years of hard-earned wisdom into practical tips. It covers everything from the specific gear to stock (and why it matters) to clever staging tricks that keep multi-act lineups on schedule. Whether managing a small local Americana stage or a major international folk festival, these best practices help create a professional, artist-friendly environment that lets the music shine.
Stock Quiet DI Boxes for Acoustic Instruments
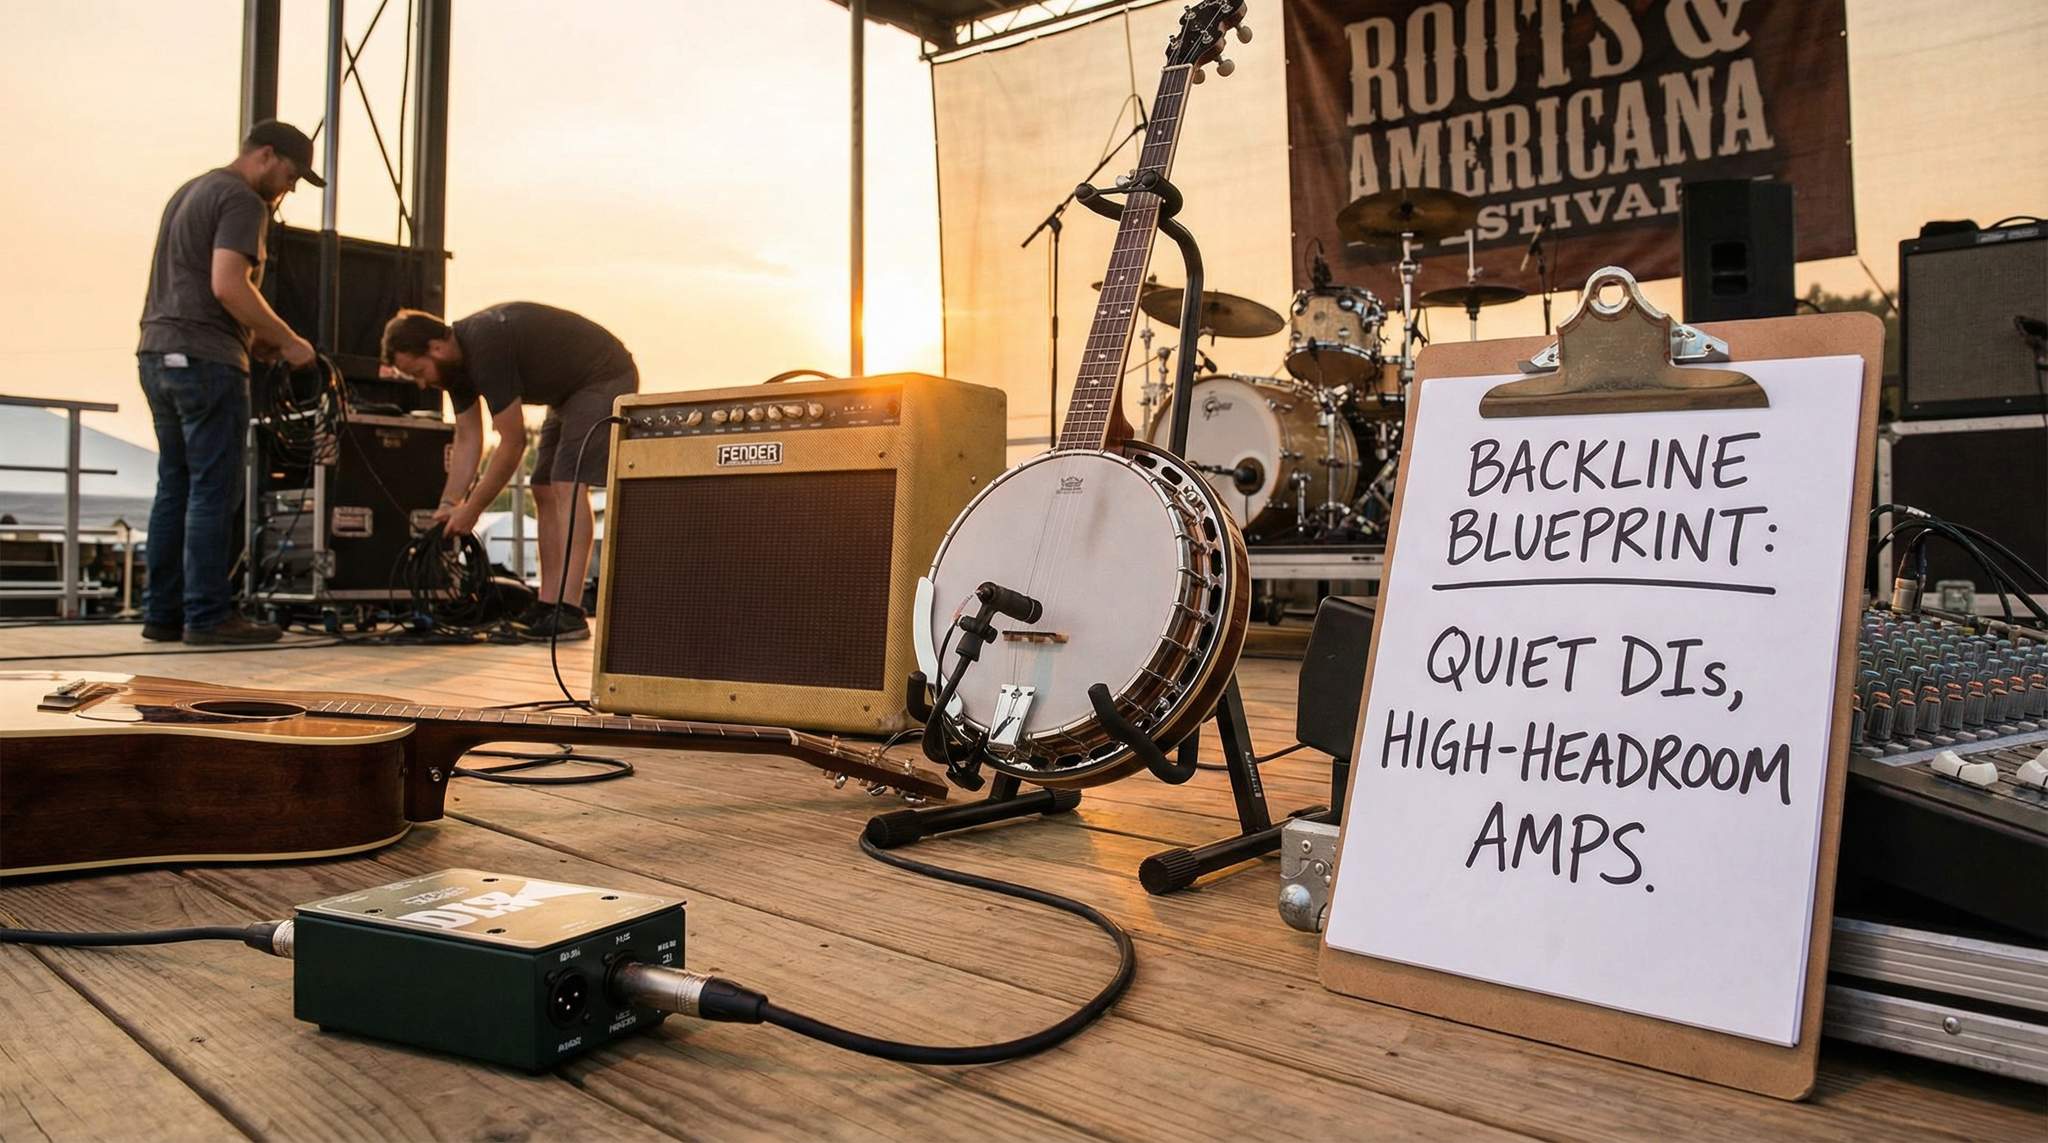
Acoustic instruments are the heart of roots music, and they often rely on direct input (DI) connections to the sound system. Ensure the stage is stocked with high-quality, quiet DI boxes designed for acoustic pickups. Poor-quality DIs can introduce hiss or hum, which is painfully obvious during a delicate fiddle tune or an acoustic guitar intro. To preserve the warm, authentic tone of instruments like guitars, mandolins, and dobros, use DIs known for low noise and transparency. For example, passive transformer-isolated DIs (often used in studios) are excellent at eliminating ground buzz and handling hot pickup signals without distortion. Active DIs with high headroom can also work well – just make sure they have a good reputation for a clean signal.
One festival anecdote drives home the importance of DI quality: at a folk festival in Canada, an evening set was marred by a persistent hum whenever the dobro player plugged in. The culprit was a cheap DI box that couldn’t handle the instrument’s pickup. The next day, the crew swapped in a premium DI (with a proper ground lift and padding options) and the difference was night and day – crystal-clear sound with zero buzz. The lesson is simple: invest in a reliable set of DI boxes as part of your backline. It keeps acoustic instruments sounding natural and spares your audio engineers endless troubleshooting.
Practical tips: Keep a DI on hand for every acoustic instrument that might appear on stage – guitars, fiddles with pickups, banjos with pickup systems, even accordions or dulcimers. Label each DI and its cable clearly so artists and techs know which cable is for which instrument. Always have a couple of spare DIs, and if possible, test them before the festival or each morning to catch any faulty units. A quiet stage starts with quiet gear.
Provide High-Headroom Guitar Amps for Clean Tones
Roots and Americana guitarists often crave clean, rich tone with plenty of headroom. Whether it’s a country Telecaster player needing sparkling clean twang, a blues guitarist blending clean and slight overdrive, or even a pedal steel guitar that requires pristine clarity, the backline should include amplifiers that won’t distort or break up at moderate volume. This means high-headroom guitar amps in your inventory. In practice, that might be a well-maintained tube amp known for clean tones (for example, a Fender Twin Reverb or similar amp with 50–100W of power) and possibly a solid-state or modern modeling amp that can stay clean and loud. High headroom ensures that when an artist really digs into a strumming pattern or chicken-pickin’ lead, the amp delivers volume without unwanted distortion or speaker breakup.
Planning a Festival?
Ticket Fairy's festival ticketing platform handles multi-day passes, RFID wristbands, and complex festival operations.
For instance, a bluegrass-electric fusion band in the UK once lamented that the provided backline amp started overdriving too early, coloring their sound in a way they didn’t want. Their set at a festival suffered as the guitarist spent half the time fighting the amp’s controls. The fix for future events was clear: supply an amp with more clean headroom so artists can shape their tone as they intend (using their own pedals or playing dynamics) rather than being forced into distortion. Many festival producers also keep a small tube amp (15–30W) on hand as an alternative, since some roots artists do like a bit of natural tube breakup. However, the default should be an amplifier that can get loud and still sound clean and balanced.
Practical tips: Position guitar amps on risers or tilt stands if possible, so performers hear themselves and don’t crank the volume purely to overcome directional sound hitting their legs. Mark default settings (e.g. a piece of tape indicating a “neutral” knob position for EQ and volume at soundcheck levels) – this is handy when resetting the stage between acts. Also, provide extra instrument cables by the amps and a spare amp if you can, so if one fails or isn’t to an artist’s liking, you have a backup ready to go.
Use Reliable Clip-On Microphones for Fiddles and Banjos
Fiddles, banjos, and other traditional acoustic instruments (like mandolins or ukuleles) are staples of roots festival stages. Miking these instruments can be tricky: players move around a lot, and their instruments often have complex tones that a single static mic might not capture consistently. The solution many experienced crews turn to is reliable clip-on microphones. These small condenser mics attach directly to the instrument (for example, on the fiddle’s body or the banjo’s rim), allowing the performer to roam freely while the mic stays optimally positioned. High-quality clip-ons are designed to handle the swift bow strokes of a fiddle or the percussive punch of a banjo without cutting out or feeding back easily.
When choosing clip-on mics for your backline kit, look for models known in the industry for dependability and natural sound. Many professional fiddlers and horn players use clip-on condensers (some examples include models by DPA or Audio-Technica) that can take a beating on the road yet deliver studio-quality sound. Make sure to have appropriate cables or wireless packs for these mics – if they are wireless, check that you have fresh batteries and secure frequencies; if they are wired, have extra long lightweight cables so performers don’t feel tethered.
Real-world lesson: At a major Americana festival in the southern US, a fiddler once started a fiery solo only to realize she’d stepped too far from her microphone, causing the first part of her break to be nearly inaudible out front. The next year, that festival equipped every fiddle and banjo act with clip-on instrument mics. The difference was clear: consistent volume and tone no matter where the musician danced or moved, and no more moments of “lost” solos. It also decluttered the stage – fewer mic stands to navigate around – which performers appreciated. Bottom line: have at least a few sturdy clip-on mics in your backline arsenal, and test them with the monitor system for feedback before the show. They can dramatically improve sound reinforcement for your roots acts.
Offer Sturdy Upright-Bass Solutions
The upright bass (double bass) often forms the rhythmic backbone of folk, bluegrass, and swing bands. But amplifying an upright bass on a festival stage poses special challenges. These instruments are large, resonant, and prone to feedback if not handled carefully. A sturdy upright-bass solution means both the physical support of the instrument and its amplification.
First, consider the amplification: many upright bass players travel with their own pickup installed in the bridge or fingerboard. As a festival producer, be prepared to accommodate those with a high-quality bass amp or preamp/DI. Unlike electric bass in a rock band, a roots upright bass usually sounds best through an amp designed for clarity and warmth (for example, amps used in jazz circles or acoustic settings). These amps have full-range speakers (often including tweeters) to reproduce the bass’s deep lows and woody highs without distortion. If providing a bass amp as part of backline, choose one known for reliability and a clean sound at moderate volumes. High headroom is again key – the amp should handle strong plucks (or even the occasional slap technique in rockabilly) without clipping. Common solutions include combo amps with a 12” or 15” speaker, or even portable PA-style amps specialized for acoustic instruments.
Next, physical stability: make sure the stage has a safe spot for the bassist to put the instrument when not playing (some players use an instrument stand designed for double bass). If quick band changeovers are expected, have a plan to swap basses or move the bass on and off stage smoothly – for instance, a small rolling cart or an extra pair of hands ready to assist, since an upright bass is tall and awkward to carry through tight stage wings. Sturdy solutions also mean using feedback control tools: for example, a notch filter or high-pass filter on the bass channel to cut problem frequencies, or even something as simple as a foam piece that some bassists wedge between the tailpiece and the body to reduce resonance on loud stages.
Practical story: At a bluegrass festival in Australia, the sound crew noticed every time the upright bass hit a certain note, a thunderous feedback would ring out due to stage resonance. After that incident, they added a small parametric EQ/DI box to their backline kit for bass, allowing them to dial out the offending frequency whenever an upright bass was in use. They also began keeping a sturdy bass stand at the ready, after one costly accident where an upright fell and cracked on stage after being propped against an amp. The take-away is to give upright bass special attention: talk to the bassist or band engineer in advance if possible, have both a DI and mic option available, and ensure there’s a solid amp and safe space for the instrument. These steps prevent on-stage mishaps and keep the bass sounding great.
Keep Spare Capos, Tuners, Batteries, and Strings at Each Wing
Even the most seasoned musicians can have an off day – a forgotten capo, a dead battery in a tuner or pickup, or the dreaded broken string mid-set. For roots and Americana acts, these minor crises can and do happen, but they don’t have to derail the performance. The key is anticipating them by stocking every stage wing with spare accessories. At both stage left and stage right, have a small kit or drawer that contains the essentials: capos, clip-on tuners, various batteries, and a selection of string packs.
- Capos: Many folk and country guitarists, as well as banjo players (5-string banjos often use a special 5th-string capo or spikes), rely on capos for key changes. Keep a few universal guitar capos and one or two banjo capos in the kit. This way, if someone’s capo falls and breaks or simply goes missing, a stagehand can immediately hand them a spare.
- Tuners: Clip-on tuners are a lifeline in acoustic sets. Have a couple of good quality clip-on tuners ready to go (with fresh batteries in them). If an artist’s pedal tuner malfunctions or they forgot their tuner, a crew member can quickly provide one so the show can go on in tune.
- Batteries: Acoustic instrument pickups (especially older active preamp ones) and wireless packs for instrument mics often run on batteries (commonly 9V for guitar preamps, AA or AAA for clip-on mic transmitters and tuners). Always have a stockpile of 9V, AA, and AAA batteries on each side of the stage. Mid-set battery failures are more common than one might think – a mandolin pickup dying due to a drained 9V, or in-ear monitors cutting out on a singer. A tech should be able to swap in a new battery at a moment’s notice. Pro tip: use a small piece of tape to label each battery with the date it was added to the kit so you can cycle out old ones and ensure freshness.
- Strings: Broken strings can turn a joyous jam into a silent scramble if no replacements are at hand. Keep full string sets for guitar (both acoustic and electric sets, in common gauges), fiddle (violin E strings are notorious for breaking, so have a couple spares), mandolin, banjo, and even bass. While not every instrument will break a string, strings are cheap insurance. Also include a string winder and wire cutters to speed up string changes. Some festivals even keep a spare inexpensive acoustic guitar backstage, pre-tuned, so if a guitarist snaps a string mid-song, they can grab the spare guitar and keep going while a tech restrings the primary one off to the side.
Having these spares at each wing means no matter where an artist is on stage, help is nearby. If the fiddler’s E string pops, a replacement is seconds away. If a guitarist’s preamp battery dies, you don’t have to run across to the other side in a panic – you can fix it quickly from the closest wing. It’s all about being prepared and fast. Make sure your stage crew is aware of these kits and checks them daily to replenish anything used. A short tale from experience: at a folk festival in New Zealand, a headlining singer-songwriter walked on stage only to realize he left his capo in the green room – without missing a beat, the stage manager produced a spare capo from the wing kit, saving the day and likely the mood of the performance. These little things are the unsung heroes of festival production that artists deeply appreciate.
Label Cable Looms and Color-Code Inputs for Clarity
When you have multiple acts in a row, each with their own array of instruments and microphones, the stage cabling can become a jungle. To avoid confusion during frantic changeovers, label and color-code all your cable looms and inputs. This bit of organization goes a long way to prevent errors like plugging a fiddle into the wrong DI or routing a vocal mic to the wrong channel on the console.
Need Festival Funding?
Get the capital you need to book headliners, secure venues, and scale your festival production.
Start with the stage loom – the bundles of XLR cables or audio snakes that run from the stage to the mixing desks. It’s common to use sub-snakes or looms for different sections of the stage. For example, one small sub-snake handles all the drum mics, another covers the stage left inputs (guitars, bass, etc.), and a third covers stage right inputs (fiddles, keyboards, vocals on that side). Clearly label each loom with both a number and a name (e.g., “Loom 1 – Drums”, “Loom 2 – Stage Left”) and even consider color-coding with electrical tape. You might wrap red tape around all connectors for the drum loom, blue tape for stage left, and yellow tape for stage right, for instance. Then mark the corresponding inputs on the main snake or stage box with the same color codes. This way, when plugging things in or troubleshooting a missing connection, the team can instantly identify which group of cables is which.
Each individual XLR or quarter-inch cable should also have a label at both ends – usually the channel number or instrument name. For example, label a cable “Vocal 1” or “Fiddle DI” or “Channel 7” matching the patch sheet. Velcro cable ties in matching colors can also help keep coiled slack tidy and distinguish groups of cables at a glance.
Why go to this length? Because in the heat of a quick 15-minute turnover between bands, small mistakes can happen if cables aren’t clearly identified. A labeled and color-coded system means even if you bring in extra volunteer stagehands or work with local crew in a foreign country, anyone can grasp the system quickly (“hand me the green fiddle XLR from the blue loom”). It speeds up setup and tear-down and reduces on-stage chatter and confusion during line-checks.
A case in point: an Americana festival in Spain adopted a color-coded input scheme and saw their patching errors drop dramatically. Before, they occasionally had incidents like the mandolin coming through the wrong channel because someone plugged it into the nearest jack. After implementing a labeling system and training the crew on it, each instrument consistently ended up in the right channel, and soundcheck for each act was faster and smoother. It’s a simple organizational step, but labeling and color-coding are the unsung heroes of stage management. Finally, make sure to laminate a patch list (input list) as part of your documentation (more on laminated stage plots next) so everyone knows which color/label corresponds to which instrument for each act.
Laminate Per-Act Stage Plots and Input Lists
Communication is key when juggling many artists on one stage, and nothing beats a clear stage plot for each act. A stage plot is a diagram that shows where each performer is positioned on stage and what gear or inputs they need (e.g., “Lead singer – center – vocal mic; Guitarist – stage left – guitar amp + DI; Fiddler – stage right – clip-on mic + DI for pickup”, etc.). To make these plots maximally useful to your crew, have them printed in color and laminated. Laminating each band’s stage plot (and the associated input list or patch sheet) ensures they survive the entire day or weekend without tearing, smudging, or dissolving in a surprise rain shower.
Distribute these laminated plots to key personnel: one at the monitor mixing position, one at the front-of-house mixing desk, and at least one kept side stage for the stage manager and techs. You can even tape the relevant plot to the wing where the band will load in, so that as the incoming musicians approach the stage, crew members see the exact layout and can quickly place monitors, microphones, and stands in the correct spots. Color coding on the plot itself (matching the cable colors you set up earlier) can further reduce any guesswork.
Laminated stage plots have another advantage: you can mark them with erasable markers for any last-minute changes. If the next act says, “Our banjo player couldn’t make it, so it’s just the fiddler on that side,” a tech can scribble a note on the laminate to remove the banjo mic and share that update with the audio team immediately. After the set, it wipes clean, ready for the next use.
In practice: a festival in England that focuses on folk and roots music started laminating stage plots after experiencing one too many incidents of paper setlists and plots blowing away in the wind or disintegrating with spilled drinks. They noticed crew coordination improved dramatically. Stagehands were no longer squinting at crumpled, faded printouts or trying to pull up emails on their phones — instead, they had a durable, clearly visible reference for every changeover. This not only saved time but prevented errors like setting up in the wrong configuration. Artists arrived on stage to see things largely in place as per their rider, boosting their confidence in the production.
As a festival producer, encourage the artists to send their stage plots well in advance (and double-check any odd requests or notations). Then take the time to print them in a legible size. One pro tip: hang the day’s stage plots in order on a backstage wall or board for the crew to refer to, perhaps under a heading like “Today’s Lineup & Stage Plots”. A quick glance tells the team what’s coming up next and how to prepare.
Pre-Build Dual Risers for Drums and Keyboards to Speed Changeovers
Long changeovers can kill the vibe at a festival. One of the biggest bottlenecks during set transitions is the drum kit (and sometimes large keyboard rigs). Drummers need time to adjust the kit to their preference, and keyboard players often have multiple boards, stands, and pedals. To drastically cut down swap time, many professional festival stages utilize dual risers: essentially two platforms on wheels that can be swapped in and out. While one band is performing, the crew is busy on the side of the stage pre-assembling the next band’s drum set (or rolling out a fully set keyboard setup). As soon as a band finishes their last song, one team rolls the current drum riser off-stage as another team rolls the next band’s prepped drum riser on-stage.
This technique requires some space and coordination, but it’s a game-changer for efficiency. Let’s say on a roots stage, Band A and Band B both have drum kits. Band A’s drummer used the festival’s house drum kit (or their own, set up on Riser A). While Band A is playing, the crew can be behind the curtain assembling Band B’s kit on Riser B – cymbals in place, drum throne adjusted, mics already positioned and cables run to a side-stage snake, perhaps even line-checked with headphones or a PFL at the monitor console. The moment Band A finishes, Riser A is unlocked and rolled out, and Riser B with Band B’s drums rolls into the exact marked position. Plug in the loom from Riser B to the stage drop snake, and the drum changeover is effectively done in a couple of minutes. The same concept goes for keyboards: if one act has a large keyboard setup (say, a Hammond organ or just multiple keyboards and effects on a wheeled platform), set those on a riser that can be wheeled on and off without having to reconnect every cable on the fly.
Festivals in the US and Europe popularized this method on their main stages, but it’s equally useful on secondary stages with tight schedules. For example, the stage crew at a bluegrass festival in North Carolina noticed that their schedule was slipping behind each day specifically during band changeovers involving drums. They invested in a second drum riser and implemented this pre-build system. The result was a reduction of average changeover time from 15 minutes to under 7 minutes for those sets. Not only did it keep the festival on schedule, but it also reduced stress for the crew and artists alike – the next drummer could calmly get things just right while offstage, rather than rushing a setup in front of the audience.
Key considerations: You’ll need duplicate hardware (at least two drum kits, or one house kit that can be quickly reconstructed, or enough extra stands and hardware to set up a second while one is in use). Mark the stage with tape so risers roll to the correct spot every time for consistent mic placement. Ensure risers have locking wheels and are sturdy enough to not wobble during a performance. And coordinate a clear choreography for the crew: rehearse the swap if possible, so everyone knows who is doing what (one person handles unplugging and replugging the loom, two people handle rolling each riser, etc.). With practice, your team can pull off amazingly fast set changes that impress artists and keep the audience engaged with minimal downtime.
Implement a “Reset to Default” Checklist Before Each Set
In the flurry of festival operations, it’s critical to have a moment of reset between acts. This is where a “reset to default” checklist becomes invaluable. Essentially, after one band is cleared and before the next one loads on, the stage should be returned to a known baseline configuration. Posting a checklist of those reset steps – and requiring each tech to verify and sign off on their portion – ensures nothing gets overlooked in the rush.
What might a reset checklist include on a roots stage? Here are some common items:
- Stage Clear & Safe: Verify the previous band’s gear, set lists, and personal items are fully removed. Clear any stray cables or gaffer tape balls. Wipe up any spilled water or drinks to avoid slips.
- Backline Reset: Return all festival-provided backline gear to its standard settings. This means turn amplifiers to standby or off (prevent that horrendous pop when plugging in new instruments), set amp EQ knobs and volumes back to a neutral or predetermined position, and double-check that any modelers or effects units are ready for the next user. If the last band reconfigured the drum kit or moved monitors, put everything back to the default arrangement for the next act’s arrival (unless you know the next act’s exact needs allow a different pre-setup).
- Cable and Input Check: Make sure all DIs and mic cables are back in place and connected to the correct channels as per the patch list. Often in the scramble of teardown, a cable might get pulled or moved – verify that “Guitar DI 1” is indeed back in channel X, that the clip-on fiddle mic is reattached to its cable, etc. If any cable was swapped out during the last set due to a fault, note it and ensure the new cable is labeled correctly.
- Spare Kit Replenish: Did someone use the spare capo or a 9V battery from the wing kit during the last set? Replace it now. Check that the spare strings are still there and not scattered. This is also a good time to quickly tune the house spare instruments (like that backup acoustic guitar) if they were handled.
- Monitor and Mic Reset: Mute all channels on the mixing boards while re-patching to avoid pops. Reset monitor send levels or mixes to a default starting point (especially if you have a default mix for, say, a solo singer-songwriter vs. a full band – some digital consoles allow you to save a baseline scene). Turn off phantom power on channels not in use for the next act, and ensure any phantom needed for active DIs or condenser mics for the upcoming act is engaged only once that mic is plugged in. Basically, get the audio system “quiet” and ready for new inputs.
- Visual Once-Over: One tech (often the Stage Manager or Crew Chief) should do a final walk across the stage, checking that everything looks tidy and ready. This includes verifying that stage plot documents for the next band are on hand, mic stands are positioned roughly where needed (or off to the side ready to place), and that any risers are set to their starting positions. They can initial the checklist or call out “Stage is reset!” to inform everyone.
By having each crew member sign off on their part – say, the audio tech signs for “patch reset complete”, the backline tech signs for “backline gear reset”, etc. – you instill a sense of ownership and attention to detail. It’s surprisingly easy to miss something small in the frenetic energy of a festival. A checklist turns the reset into a routine where fewer things slip through the cracks.
One festival producer from Indonesia implemented such a checklist after a near-disaster: a hurried changeover left a DI box from the previous band still engaged with a 20 dB pad, and when the next act’s acoustic guitarist plugged in, their signal was mysteriously low. It took half a song to realize the issue. After that, the “reset to default” list at that festival specifically included “Check all DI pads/lifts are set to normal” as an item, among others. No more repeats of that mistake! Over time, the crew will internalize many of these steps, but having them posted in writing is a great fail-safe.
Conclusion
Running a smooth roots music festival stage is both an art and a science. It requires understanding the particular needs of acoustic and Americana performers and translating that into concrete preparations: the right gear, the right procedures, and the right mindset. From North America to Europe, Asia to Oceania, the best festival organizers share one trait: they sweat the details so that artists and fans can bask in the magic of live music without hiccups.
By following this backline blueprint – stocking specialized equipment like quiet DIs and high-headroom amps, anticipating musician needs with spares, keeping the stage meticulously organized with labels and documentation, and streamlining logistics with risers and checklists – festival producers can dramatically improve the on-stage experience. The payoff? Happier musicians who feel taken care of, shows that run on time, and an audience that enjoys seamless performances one after another.
In essence, being proactive and detail-oriented is the secret. Every extra minute spent labeling a cable or packing spare batteries might save ten minutes of emergency scrambling during a live show. Every pre-built riser or laminated stage plot is a minute of confusion avoided in the heat of the moment. And every satisfied artist who walks off stage without technical frustrations is an investment in your event’s reputation.
For the next generation of festival producers: take these lessons to heart. Use them, adapt them to your local context, and keep building on them with your own experiences. The result will be stages that run like clockwork yet feel welcoming and relaxed – the perfect atmosphere for roots music to come alive.
Frequently Asked Questions
Why are quiet DI boxes important for acoustic instruments?
High-quality, quiet DI boxes are essential for acoustic instruments like fiddles and banjos to prevent hiss, hum, and ground buzz that cheap units introduce. Passive transformer-isolated DIs or high-headroom active DIs preserve the warm, authentic tone of the instrument and ensure a crystal-clear signal for the sound system.
What type of guitar amps work best for Americana festivals?
Roots and Americana festivals require high-headroom guitar amps, such as 50–100W tube amps like the Fender Twin Reverb, to deliver clean, rich tones without unwanted distortion. These amplifiers allow guitarists and pedal steel players to maintain sparkling clarity and volume dynamics that smaller amps often cannot handle.
How should sound engineers mic fiddles and banjos on active stages?
The most reliable solution for miking fiddles and banjos is using high-quality clip-on condenser microphones attached directly to the instrument. This allows performers to move freely without losing volume or tone consistency, avoiding the dropouts common with static stand microphones during energetic performances.
How can festivals prevent feedback when amplifying upright basses?
Amplifying upright basses requires high-headroom amps with full-range speakers and specific feedback control tools like notch filters or high-pass filters to cut resonant frequencies. Additionally, providing a sturdy instrument stand and a dedicated DI box helps manage the instrument’s large acoustic footprint and prevents physical accidents on stage.
How do dual risers improve festival stage changeovers?
Dual risers significantly reduce changeover time by allowing the crew to pre-assemble complex setups like drum kits or keyboards on a wheeled platform while the current band performs. Once the set finishes, the old riser is rolled off and the pre-staged riser is immediately rolled into place, streamlining the transition.
Why is it beneficial to laminate stage plots for festivals?
Laminating stage plots and input lists protects critical documentation from wind, rain, and spills, ensuring the crew has a legible reference for every act. These durable sheets allow for color-coded organization and let technicians make temporary updates with erasable markers, preventing setup errors and confusion during fast-paced festivals.