Introduction
Inclusive ticketing and admissions ensure no fan is left behind – from buying a ticket online to passing through the festival gates. This step-by-step guide shows festival organizers how to make the entire ticket purchase and entry process accessible for attendees with disabilities. By following these steps, you’ll meet legal requirements and build goodwill with your audience. The result? A festival where all fans, regardless of ability, can participate in the magic from start to finish.
Why it Matters: Over 1 in 5 people live with a disability, highlighting that accessibility is where festival culture matters most. Making ticketing accessible isn’t just the right thing to do – it expands your audience and reputation. Festivals known for great accessibility (like Glastonbury or Lollapalooza) consistently earn praise and loyalty from attendees.
Prerequisites & Preparation
Before diving into implementation, make sure you have the following in place:
- Knowledge of Accessibility Laws: Understand regulations like the ADA ticketing requirements in the US, the UK Equality Act 2010, or local disability access laws in your country. These set minimum standards for accessible ticket sales, seating, and services.
- Commitment from Leadership: Ensure your festival leadership prioritizes inclusivity. Allocate budget and resources for accessibility features (e.g. accessible infrastructure, assistive tech, training). Treat accessibility as a must-have, not a nice-to-have.
- An Accessible Ticketing Platform: Choose a ticketing provider that supports ADA-compliant design and features (more in Step 2). The platform should accommodate screen readers, easy seat selection for accessible seating, companion ticket options, etc.
- Accessibility Coordinator or Team: Designate a staff member or team to champion accessibility. This group will oversee accommodations, handle requests, and ensure all steps below are executed effectively.
- Consultation with the Community: If possible, seek input from people with disabilities or advocacy groups. They can provide insight on common barriers and practical solutions (e.g. a local disability nonprofit might audit your ticketing site or advise on venue setup).
With preparation done, you’re ready to build an inclusive ticketing and admissions process step by step.
Smooth Entry With Mobile Check-In
Scan tickets and manage entry with our mobile check-in app. Supports photo ID verification, real-time capacity tracking, and multi-gate coordination.
Step 1: Educate Yourself on Accessibility Requirements
Action: Start by learning the legal and practical requirements for accessible ticketing in your region. This foundation will guide all your planning.
- Understand Legal Obligations: Research laws and guidelines that apply to your event. In the US, familiarize yourself with ADA rules for ticket sales and seating (e.g. offering accessible seats at all price levels, allowing companion seating) regarding purchasing multiple tickets. In the UK and EU, know your duties under equality and anti-discrimination laws to provide “reasonable adjustments.” For example, Brazil’s 2015 Inclusion Law mandates access for people with disabilities at public events, a shift that has driven accessibility innovations at major festivals, which spurred festivals like Rock in Rio to add sign language interpreters and other services.
- Learn Industry Best Practices: Read up on successful accessibility programs at other festivals. For instance, Just So Festival (UK) pursued accessibility for years and earned a Gold charter from Attitude is Everything, putting it on par with giants like Glastonbury, proving that strategic planning yields accessibility benefits. Understanding such case studies helps you grasp what “great” looks like.
- Identify Common Barriers: Make a list of obstacles disabled attendees commonly face. This could include: websites that don’t work with screen readers, lack of wheelchair-accessible seating, no accommodations for the deaf or blind at entry, etc. Knowing these will help you target solutions in upcoming steps.
- Avoid Common Mistakes: Don’t treat accessibility as an afterthought or merely a legal checkbox. Common mistake: Some event organizers wait until a complaint arrives or assume standard procedures work for everyone. Instead, be proactive. Commit to accessibility from the outset of planning (ideally 6-12 months before the festival) so that inclusive measures are baked into your ticketing and admissions process.
Expected Outcome: By the end of Step 1, you should have a solid understanding of required accommodations and inspiration from industry leaders. You’ll be aware of specific legal mandates (like ADA seat rules) and have a clear vision that your festival will be welcoming to all. This knowledge empowers you to make informed decisions in the next steps.
Planning a Festival?
Ticket Fairy's festival ticketing platform handles multi-day passes, RFID wristbands, and complex festival operations.
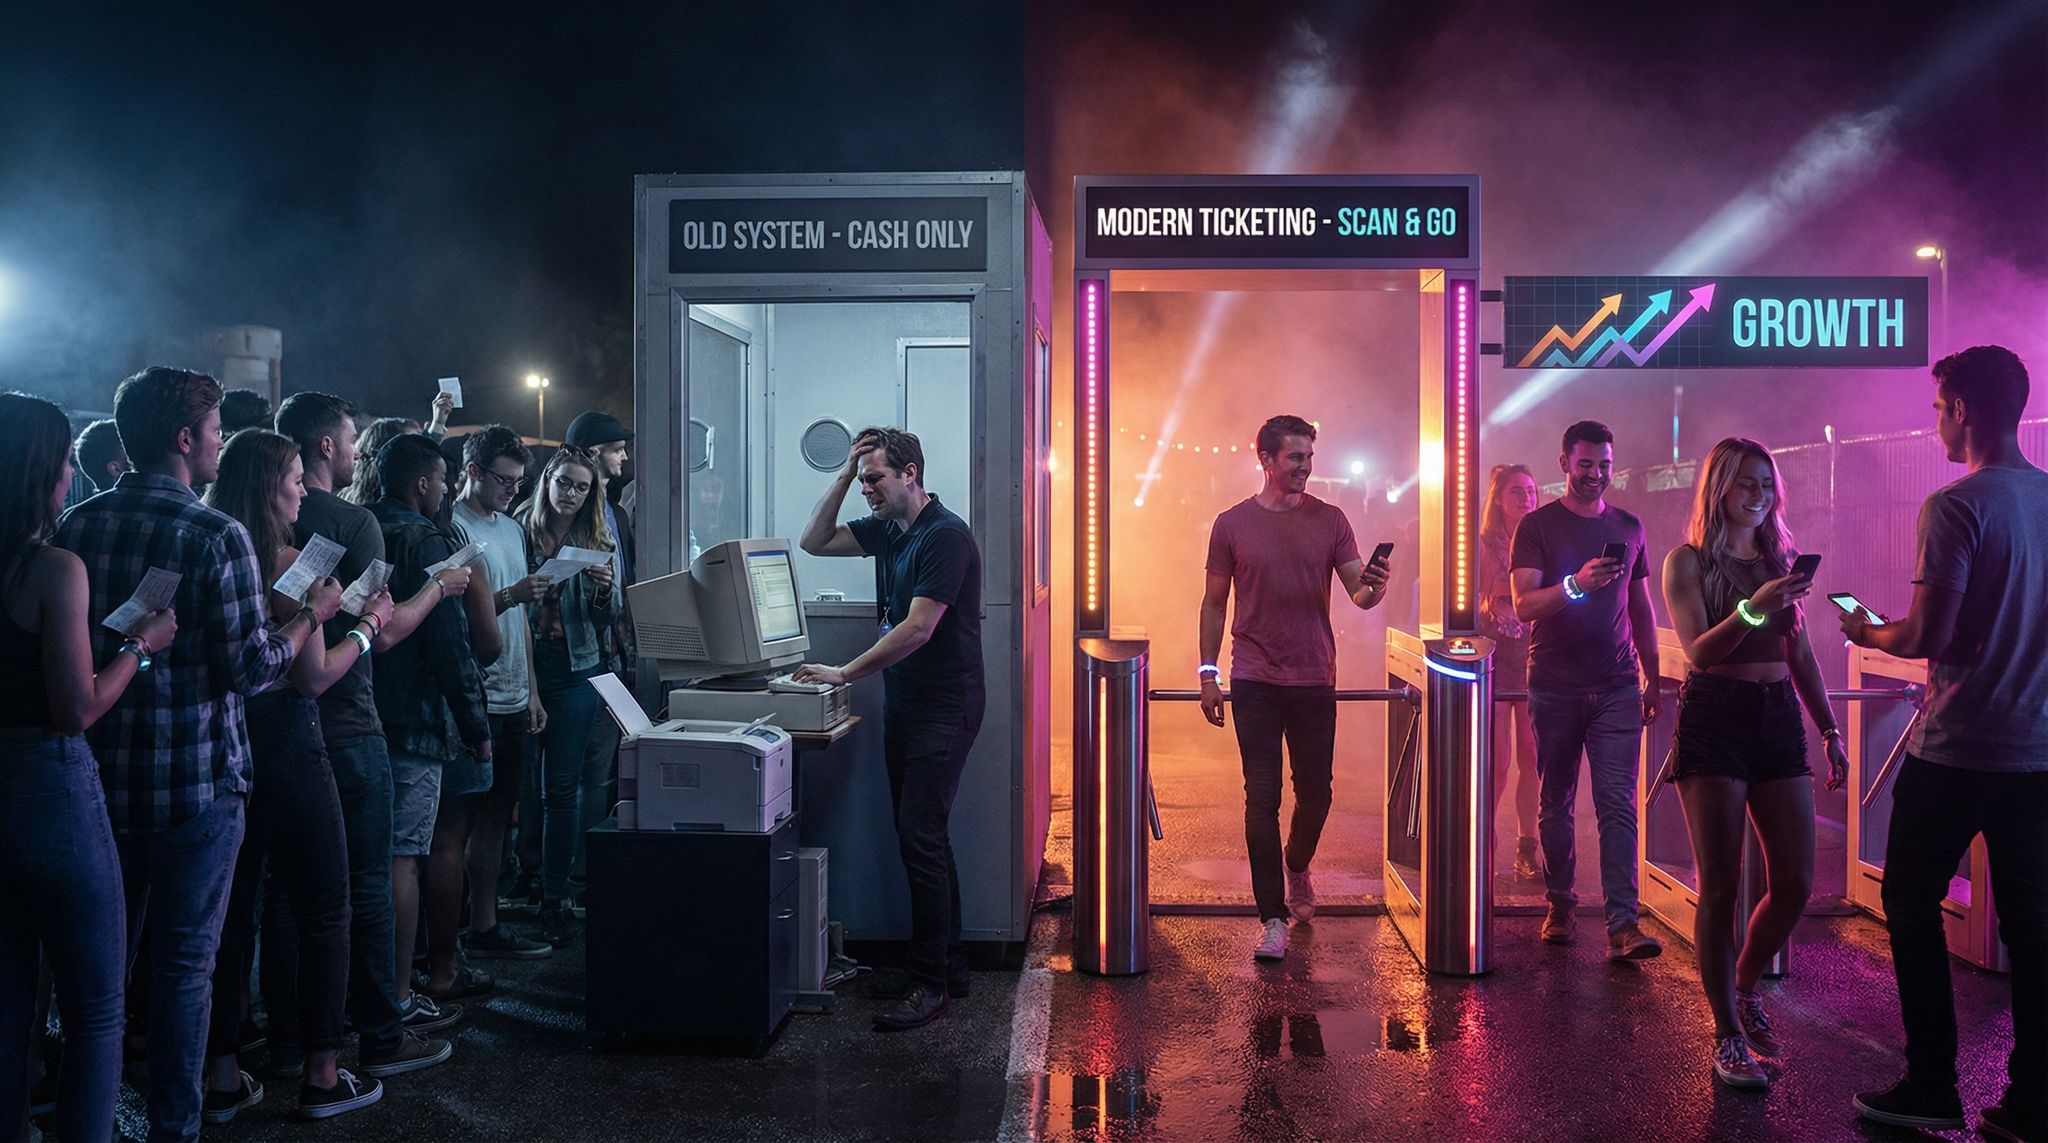
Step 2: Choose an ADA-Compliant Ticketing Platform
Action: Select a ticketing platform with accessibility features and design. The ticket purchase experience should be barrier-free for users with disabilities.
- Web Accessibility (WCAG Standards): Ensure the ticketing website or app follows WCAG guidelines for accessible design. This means all buttons and forms can be used with a keyboard (for those who can’t use a mouse), images have descriptive alt text, and the interface works with screen readers. Test your ticket purchase flow using a screen reader (like NVDA or JAWS) to verify that announcements make sense (e.g., “Buy Ticket button”) and that a user can navigate via keyboard alone. Pro Tip: Use high-contrast colors and legible fonts on your ticket pages. High contrast and clear text help attendees with low vision or colour blindness read details and complete orders more easily, ensuring high contrast and clear legibility. Avoid tiny or cluttered text that becomes illegible when zoomed.
- Multiple Contact Options: Not everyone can or will use a web checkout. Choose a platform or vendor that offers alternative purchase methods – for example, a dedicated phone line or email for ticket purchases and support. Some major festivals provide a phone hotline for accessibility assistance when buying tickets (Coachella’s website, for instance, lists a special assistance number for those using screen readers). Having a real person available to assist or an easy email process ensures that if the online system poses a challenge, the attendee still has a path to get a ticket.
- Accessibility Features in the Platform: Look for specific features geared toward inclusivity. Can the system mark accessible seating (with a wheelchair icon) and allow those tickets to be bought online by the people who need them? Can you offer a free companion ticket in the same transaction (or via a simple request)? Does the platform support discount codes or special ticket types for ADA patrons? An accessible platform will also allow multiple formats of tickets – e.g., mobile QR codes and printable tickets – so attendees can choose what works best for them. If an attendee can’t use a standard mobile ticket (say, due to assistive tech compatibility issues or not owning a smartphone), the platform should let you issue them a physical ticket or a will-call pick up easily.
- Vendor Reputation: Ask ticketing providers about their accessibility track record. Choose a partner that actively emphasizes accessibility (for example, Ticket Fairy has focused on an inclusive purchase process) that allows users with screen readers to navigate the purchase process. Reading client case studies or testimonials can reveal if a system has been successfully used for events with diverse audiences. Also consider getting feedback from disability advocates on the platform’s usability.
- Avoid Common Mistakes: Don’t select a ticketing system solely on flashy features or low fees if it fails basic accessibility. Common mistake: Overlooking accessibility during platform demos. Always ask the vendor to demonstrate how a blind user would buy a ticket, or how you can accommodate a wheelchair user’s seating choice. If they can’t show this clearly, that’s a red flag. Another mistake is requiring all users to use a smartphone app – this can exclude attendees who rely on simpler phones or assistive devices. Always provide an accessible alternative (like an email PDF ticket or list at the door).
Expected Outcome: After Step 2, you will have a ticketing platform in place (or an upgraded plan with your current provider) that is ADA-compliant and user-friendly for all. The purchase interface will be tested for assistive technology compatibility, and you will have confidence that attendees with visual, hearing, or motor impairments can independently buy tickets. You’ve laid the groundwork for an equal online experience.
Step 3: Implement Inclusive Ticket Options & Policies
Action: Configure your ticketing setup to offer accessible ticket options and clear policies at the point of purchase. This includes companion tickets, accessible seating, and flexibility for those who need it.
- Accessible Seating & Viewing Areas: If your festival has reserved seating sections, designate a number of wheelchair-accessible seats in various price tiers, each with adjacent companion seats. Mark these clearly on the seat map with a wheelchair symbol and allow them to be purchased like any other ticket (no secret phone call needed!). For general admission festivals, plan to offer ADA viewing platforms or areas. These are elevated or ground-level spaces where wheelchair users or others who can’t stand in a crowd can see the show. Often, festivals require attendees to request a pass or wristband for ADA viewing areas after ticket purchase, due to limited space. Set up a fair reservation system for these spots – first-come-first-served via an online form, or a lottery if demand exceeds supply. For example, many major music festivals build multiple viewing platforms across stages and have an online signup so disabled guests can reserve space in advance.
- Companion and Caregiver Tickets: Many attendees with disabilities rely on a personal assistant or friend for help during the event. It’s common practice at festivals to let a disabled attendee bring one companion at no extra cost, often through free or discounted companion ticketing terms. Consider implementing a companion ticket policy: allow a free or discounted caregiver ticket for each attendee who requires one. Typically, the attendee buys their own ticket first, then applies for a complimentary companion pass. You can handle this by having an “ADA Companion Pass Request” form on your website. Ask for the order number of the paid ticket and some documentation of disability (or membership in an accessibility program) to approve the free companion pass. Make sure the companion ticket grants the same access as the primary ticket (e.g. if the attendee has a VIP ticket or ADA viewing platform access, their helper should too). Plan your ticket inventory and capacity with these companions in mind so areas don’t get overcrowded.
- Early Entry & Late Exit Policies: Offering early entry for those who need extra time or a calmer entry can dramatically improve the experience. For instance, a UK festival allows families with autistic children to enter show areas a bit early to avoid the rush and settle in without stress, and labels certain areas for accessibility. You can implement a policy where guests with disabilities (and their companions) are allowed to enter, say, 15-30 minutes before general gates open. This gives them time to navigate or find accessible viewing spots before crowds arrive. Similarly, having the option for a late exit or to remain seated until crowds thin out can be helpful for some. Communicate how attendees can take advantage of early entry – whether they need to pre-request it or simply show an ADA indicator on their ticket at the gate.
- Alternative Ticket Formats & Verification: Ensure your ticketing accommodates those who cannot use standard mobile tickets. Not everyone can easily use a smartphone or digital ticket – for example, a person with vision impairment might struggle with a QR code on their phone, or an older attendee may not own a smartphone. Plan for alternatives: allow print-at-home tickets as an option or have a will-call list at the entrance where a person can show an ID to retrieve their ticket/wristband. Train your ticket office to accept alternative verification, such as matching a name and order number, if someone’s phone isn’t accessible. Pro Tip: If your festival uses RFID wristbands shipped in advance, offer an easy activation method for people who can’t use the small-print instructions or website. This might mean a phone line to activate the wristband via call, or staff who can assist at the gate without penalty for not pre-activating.
- Clear Refund/Exchange Policy: Life happens, and more so for some disabled folks if health issues flare up. Having a compassionate refund or ticket rollover policy for accessible tickets can build goodwill. For example, allow a ticket holder who can’t attend due to a medical issue to transfer their ticket to the next year or get a refund (perhaps with a doctor’s note). While this might not be advertised to all customers, it’s a considerate option to mention in your accessibility info.
- Avoid Common Mistakes: Be careful not to require onerous proof or separate processes beyond necessity. Common mistake: Hiding the accessible seating option or requiring disabled customers to call a special line that’s not well-publicized. This creates a barrier and can feel stigmatizing. Wherever possible, let people with disabilities buy tickets through the same channels as everyone else, with just a checkbox or selection for accommodations. Another mistake is forgetting to account for companion tickets in your capacity counts – you don’t want to “oversell” an accessible platform or section by not counting the companions.
Expected Outcome: After Step 3, your ticket sales system will be configured to handle accessibility needs seamlessly. Attendees who require wheelchair seating or a caregiver will see those options during purchase or have a straightforward way to request them. The policies for early entry, companion passes, etc., will be drafted and ready to communicate. You’re ensuring the ticket itself opens the door for every fan, rather than being an obstacle.
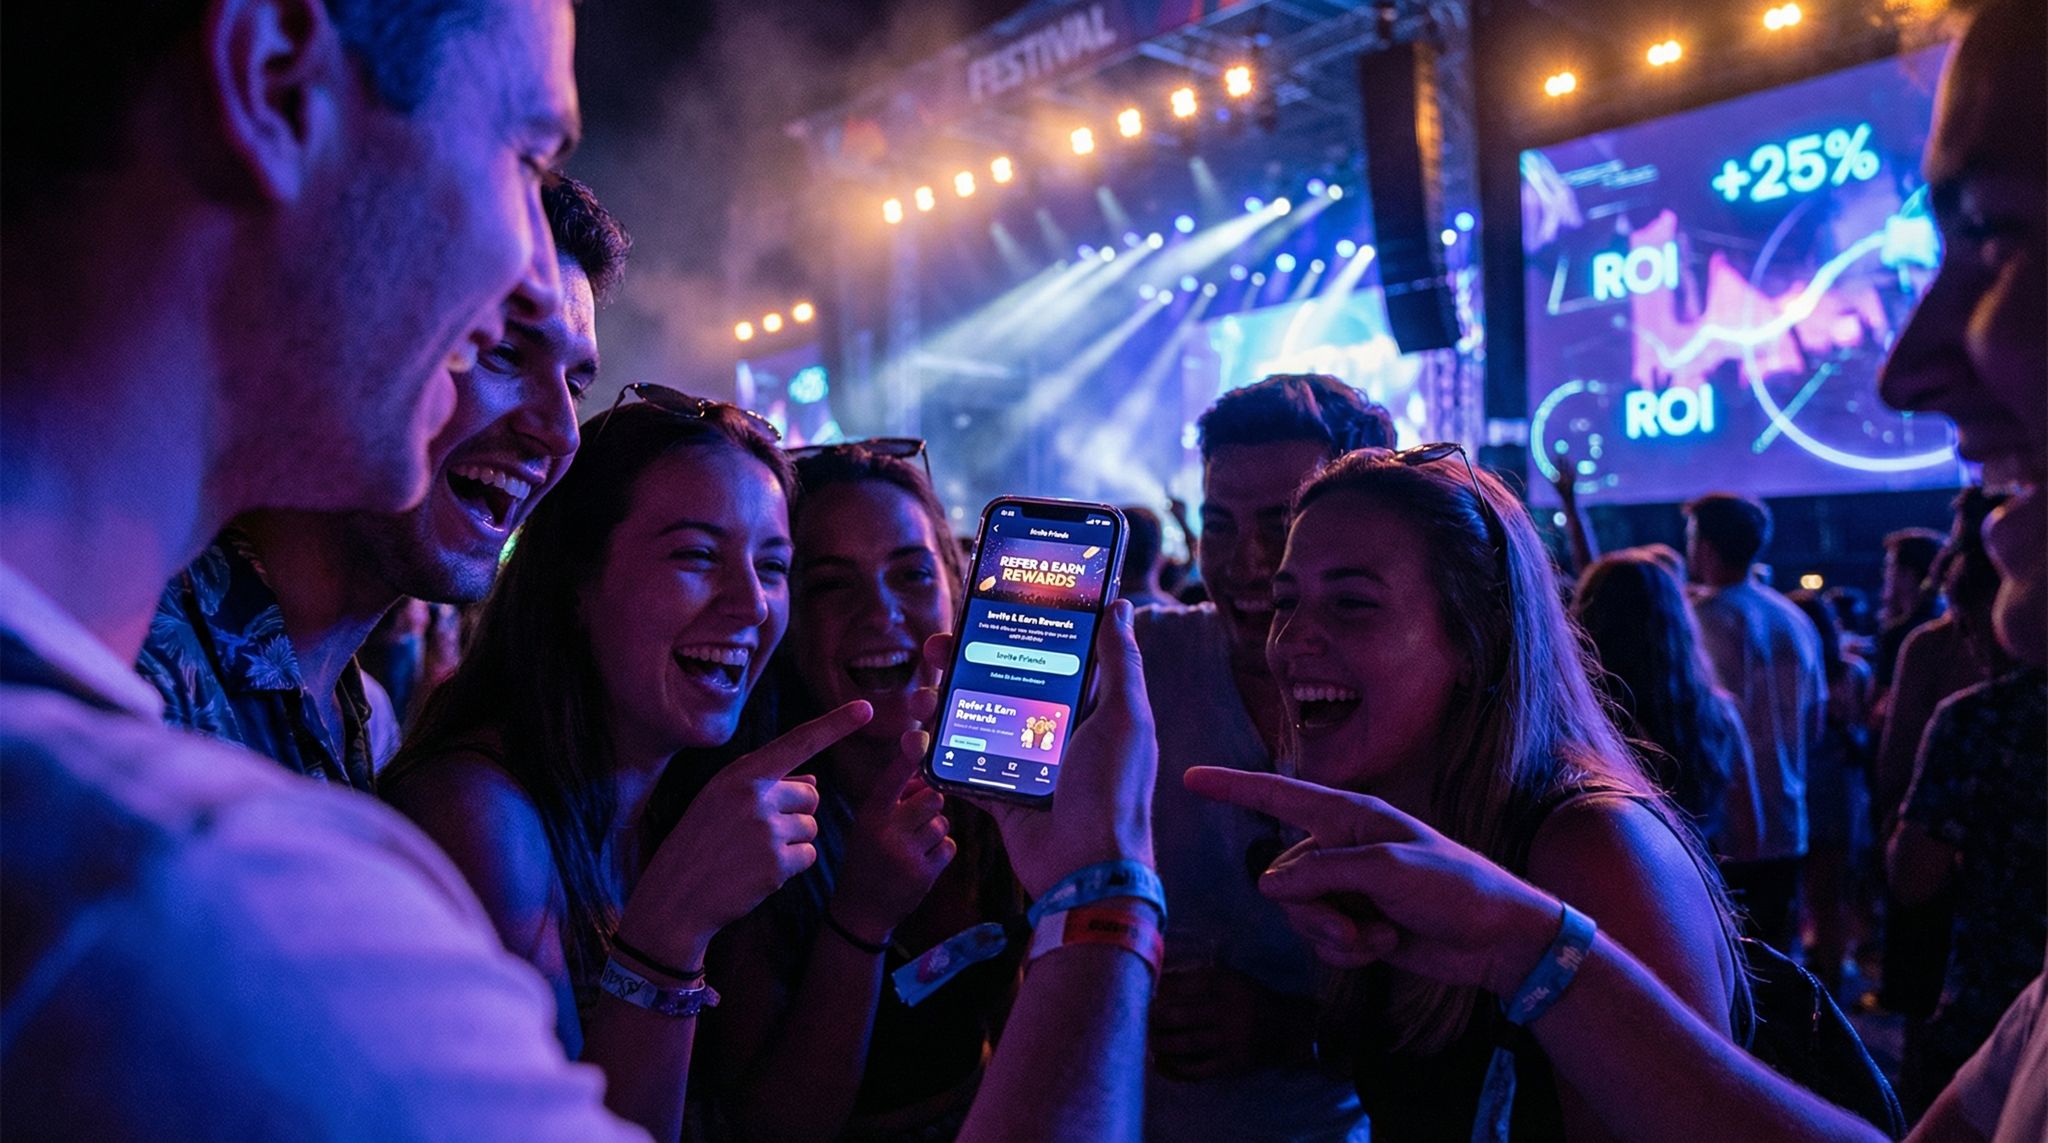
Turn Fans Into Your Marketing Team
Ticket Fairy's built-in referral rewards system incentivizes attendees to share your event, delivering 15-25% sales boosts and 30x ROI vs paid ads.
Step 4: Communicate Accessibility Information Clearly
Action: Now that you have accommodations and policies in place, tell your audience about them. Make information on accessibility easy to find and understand before and during ticket purchase.
- Dedicated Accessibility Page: Create an Accessibility Information section on your festival website and ticketing page. This page should detail all the available accommodations and how to use them. List features like: wheelchair-accessible entrances and routes, ADA parking or shuttle services, accessible restrooms, availability of assistive listening devices, sign language interpreters, sensory-friendly spaces, and anything else relevant, creating a dedicated accessibility information page. Also outline policies from Step 3 (companion tickets, early entry, etc.). Present this in plain language and a logical order. By centralizing this info, you not only help those who need it but also signal to all potential attendees that your festival is welcoming and well-prepared.
- Ticket Purchase Instructions: If buying accessible tickets or requesting accommodations requires any special step, explain it clearly. Ideally your ticketing platform handles simple cases (like selecting an ADA seat) directly. But if an extra step is needed – for example, “After buying your ticket, fill out the ADA accommodations form to request a viewing platform pass or parking permit” – spell that out prominently. Include deadlines for any applications (e.g. “Request by June 1”). Pro Tip: Add an option during the ticket checkout process for buyers to indicate if they have accessibility needs. Even something like a checkbox that says “I will require ADA accommodations, please contact me” can prompt a follow-up by your team to assist the buyer.
- Multiple Formats & Channels: Distribute accessibility info in various formats. On your website, ensure the text is screen-reader friendly (no PDFs that aren’t tagged properly). Offer a PDF or printable guide for those who like to have a hard copy. If you have an official festival app, include an “Accessibility” section in it as well. Use your social media to occasionally highlight accessibility features (“Did you know we have an Access Services tent and ADA viewing areas? Learn more on our site!”). This not only informs but shows your commitment publicly.
- Contact for Questions: Provide a direct contact point for accessibility inquiries. An email like access@[yourevent].com or a small support team hotline works well. Make sure this contact is staffed by someone knowledgeable about your accessibility services. Often attendees will have unique questions (e.g., “Can I bring my oxygen tank through security?” or “Is there a place to store my mobility scooter battery?”). A prompt, understanding response builds trust. Highlight this contact info on the accessibility page and even on ticket confirmation emails. For example, include a line in confirmation: “If you have accessibility needs or questions, please reach out to our team at [contact]. We’re here to help make your festival experience great.”
- Avoid Common Mistakes: Don’t bury the accessibility info in fine print or hide it at the bottom of a FAQ. Common mistake: Only mentioning accommodations in a long Terms & Conditions document that no one reads. Make it visible – a link in your main navigation or ticketing menu that says “Accessibility” should be standard. Another mistake is using overly bureaucratic language that confuses readers. Keep it friendly, e.g., “We offer accessible viewing platforms for wheelchair users and those who need a less crowded space – reserve your spot by emailing [email protected],” rather than, “Patrons with impairments must submit medical documentation to access elevated platforms.” Tone matters!
Expected Outcome: By Step 4, all your accessibility offerings are transparently communicated. Any potential attendee, regardless of their needs, can easily learn how your event will accommodate them before they purchase a ticket. This transparency builds confidence – people know that when they arrive at the festival, those promises will translate into real support. You’ll likely see an increase in inquiries at first, but that’s a good thing as it means people are engaging and planning for an enjoyable visit.
Need Festival Funding?
Get the capital you need to book headliners, secure venues, and scale your festival production.
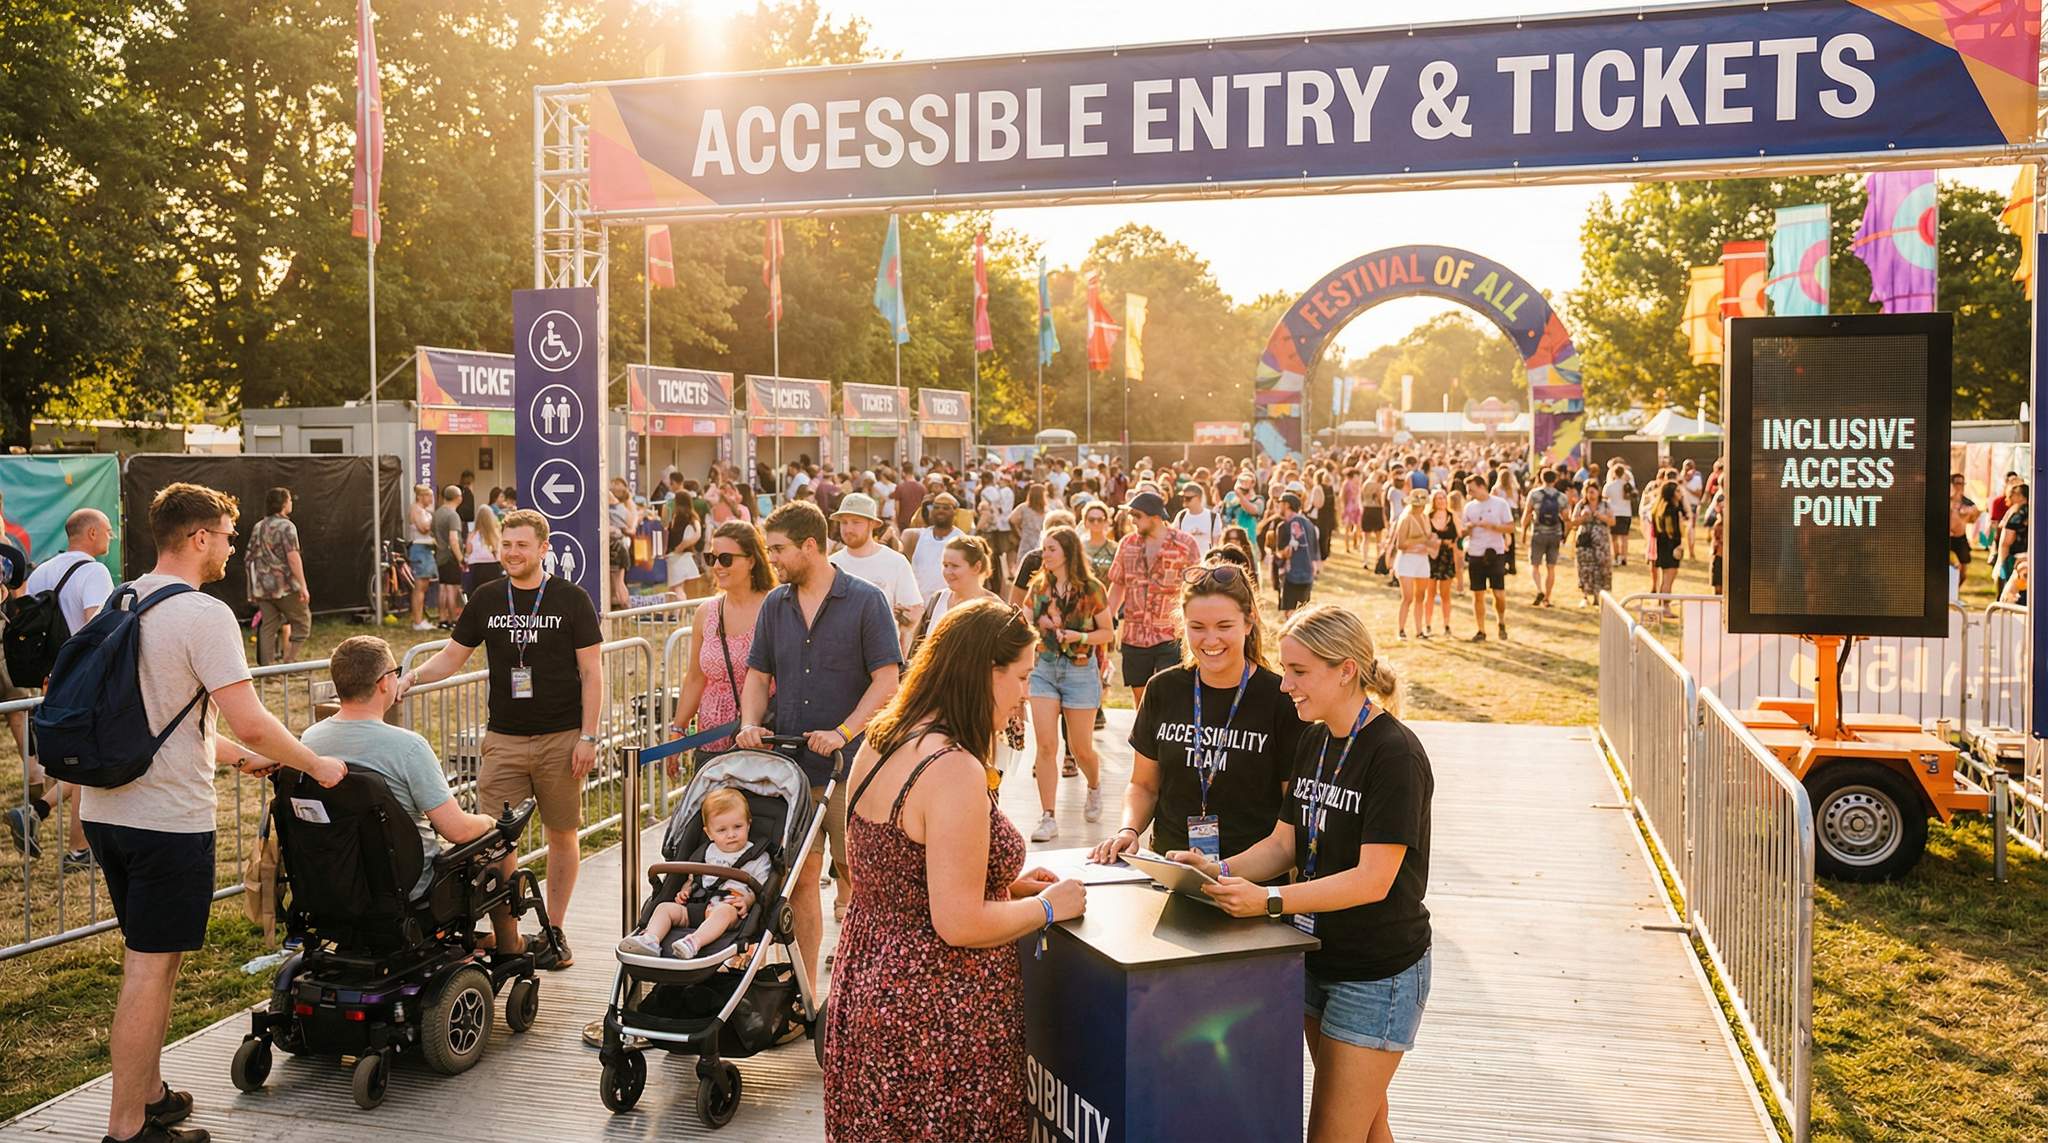
Step 5: Prepare Your Venue for Accessible Admissions
Action: As the festival approaches, set up your venue and entry points to be accessible. This step ensures that from the parking lot to the gate, attendees with disabilities have a smooth journey.
- Accessible Parking & Transport: If you provide on-site parking or shuttle buses, make them ADA-compliant. Reserve an adequate number of accessible parking spots close to the entrance (with clear signage and enforcement so they’re used only by those with ADA placards or permits). If attendees must pre-book accessible parking, coordinate that through your ticketing or event registration platform. For shuttles, use vehicles with wheelchair lifts or ramps. Communicate pick-up and drop-off locations that are accessible – e.g., curb cuts for wheelchair drop-off, or drop-off gates that avoid steep terrain. If rideshare or public transit is involved, work with city officials to designate an accessible drop-off zone for the festival.
- Entrance Layout & Signage: Design entry lanes that accommodate everyone. Set up at least one dedicated accessible entrance lane at each main gate to avoid dense crowds at the gate. Mark it with the International Symbol of Access (wheelchair symbol) and clear wording like “Accessible Entry.” Choose an entry point that has no stairs or obstacles – ideally a wider gate or a flat path where mobility devices can easily roll through. If your normal entry has metal detectors or turnstiles that might be too narrow, provide an alternative screening route for wheelchair users or anyone who cannot walk through the detector. Train security on how to wand or pat-down with sensitivity if needed. Having a separate ADA lane also helps those who cannot stand in a long queue; they can enter faster and avoid getting jostled in tight lines, effectively utilizing dedicated ADA entrance lanes. Pro Tip: Place a bench or two near the waiting area for the accessible lane, so those who need a rest while queueing have that option.
- Entry Timing (Early Access): This ties into the early entry policy from Step 3. Coordinate with security to open gates early for disabled attendees. This might mean letting the accessible lane begin processing 15 minutes before general admission. Alternatively, have a small pre-staging area inside where ADA guests can wait comfortably until general entry begins. The goal is to prevent a rush or stressful crowd situation for those folks. Clearly inform staff and signpost this: e.g., a sign at the gate can state “Early entry available here for guests with disabilities who need extra time.”
- Alternative Verification at Gate: Ensure gate staff have a list or solution for anyone who arrives without a scannable ticket (as discussed in Step 3’s alternative formats). For instance, if an attendee with a disability could not use the mobile ticket and was told to check in at will-call or the Access Center, have a copy of that list at the accessible entrance. Train staff to recognize ADA credentials too. If you issue ADA wristbands (like some festivals do at an Access Center), instruct gate staff on where to direct people to pick those up (usually just inside the entrance). If someone cannot wear a wristband on their wrist (due to limb difference or sensitivity), have an alternate method like attaching it to a lanyard or their mobility device.
- Service Animal Accommodations: Many disabled guests may have service animals. Prepare your entry to welcome them. Brief security that service animals are allowed (even if you generally ban pets) as long as they are working animals. You cannot demand documentation for a service animal in many jurisdictions; staff can only ask if it’s a service animal and what task it’s trained to perform (and not ask the person’s disability). Provide water bowls or a relief area for animals near the entrance if possible. This small touch can make the arrival for a service dog team much smoother.
- Avoid Common Mistakes: Don’t let the accessible entrance become understaffed or an afterthought. Common mistake: having an ADA gate but no trained staff assigned, leading to confusion or delays. Ensure that lane is open and clearly staffed at all posted entry times. Another mistake is failing to inform your general attendees that this exists – sometimes people with disabilities might not know they can skip the main line. Promote it in your Accessibility Info (“Dedicated accessible entrance at Gate 2 for those who need it”) so they know to head there rather than queue unnecessarily.
Expected Outcome: By completing Step 5, your festival’s arrival experience will be optimized for accessibility. From the moment a disabled guest drives up or arrives, they encounter accommodations designed for them: easy parking, a shorter or priority line, courteous assistance through security, and straightforward ticket scanning. This sets a positive tone for the rest of their day and shows that your commitment to inclusion wasn’t limited to the website – it’s in the real world where it truly counts.
Step 6: Train Your Gate & Admission Staff
Action: Even the best policies falter if staff aren’t prepared. Train your front-line staff and volunteers on accessibility etiquette, policies, and problem-solving so that they can confidently assist disabled attendees during check-in.
- Accessibility Training Sessions: In the lead-up to the festival (perhaps 1-2 weeks out), hold a training workshop for all gate staff, ticket scanners, customer service, and volunteers. Cover the basics of disability awareness: etiquette (e.g., speak directly to the person with a disability, not just their companion; never assume someone needs help – ask first), and practical know-how (like how to guide a blind attendee through the gate if they request, or how to operate a wheelchair lift if you have shuttles). Explain the accommodations you are providing: show them the companion ticket policy, early entry, ADA lane, etc. so they aren’t caught off guard when someone asks about it.
- Role-Playing Scenarios: Practice common situations with staff so they feel comfortable. For example, role-play a scenario where a Deaf attendee arrives at the gate – how will staff communicate if the person doesn’t read lips? (Solution: have pens and notepads at info points, use gestures, or basic sign if known). Another scenario: someone with a cognitive disability is confused with the ticket scanning process – how to patiently assist them through it without causing a scene or delaying others. By rehearsing these, staff will respond better on the actual day.
- Knowledge of Policies and Locations: Ensure every staff member knows what accessibility services are available and where. They should be able to answer questions like “Where is the Access Center?” or “Can I get a wheelchair charging station?” confidently, or quickly radio for an answer. Provide a one-page cheat sheet that staff can carry, listing key accessibility features (entrances, ADA toilets, viewing platforms, etc.) and the policy for each (“one companion allowed on platform,” etc.). If your festival issues any ADA credentials (like a special wristband or badge), show these to staff in training so they recognize them on sight.
- Empower a Dedicated Access Team: While all staff should be generally aware, it helps to have a few Accessibility Champions on the crew. Identify staff or volunteers (perhaps those with personal experience or strong interest in this area) who can be stationed at accessible gates or roving in the crowd, ready to assist. For example, at the main accessible entrance, schedule your more experienced or trained staff who can handle unique issues that arise. Empower them to make small accommodations on the fly – like allowing a short-notice companion entry if needed or fetching a wheelchair if someone is struggling.
- Foster a Helpful Attitude: Emphasize that accommodating guests is a core part of the festival vibe. Encourage staff to be proactive if they see someone having difficulty (while still respecting independence). For instance, if a volunteer notices someone in a wheelchair looking uncertain at the gate, it’s okay to approach with a friendly “Hi, can I help you find anything?” This kind of welcoming atmosphere can only happen when staff aren’t just informed but also motivated to help. Share stories of positive impact – e.g., how a small act like carrying a person’s cooler, or guiding them to the ADA platform, can make their festival experience.
- Avoid Common Mistakes: Don’t skip training or assume “common sense” is enough. Common mistake: Only briefing supervisors and expecting the info to trickle down. Every person with a radio or scanner at the gate should know the basics. Another mistake is adopting a one-size-fits-all approach to assistance. Remind staff that disabilities are diverse and often invisible – the person asking to use the ADA lane might not have a wheelchair but could have a less visible condition (and that’s okay, we don’t gatekeep eligibility at the front gate). Train staff to focus on needs not proof. If someone says they are unable to stand in the main line due to a disability, staff should simply direct them to the accessible entrance per policy, not interrogate them.
Expected Outcome: Step 6 will ensure your team is prepared and confident in providing accessible admissions. Attendees with disabilities will encounter staff who are courteous, knowledgeable, and ready to help. This drastically reduces the chance of unpleasant incidents at the gate – no confusion about policies, no hurtful comments or ignorance. Instead, your staff becomes an extension of your inclusion policy, personally delivering the message: “We’re glad you’re here, and we’ve got your back.”
Step 7: Provide On-Site Accessibility Support & Continuous Improvement
Action: Finally, make sure that once attendees with disabilities are inside the event, they continue to receive support (especially in the initial moments after entry). Also, plan for continuous improvement by gathering feedback post-event.
- Accessibility Services Hub: Set up an Access Center just inside the festival (or at a convenient central location). This is a booth or tent staffed by your Accessibility Coordinator team. Attendees with accessibility needs can check in here upon arrival. At the Access Center, you might distribute ADA wristbands or credentials (for those who applied for viewing platforms, etc.), handle last-minute requests, or loan out assistive equipment. Many festivals stock things like spare wheelchair batteries, earplugs, or offer sign-up for sign language interpreter schedules at their Access Centers. Make sure this booth is clearly marked (use the wheelchair symbol, labels like “Accessibility Services”) and noted on your festival map.
- Amenities for Various Needs: Be prepared to address common needs right after entry. For example, have a few assistive listening devices available if you have stages with amplified sound – these devices can be handed out at the Access Center for people who are hard-of-hearing. Ensure there’s a plan for charging mobility devices (you can run a power strip at the Access Center for electric wheelchair or scooter charging). If your festival is large, consider having a shuttle or transport service within the grounds for disabled guests – golf carts or accessible vans that can ferry people from stage to stage. At minimum, provide maps of accessible routes (paths with no stairs, temporary ramps over cables or steps) so attendees can navigate. Some events even provide braille or large-print versions of schedules and maps – a thoughtful touch if resources allow.
- Emergency and Medical Support: Coordinate with your medical and security teams on emergency procedures for people with disabilities. For instance, have evacuation plans that include getting wheelchair users out of tricky areas, or a protocol to quickly communicate with deaf guests if there’s an alarm (like visual strobes or staff alerts in person). Communicate at the Access Center what to do in emergencies so that disabled attendees feel safe (e.g., “in an evacuation, remain here and our staff will assist you”). Hopefully these plans won’t be needed, but being prepared is crucial.
- Gather Feedback: After the festival (or even during, via the Access Center guestbook or a QR survey code), seek feedback from attendees with disabilities. What worked well and what could be improved? Did they find buying tickets easy? Was getting in smooth? Use a mix of methods: post-event surveys emailed out, social media listening, or even inviting a few attendees to a debrief chat. This feedback is gold – it will highlight issues you might not have anticipated and also shine a light on your successes. For example, you might learn that your early entry was hugely appreciated, or that signage for the ADA parking was too small. Take notes for next year.
- Continuous Improvement: Commit to making accessibility an ongoing effort. Each year, review what new accommodations you can add as technology and budgets allow. Perhaps you start with basic compliance the first year, then add more advanced features like a sensory-friendly chill-out tent or on-screen captioning at stages in future editions. Many top festivals did not become fully accessible overnight – they iterated annually, focusing on continuous improvement through audits and feedback. Also, stay updated on innovations: for instance, some events are exploring vibrating floor sections so deaf fans can feel the bass, or using Access Card programs (like Nimbus Disability’s card in the UK) to streamline verifying needs, just as Bloodstock announced better accessibility for their 2025 event. Embrace a mindset that there’s always more you can do to be inclusive.
- Avoid Common Mistakes: Don’t become complacent after one successful event. Common mistake: Thinking “no one complained, so we’re fine.” It’s possible some people still faced barriers but didn’t voice them. By actively soliciting feedback, you show you truly care. Another pitfall is focusing only on the entry and forgetting about on-site experience (or vice versa). Remember, the entire journey from ticket purchase to finding a seat at the show matters. Keep auditing each part of that journey.
Expected Outcome: Step 7 ensures that accessibility is not just a one-time checklist item, but a living part of your festival operations. With an on-site Access Center and well-prepared amenities, guests with disabilities will feel supported throughout their time at the event. And by gathering feedback and striving to improve, you’ll strengthen your festival’s reputation for inclusivity year after year.
Conclusion
Designing an accessible ticketing and admissions process might require extra effort, but the rewards are immense. You’re opening your festival to a broader audience, meeting legal requirements, and creating an environment where everyone feels welcome. From the moment a fan decides to buy a ticket to the moment they step through the festival gates, every step is an opportunity to show that you’ve thought about their needs.
By following this guide, festival organizers can ensure that no fan is left behind due to accessibility barriers. It’s about more than compliance – it’s about hospitality, respect, and community. An accessible festival often gets positive word-of-mouth and press, as attendees appreciate the thoughtfulness. Moreover, you’ll see the payoff in loyalty: attendees who have a great experience will come back year after year and tell their friends.
As you implement these steps, remember that accessibility is a journey. Keep learning, keep adapting, and celebrate your successes (and those of others). Share your accessibility wins in industry forums and learn from peers. Together, the festival industry can set a new standard where inclusive access from purchase to entry is simply the norm.
Accessible Ticketing & Admissions Checklist
Here’s a quick checklist to ensure your festival’s ticketing and entry remain inclusive and ADA-friendly:
- ADA-Compliant Ticket Platform: Ensure your ticket sales website/app meets WCAG guidelines and works with assistive tech. Keyboard navigation, alt text, high contrast – all in place. Test it!
- Alternative Purchase Methods: Provide a phone hotline or email for ticket purchases and support for those who can’t use the standard online system.
- Accessible Ticket Options: Offer wheelchair-accessible seats or viewing platform reservations and clearly label them. Enable companion ticket requests (1 free PA ticket per disabled attendee).
- Inclusive Policies: Plan early entry for those needing extra time, flexible ticket formats (mobile, print, will-call), and allow service animals. Communicate these policies openly.
- Information Transparency: Publish an Accessibility Info page listing all accommodations (parking, entrances, rest areas, interpreters, etc.). Include how to request each service and a contact for questions.
- Venue Preparedness: Set up ADA parking areas, dedicated accessible entrance lanes (with ramps/no steps), and an Access Center at the venue entrance. Provide signage with accessibility symbols.
- Staff Training: Train gate staff and volunteers on disability awareness, ADA policies, and how to assist respectfully. Make sure they know locations of key accessibility features and are ready to handle situations professionally.
- On-Site Support: Equip an Access Center or staff team with resources: ADA wristbands, assistive listening devices, wheelchair charging, maps of accessible routes, etc. Be ready to address needs throughout the event.
- Feedback Loop: After the event, gather feedback from attendees about the ticketing process and entry experience. Note what to improve for next time and keep refining your accessibility measures.
By systematically checking off these items, you’ll create a festival experience where everyone – from lifelong wheelchair users to first-time concertgoers with invisible disabilities – can join the fun without barriers. An inclusive festival is a successful festival, and your efforts in accessible ticketing and admissions are key to making that happen!