
Setting up an event
Require an invitation before someone can buy tickets
Require personal invitation links for normal ticket purchases, import or enter your approved list, set recipient limits and follow every invitation after you send it.
- For
- Selling tickets through an approved invitation list
- Takes
- 16 minutes
- Turn on Invitation required to attend
- Draft the invitation email
- Choose any hidden tickets or held allocation the link should open
- Add one recipient and set both limits
- Import a larger approved list from CSV
- Review the CSV import results
- Correct any rejected CSV rows
- Send now or schedule the invitation
- Review invitations waiting to send
- Delete a scheduled invitation before it sends
- Follow each invitation after it leaves
- Resend one person's invitation
- Cancel one person's invitation
- Choose the reminder message
- Send the reminder
- Test one invitation from the email to checkout
What you need before you start
- You can edit Event Settings and send invitations for the event.
- Your brand is verified. If your brand is new or you do not know whether it is verified, contact Ticket Fairy Support before preparing the invitation.
- Open Account Settings in the dashboard and check Account Verification. Complete the verification if your account has not already been verified.
- Your approved list has a first name, last name and email address for each person.
- You know the most tickets and separate orders each recipient may place.
-
Turn on Invitation required to attend
Open Event Settings, turn on Invitation required to attend, and confirm the change. Select Save Event Settings before you open the invitations area.
Once the setting is saved, a normal event visit cannot add a ticket without a current personal invitation link. A valid referral-link visit can still buy when your event already allows that access exception.
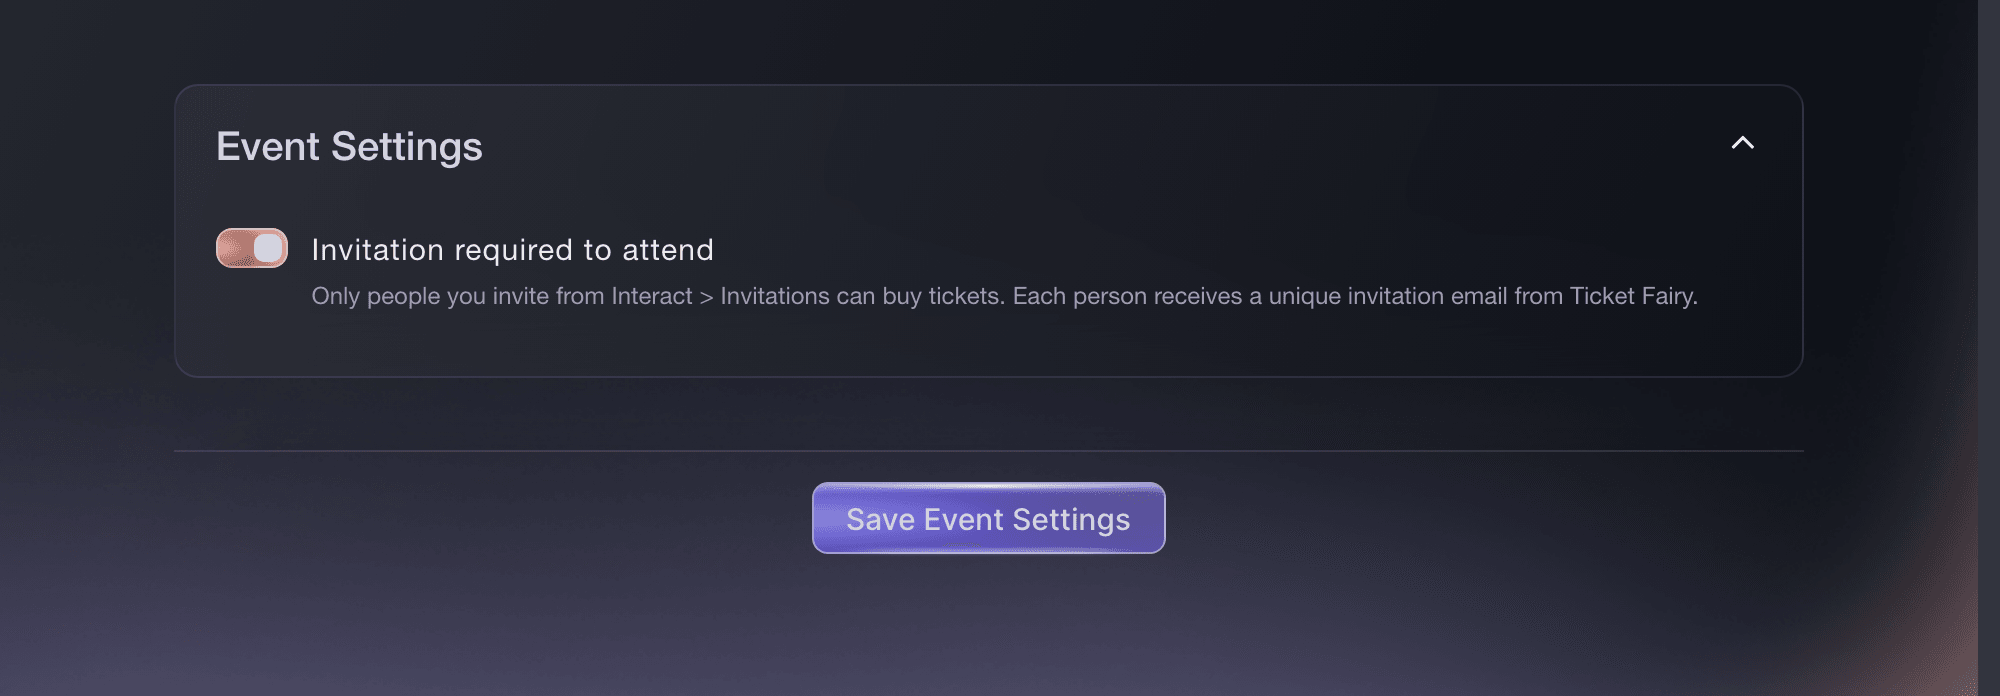
Event Settings, Invitation required to attend. -
Draft the invitation email
Open Interact, select Invitations, then start a new invitation. Enter the Subject and Invitation Content in the same voice as the rest of your event messages.
Tell the recipient what the invitation opens, when sales close and whether the link should remain private. Ticket Fairy adds the ticket link to the invitation when the message does not already contain it.
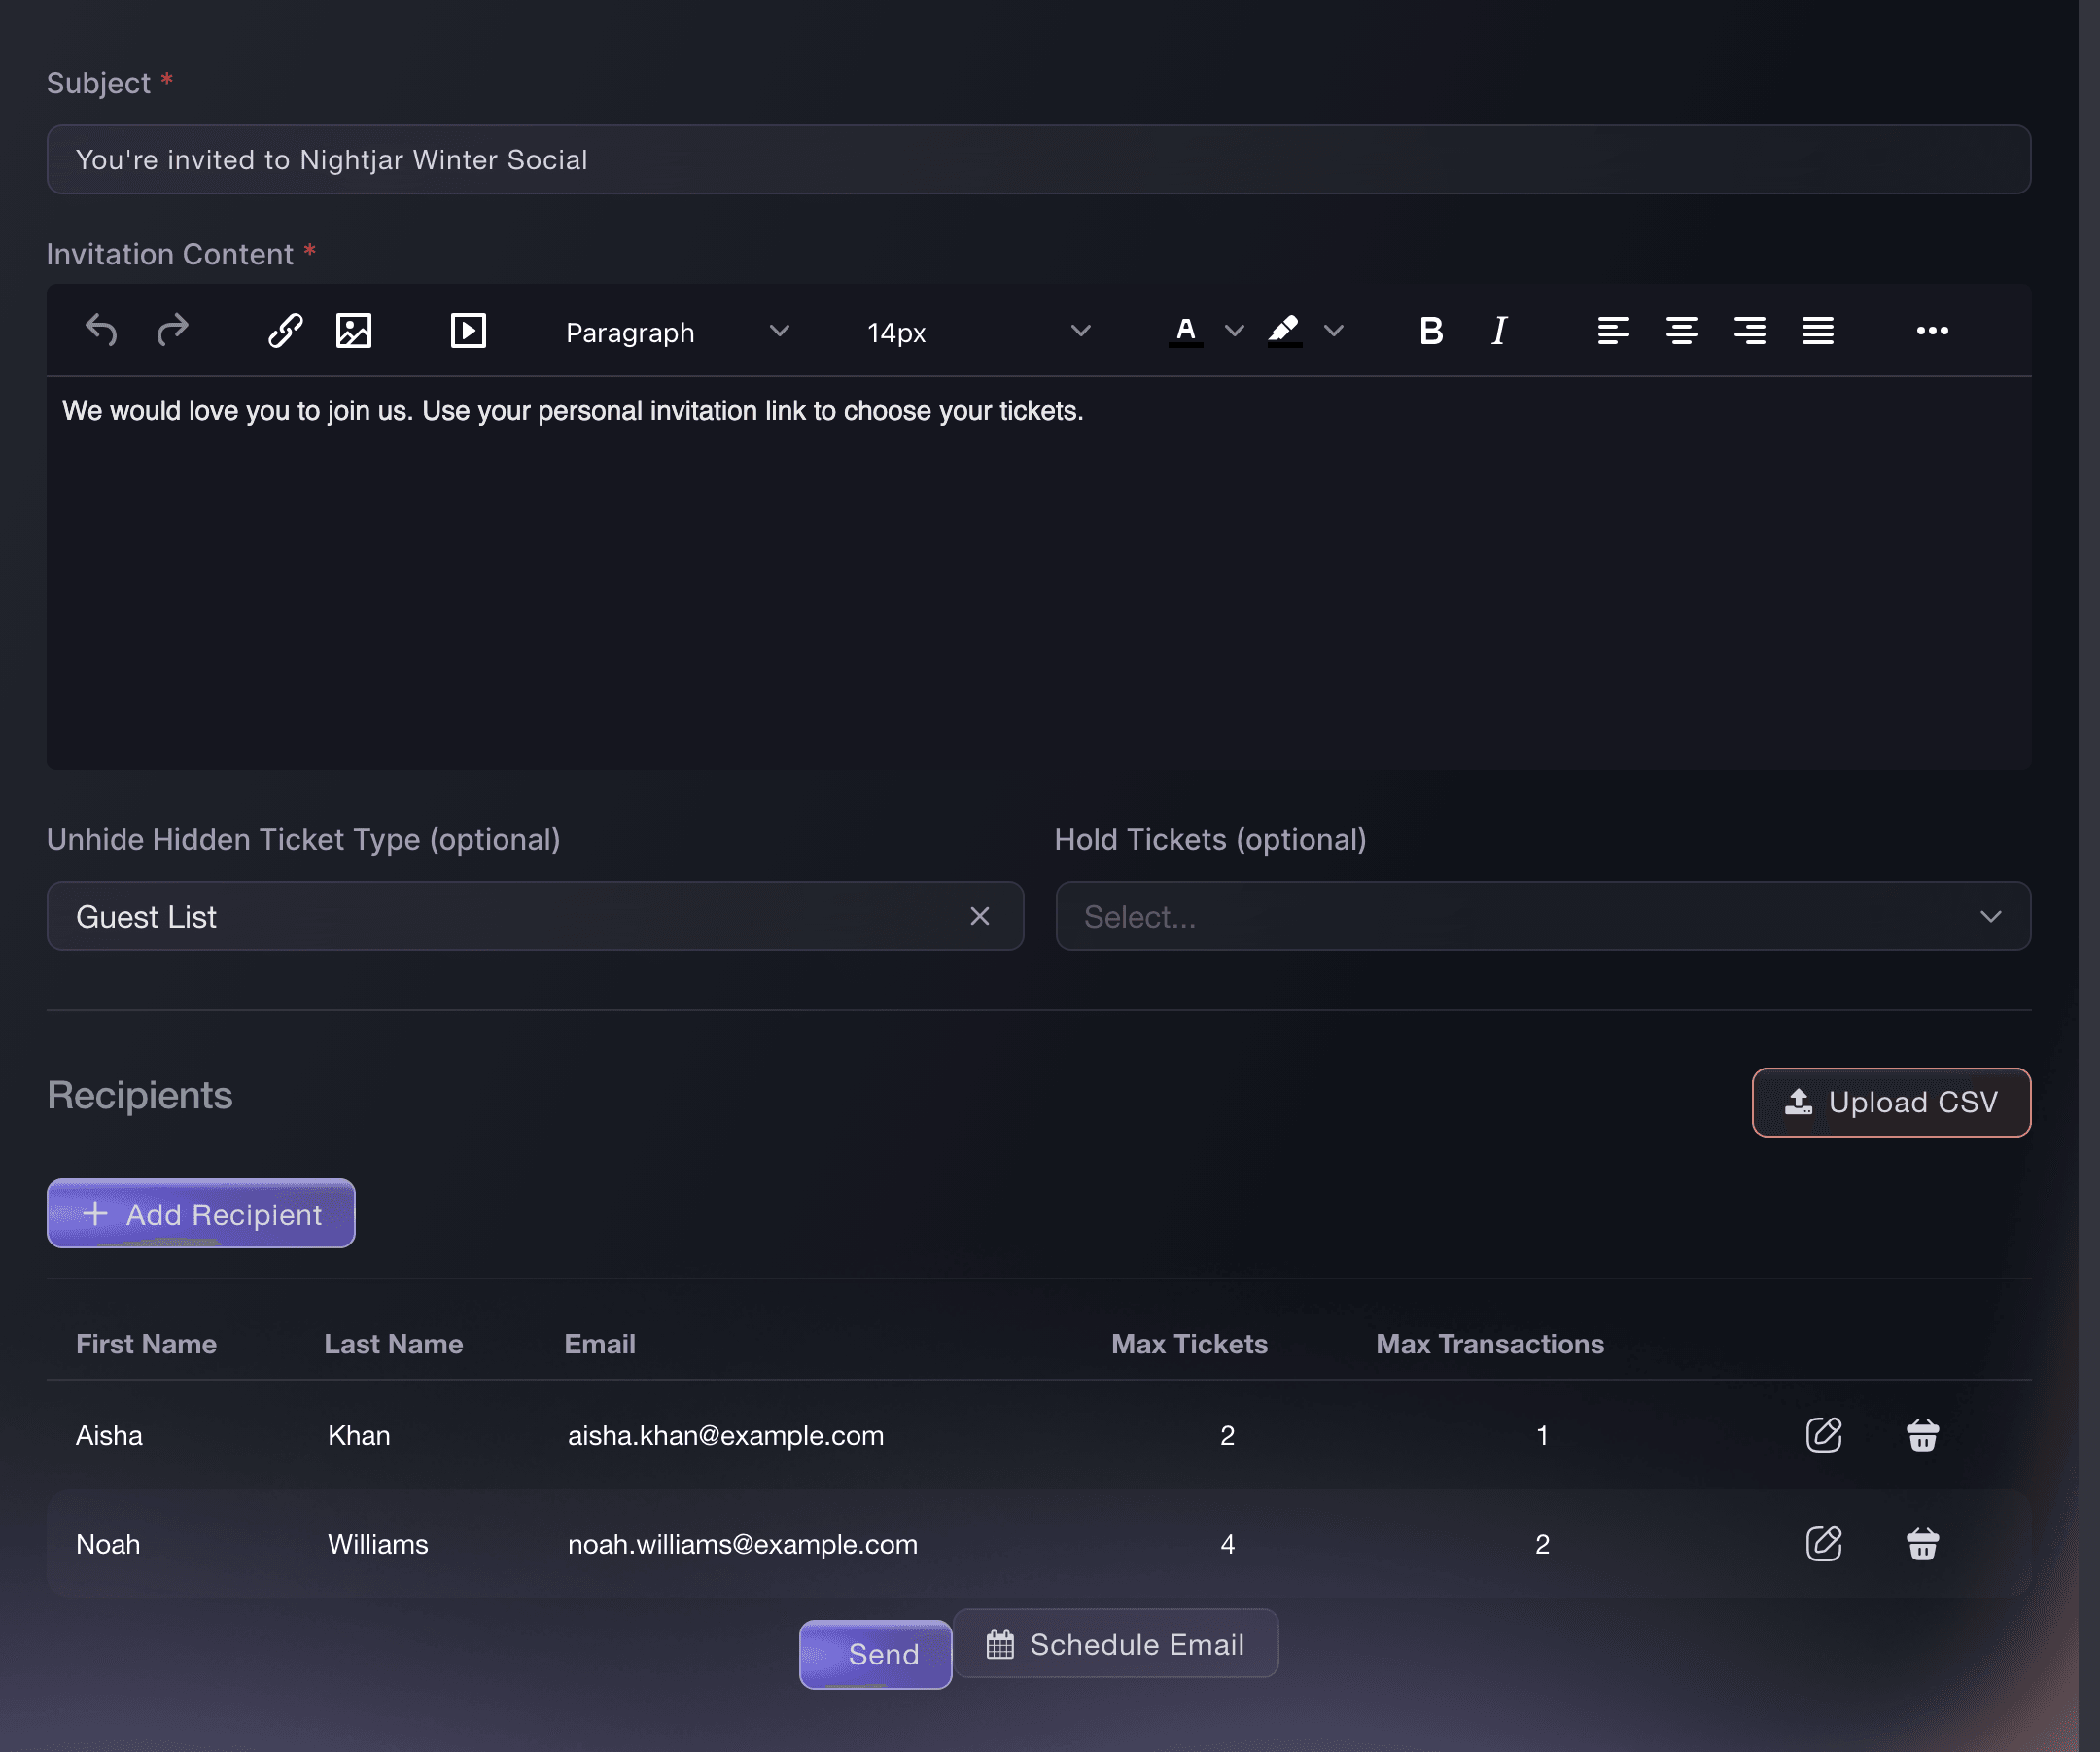
Interact, Invitations, Send Invitation. -
Choose any hidden tickets or held allocation the link should open
Use Unhide Hidden Ticket Type (optional) when this invitation should reveal one or more tickets that ordinary visits cannot see. Use Hold Tickets (optional) when you already have a held allocation set aside for the invited list.
Leave both fields empty when every invited person should choose from the normal visible tickets. The invitation requirement still applies.
-
Add one recipient and set both limits
Under Recipients, select Add Recipient. Enter First Name, Last Name, Email, Maximum number of tickets and Maximum transactions.
Maximum number of tickets is the total number of tickets this invitation may buy. Maximum transactions is the number of separate orders it may place. Set the transaction limit no higher than the ticket limit. The recipient table shortens these headings to Max Tickets and Max Transactions.
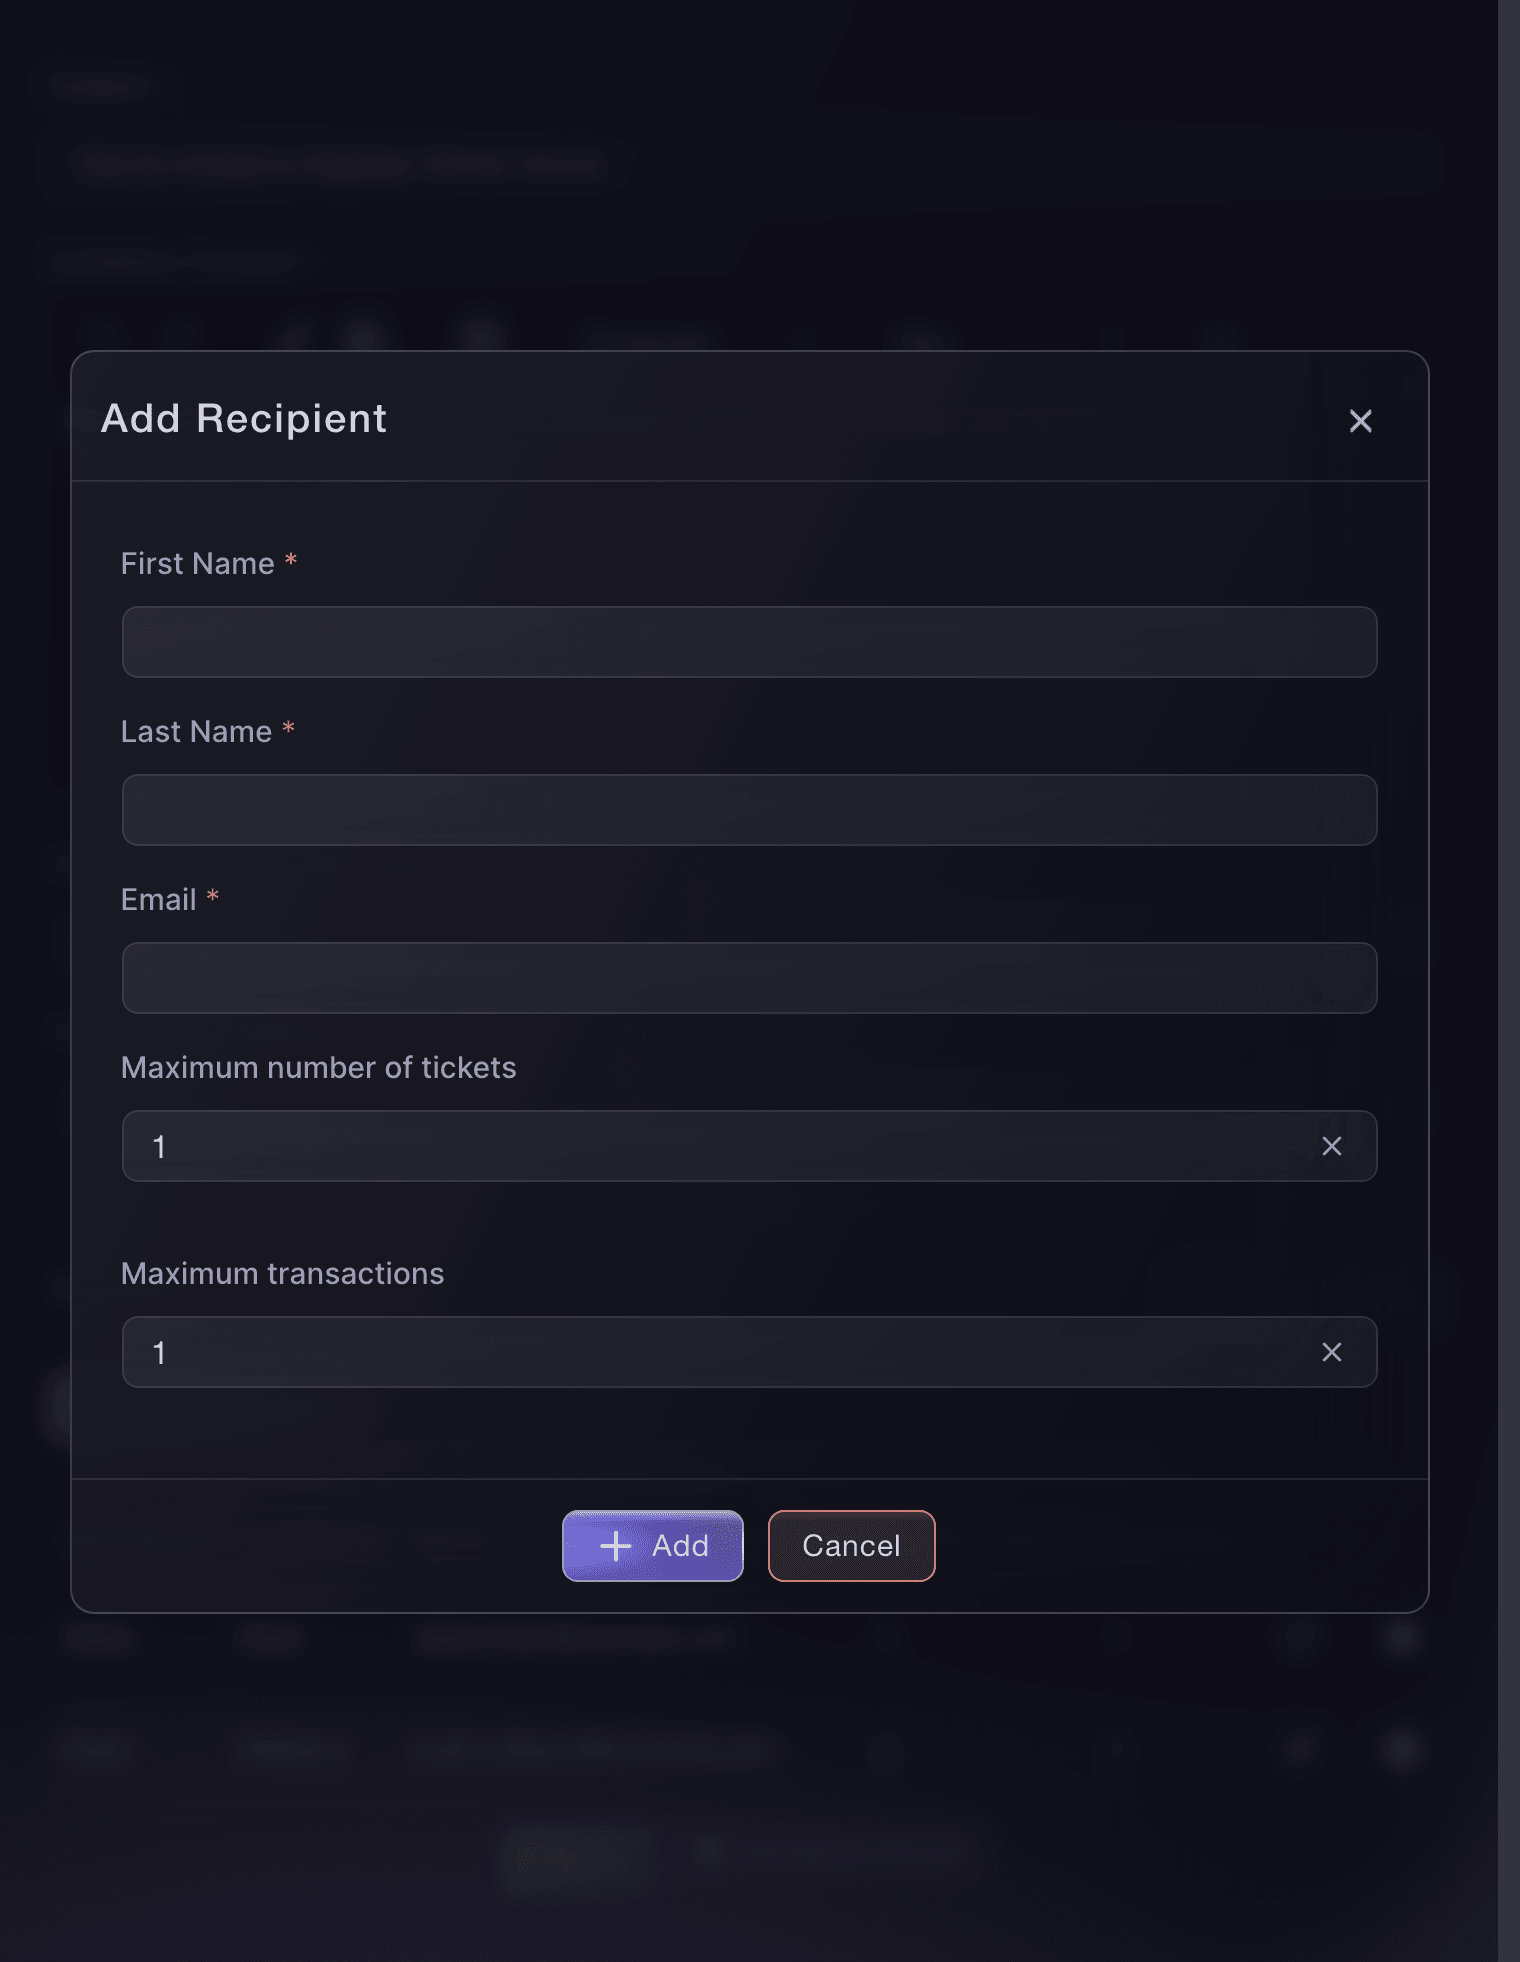
Interact, Invitations, Add Recipient. -
Import a larger approved list from CSV
Select Upload CSV, then add a CSV with no header row. Put first name, last name, email address, maximum tickets and maximum transactions in that order on every row. Drop the file onto Add CSV File, or select it and choose the file from your device.
Use one row per person. Each limit must be from 1 to 50, and maximum transactions cannot exceed maximum tickets.
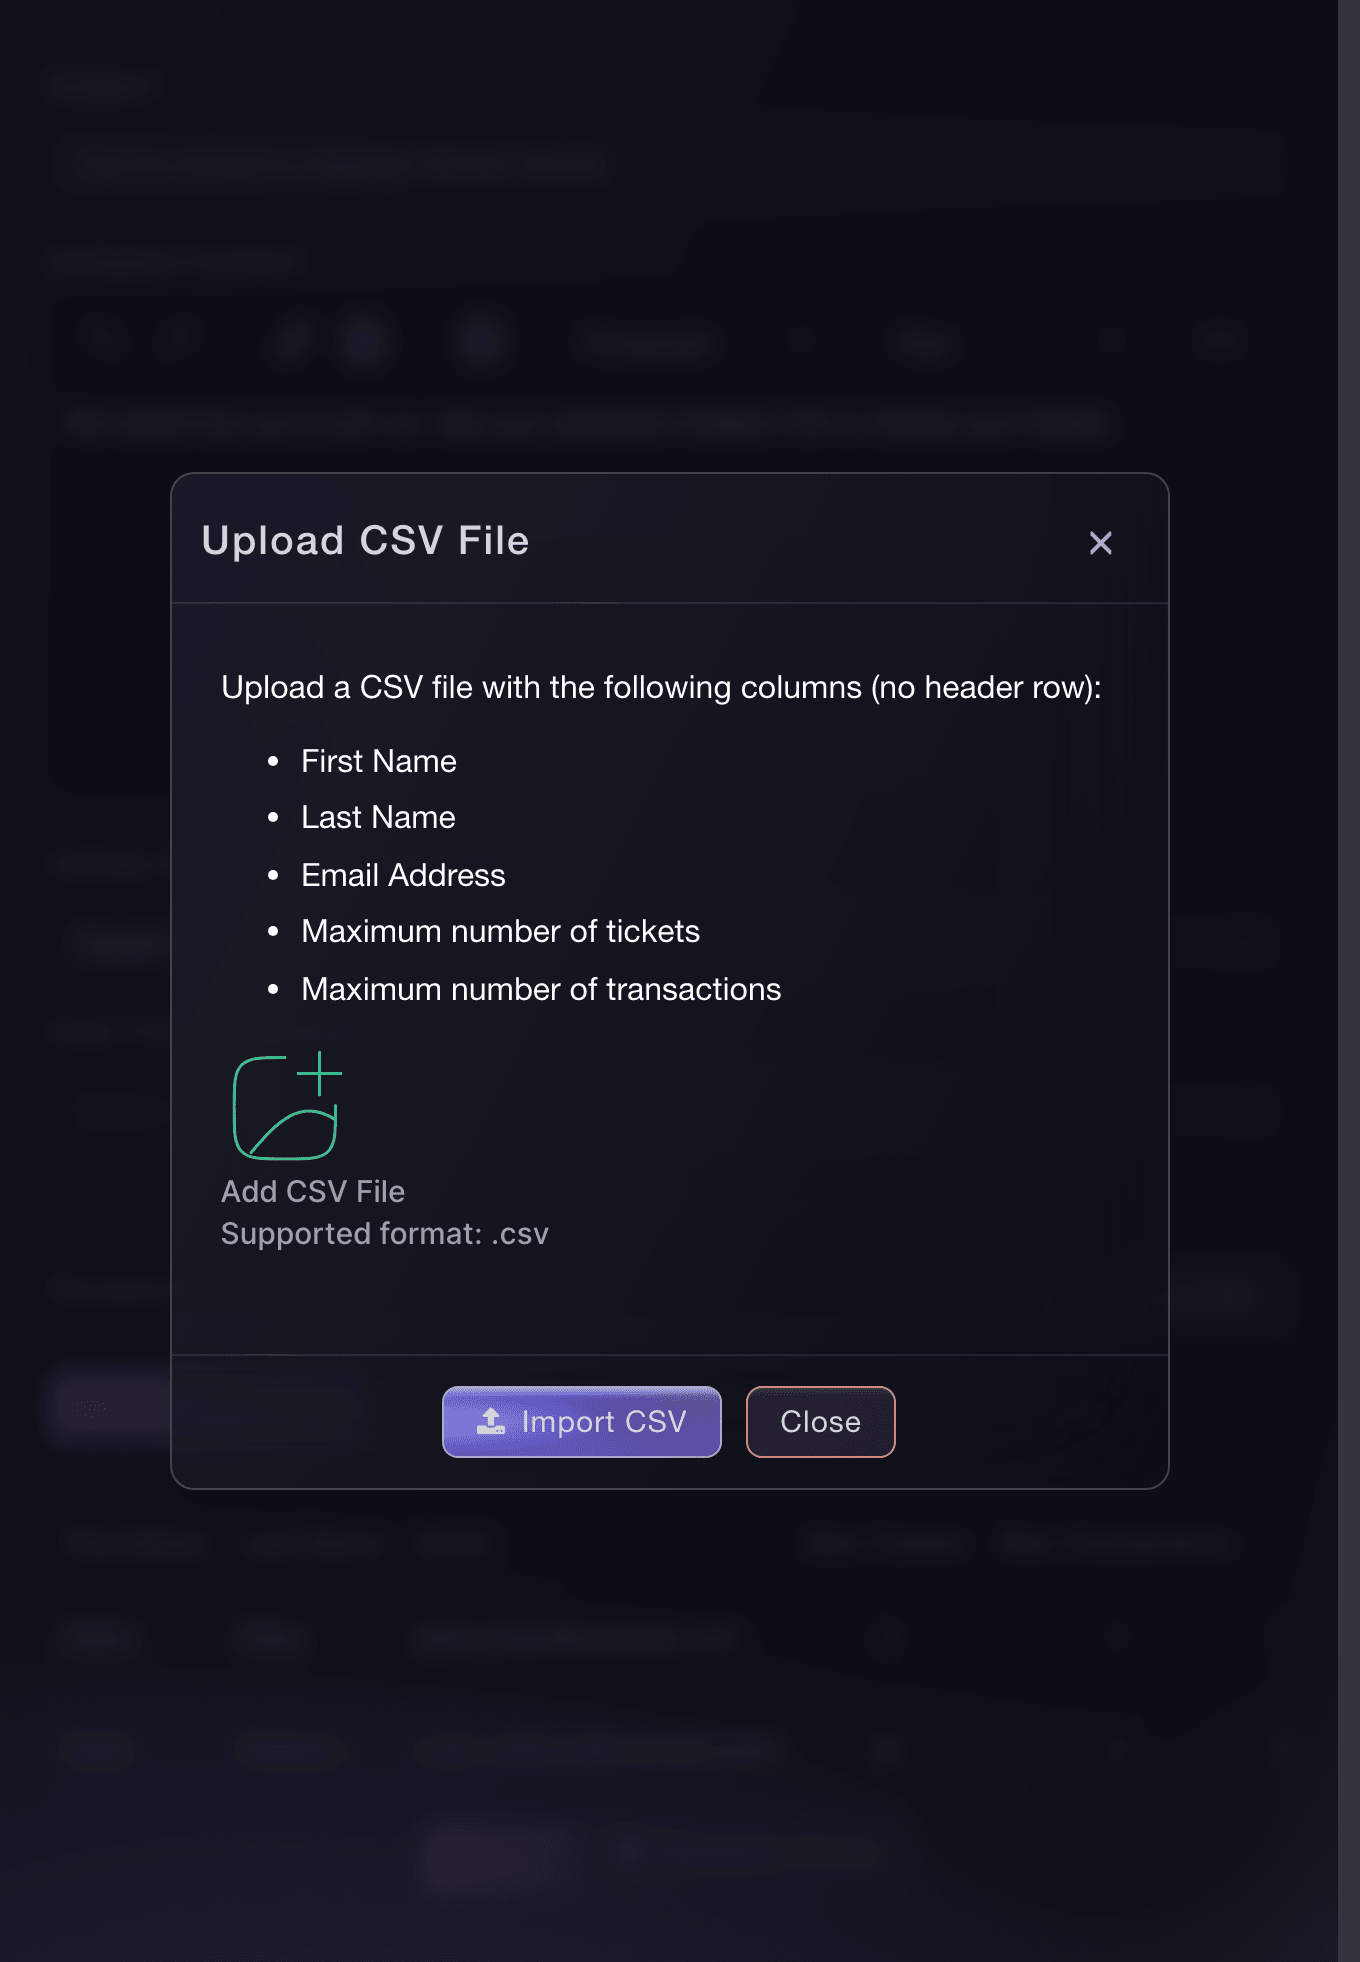
Interact, Invitations, Upload CSV. -
Review the CSV import results
Read the Processed, Imported and Failed totals. Imported recipients have already been added to the invitation. Select OK after you have checked the totals.
When Failed is greater than zero, Ticket Fairy opens those rows for correction after you select OK. You do not need to upload the valid rows again.
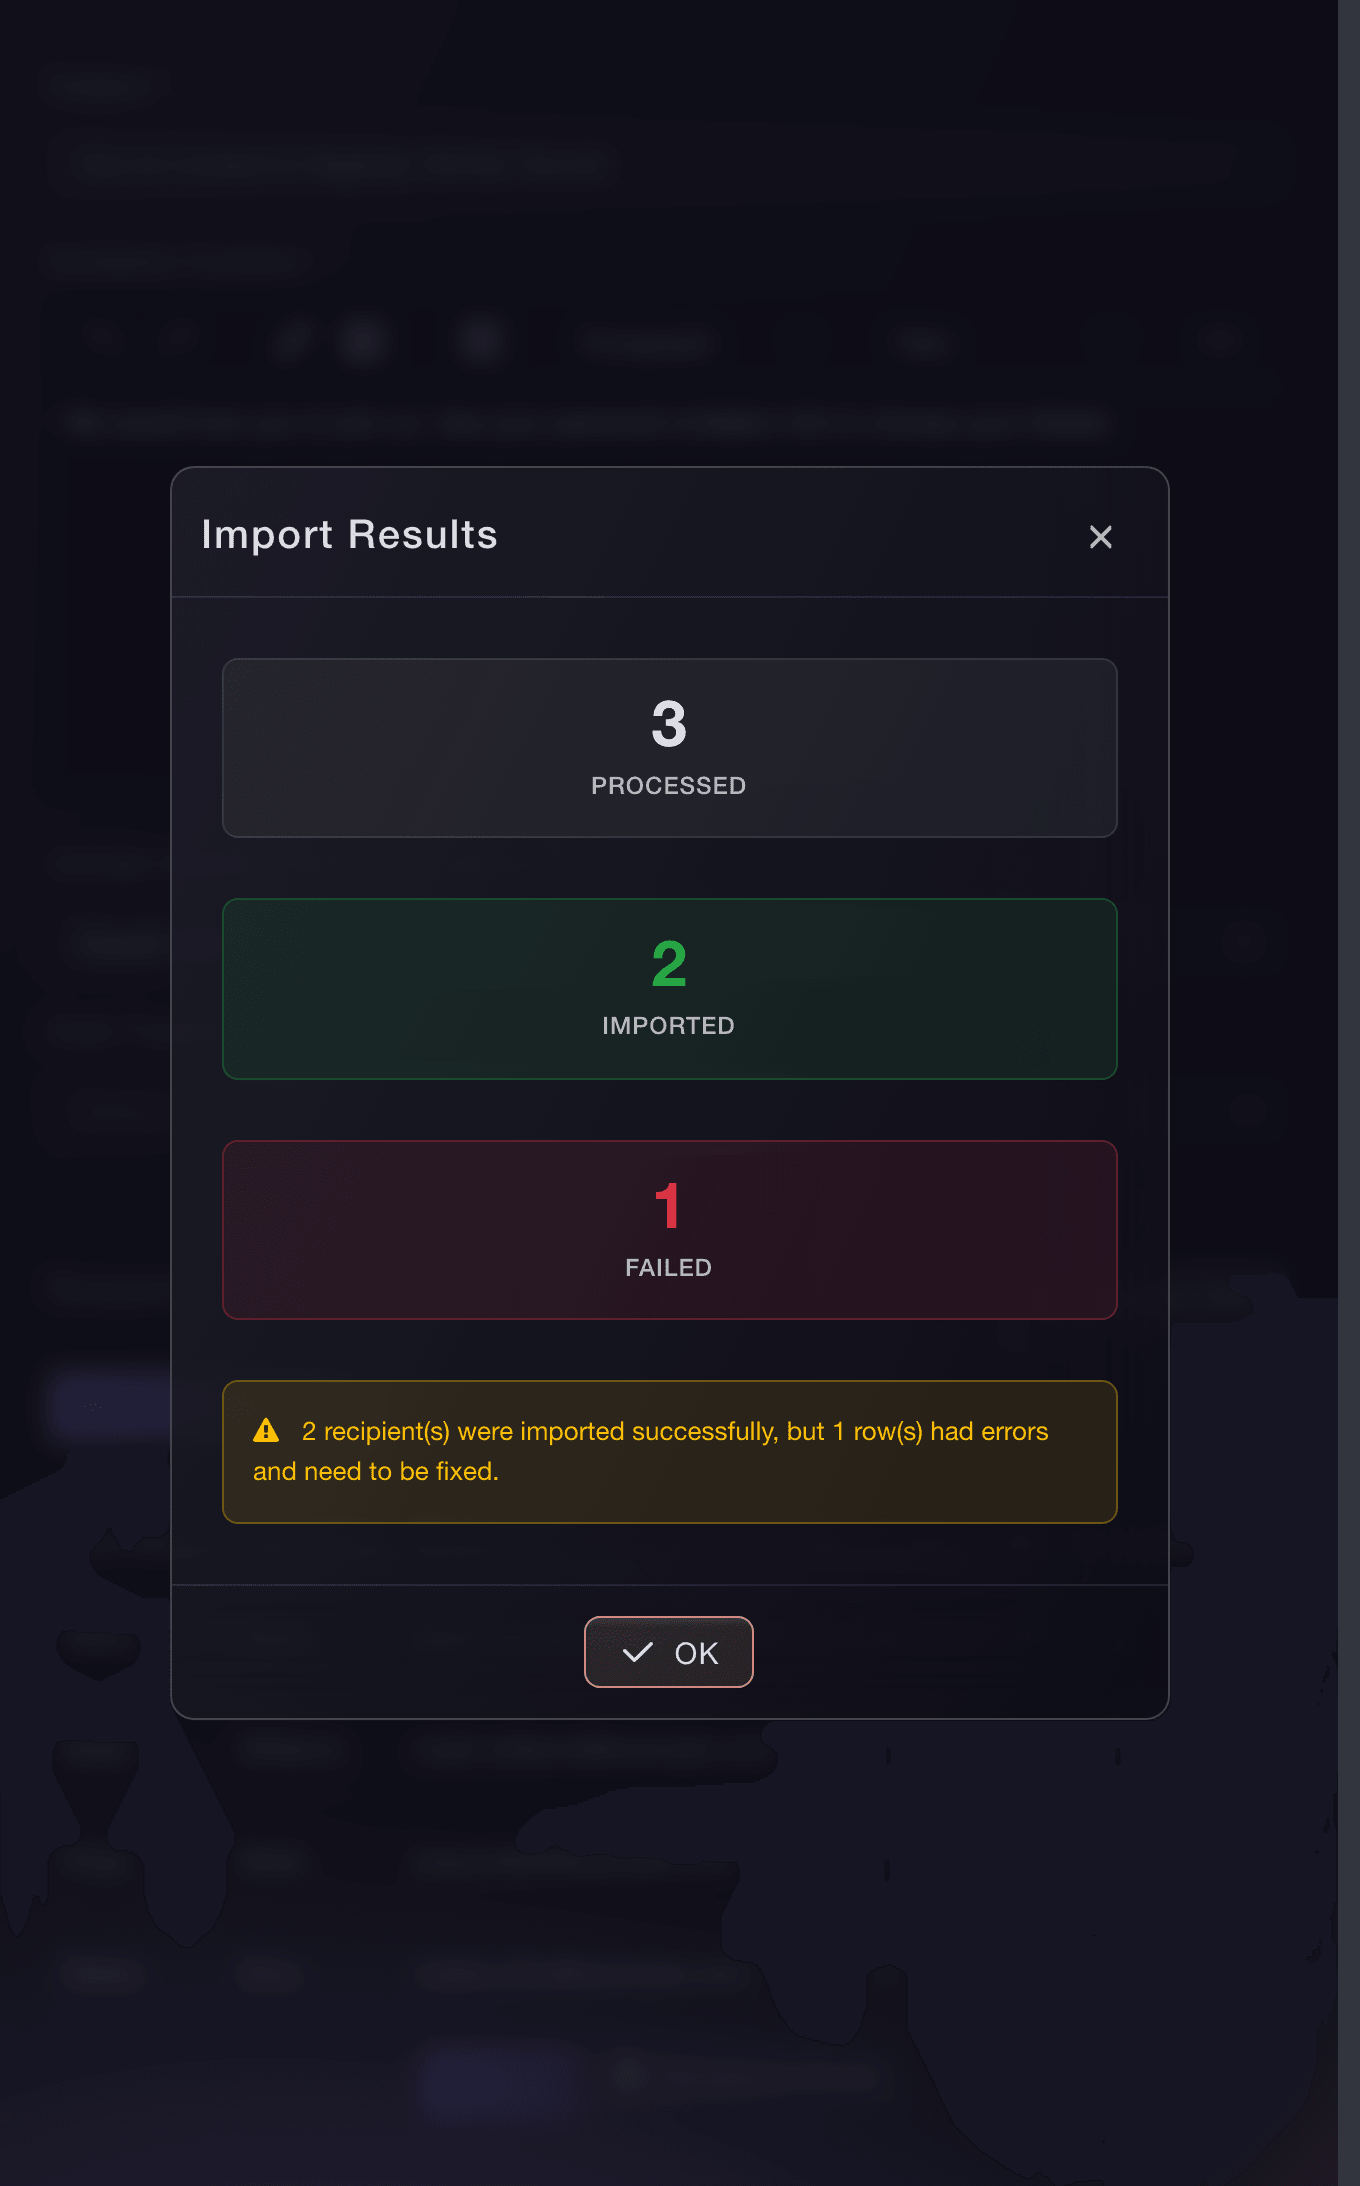
Interact, Invitations, Import Results. -
Correct any rejected CSV rows
In Fix CSV Import Errors, enter each missing or invalid value. The red message identifies the field that needs attention. Select Import Row when the row is complete.
Import Row remains unavailable until the row is valid. When several rows failed, correct every row you want to keep, then import the valid rows.
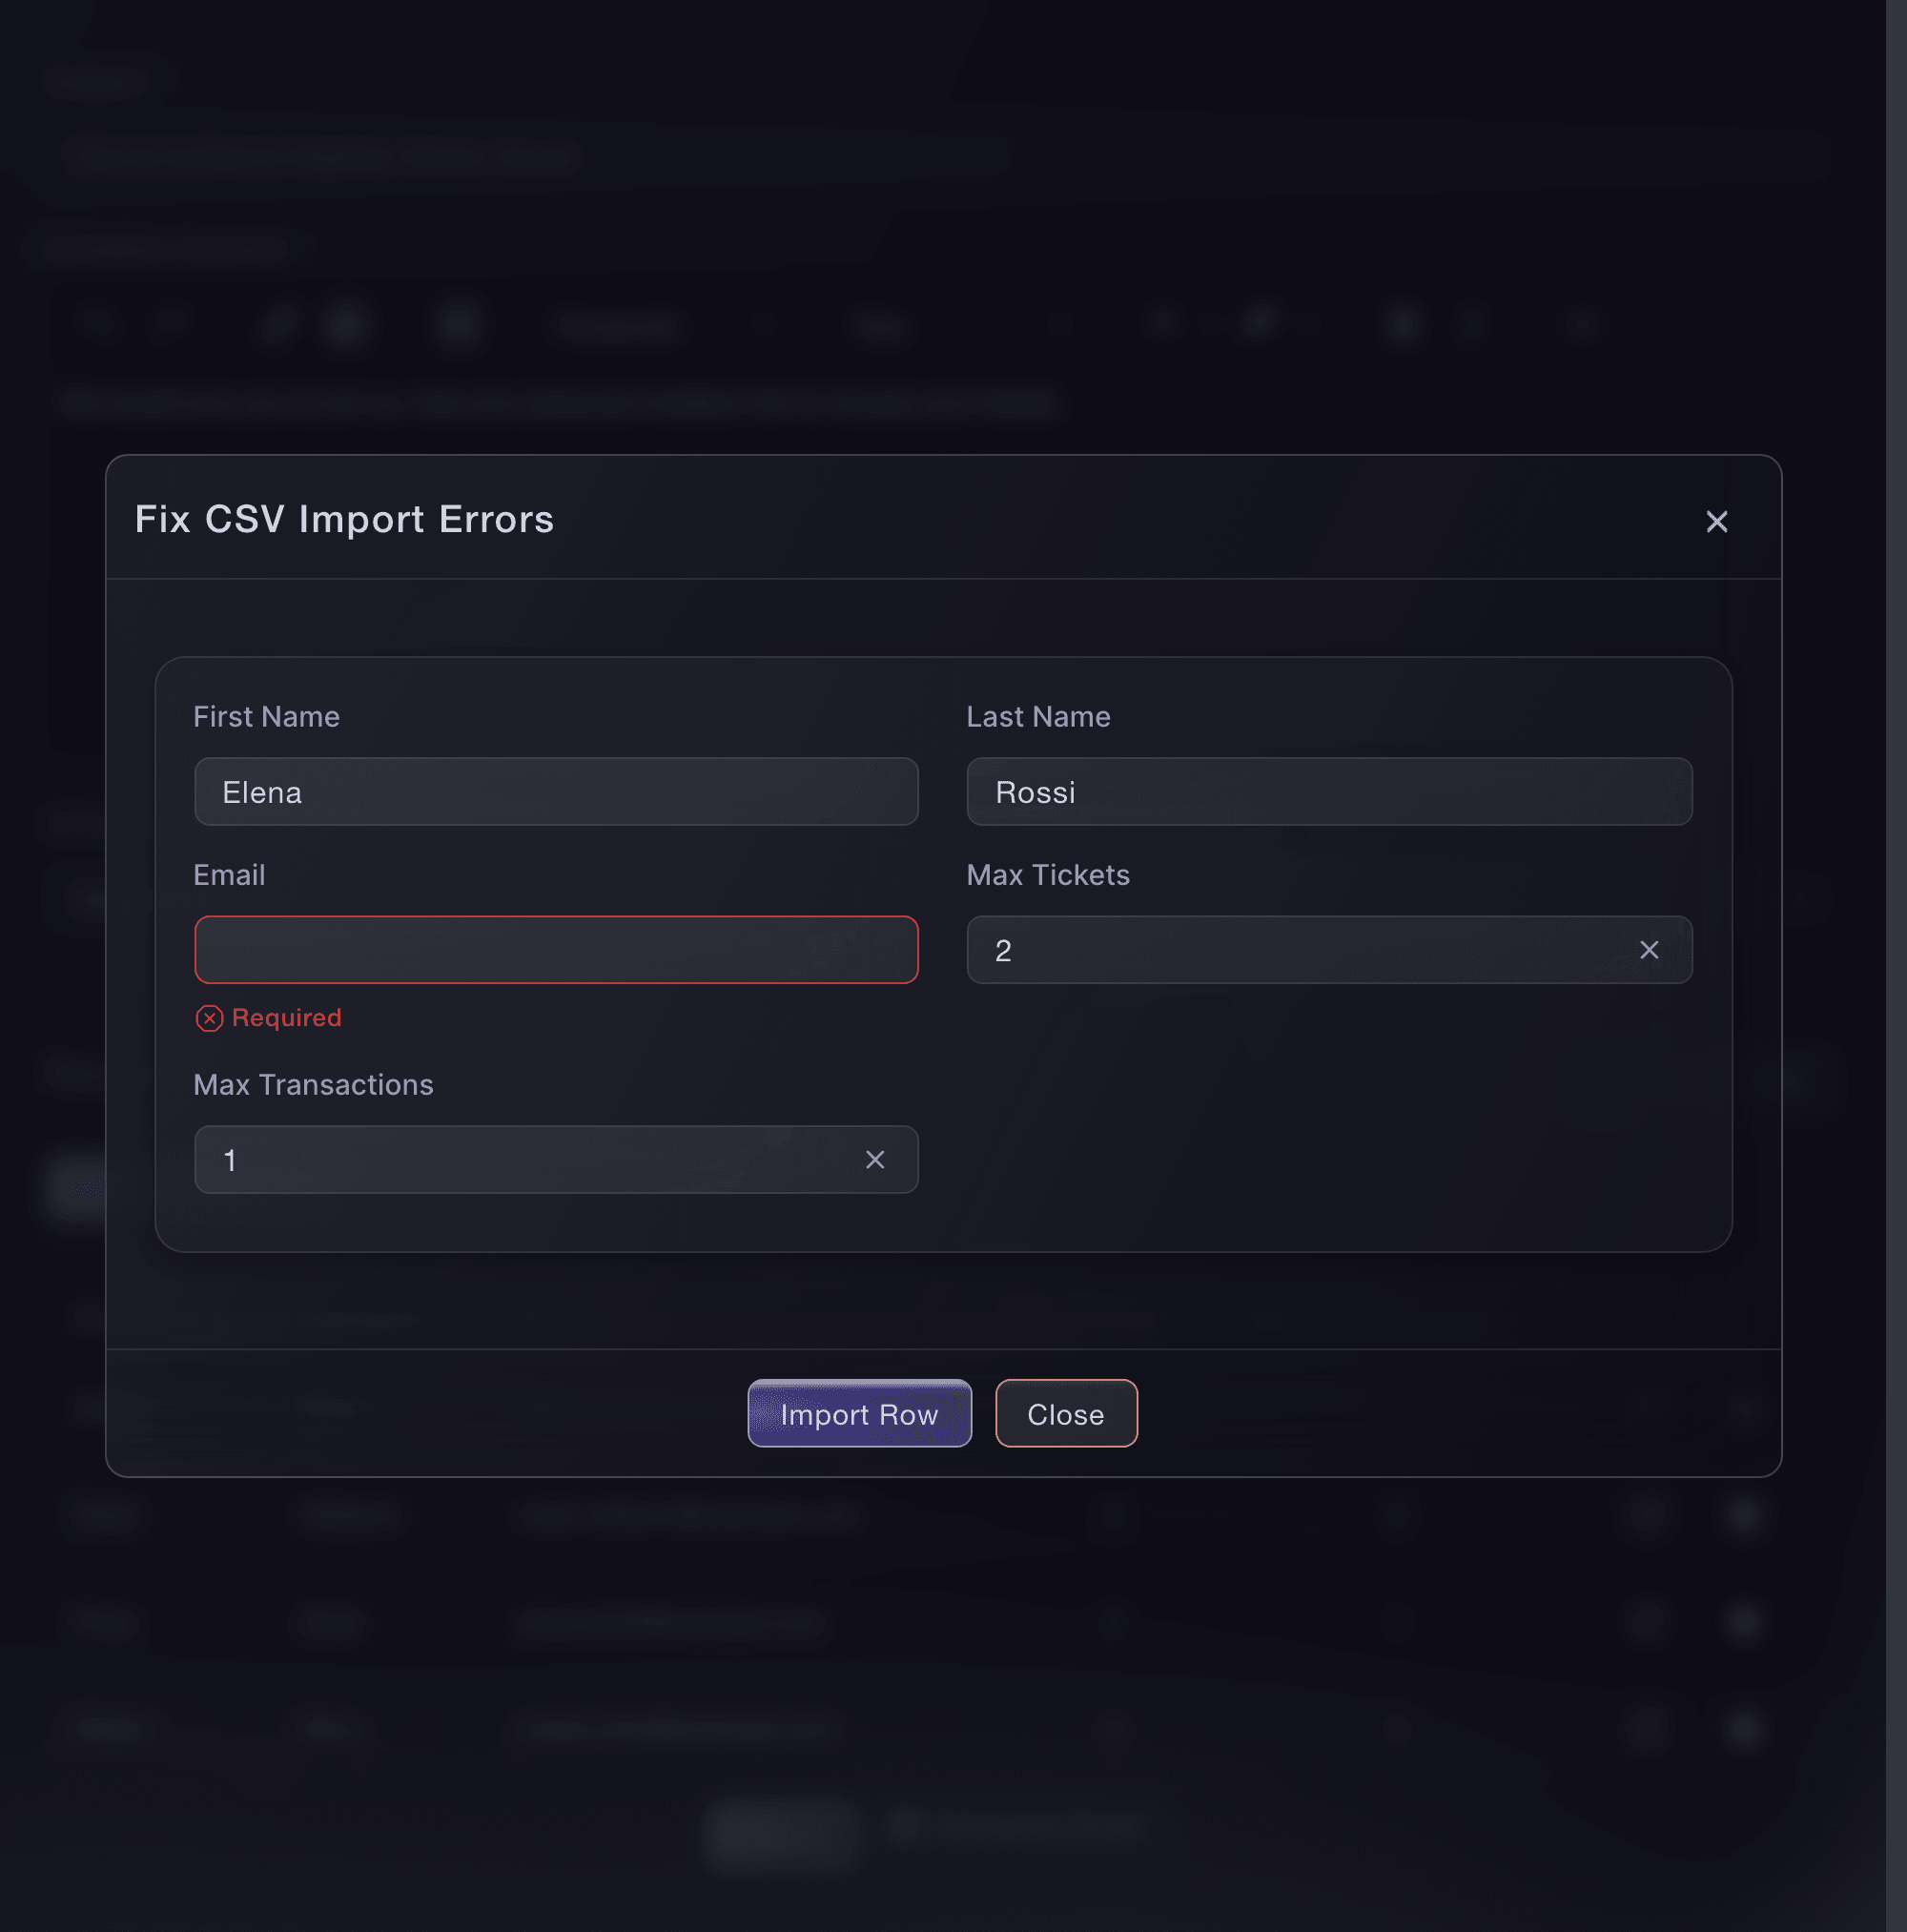
Interact, Invitations, Fix CSV Import Errors. -
Send now or schedule the invitation
Read the subject, content, ticket access and recipient rows once more. Select Send to send now. To send later, select Schedule Email, choose the date and time in the event timezone, then select Schedule.
A scheduled invitation remains under Scheduled invitations until its send time. Cancel it there if the list or message changes first.
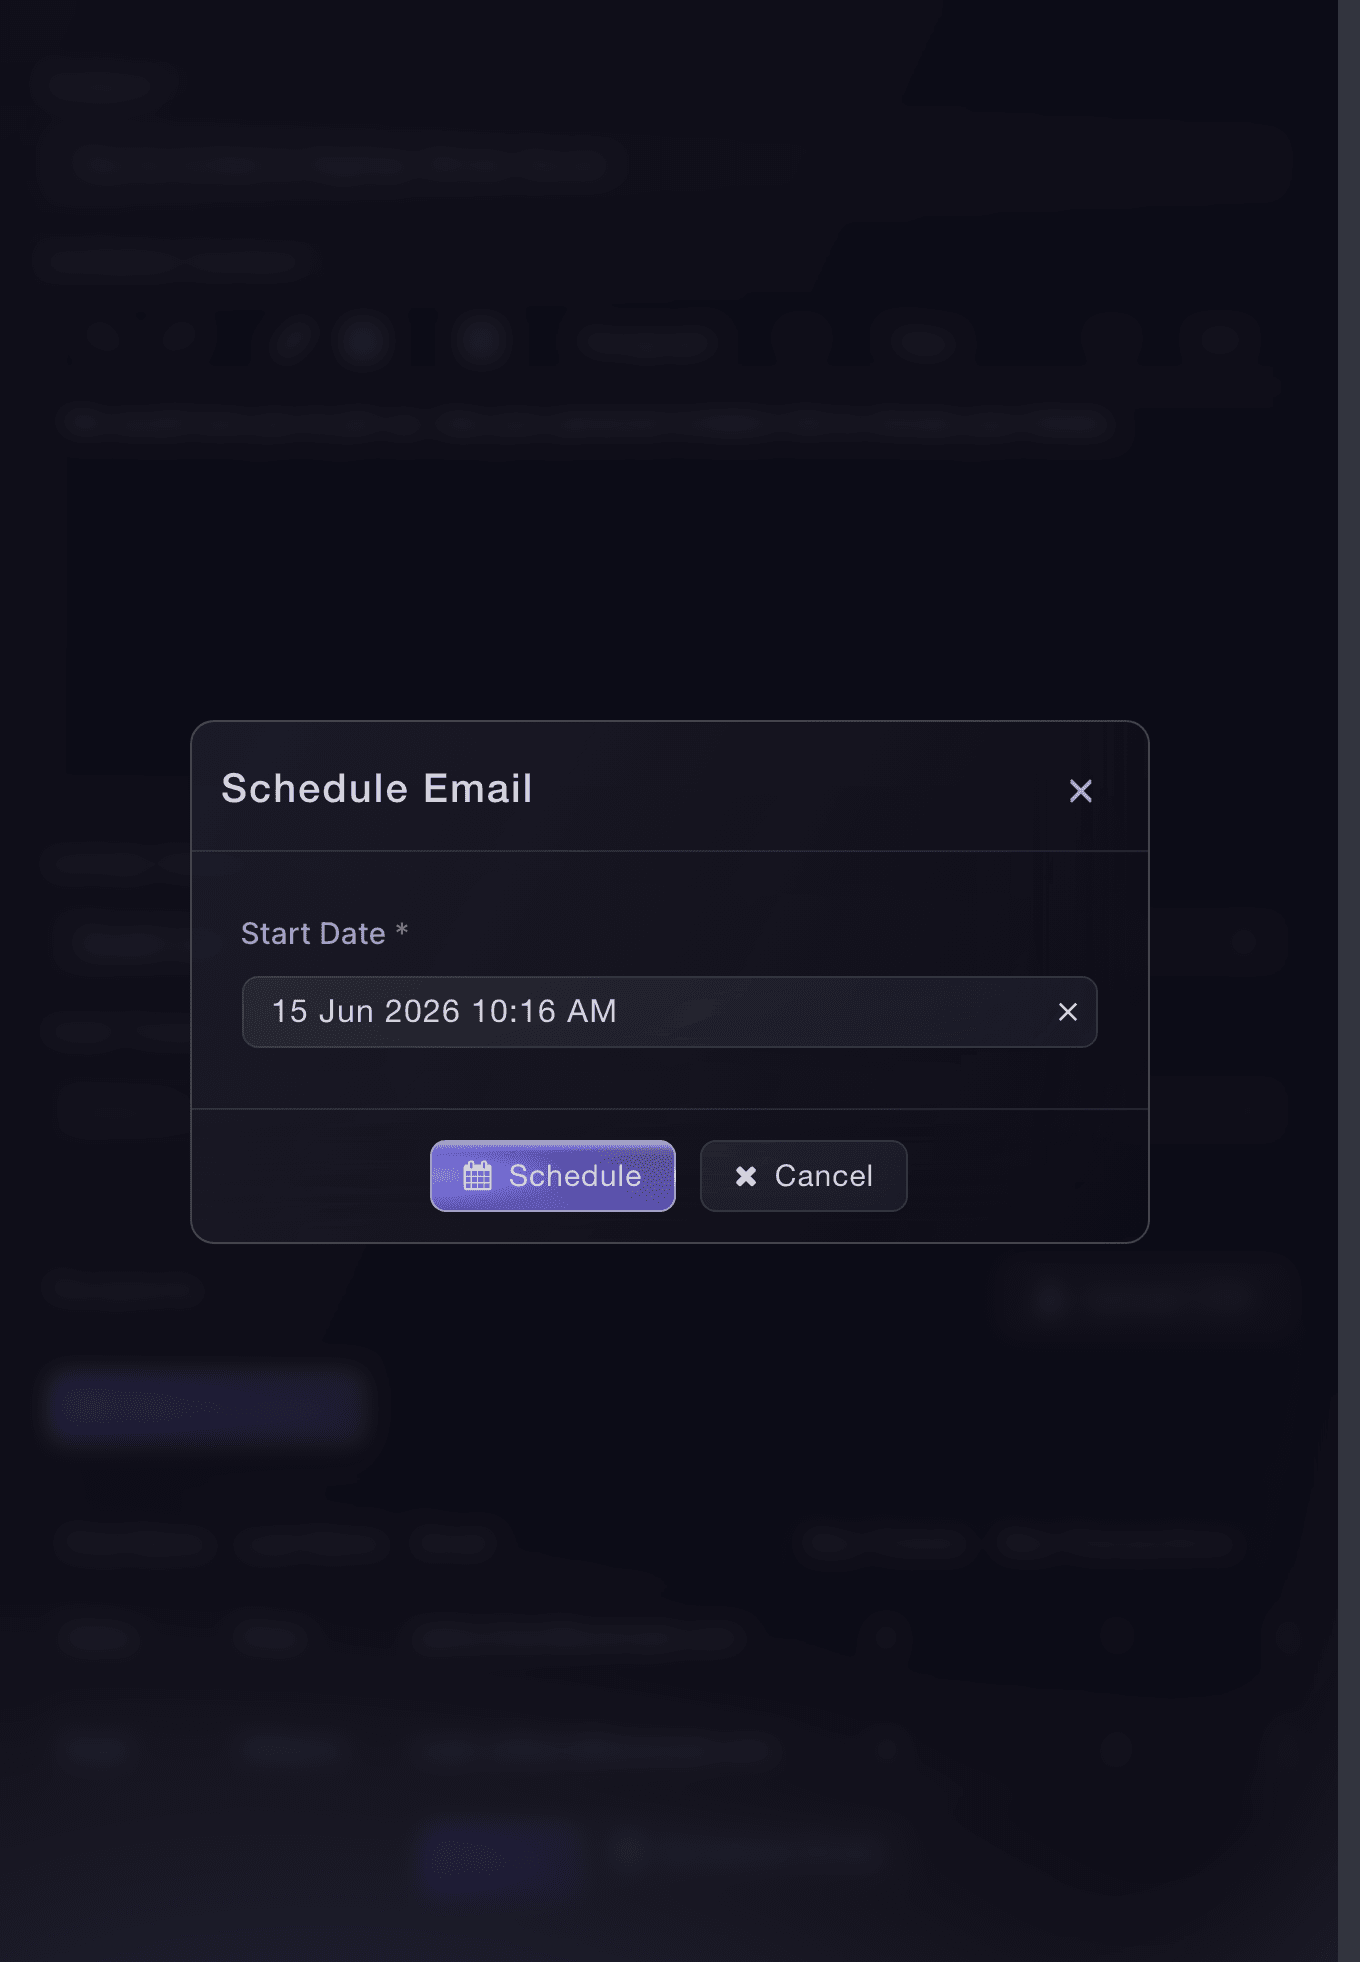
Interact, Invitations, Schedule Email. -
Review invitations waiting to send
Return to Invitations and check Scheduled invitations. Confirm each recipient, ticket type, ticket limit and scheduled time before the message leaves.
Scheduled times use the event timezone. Correct the event timezone first when the displayed time is not the time your audience should receive the invitation.
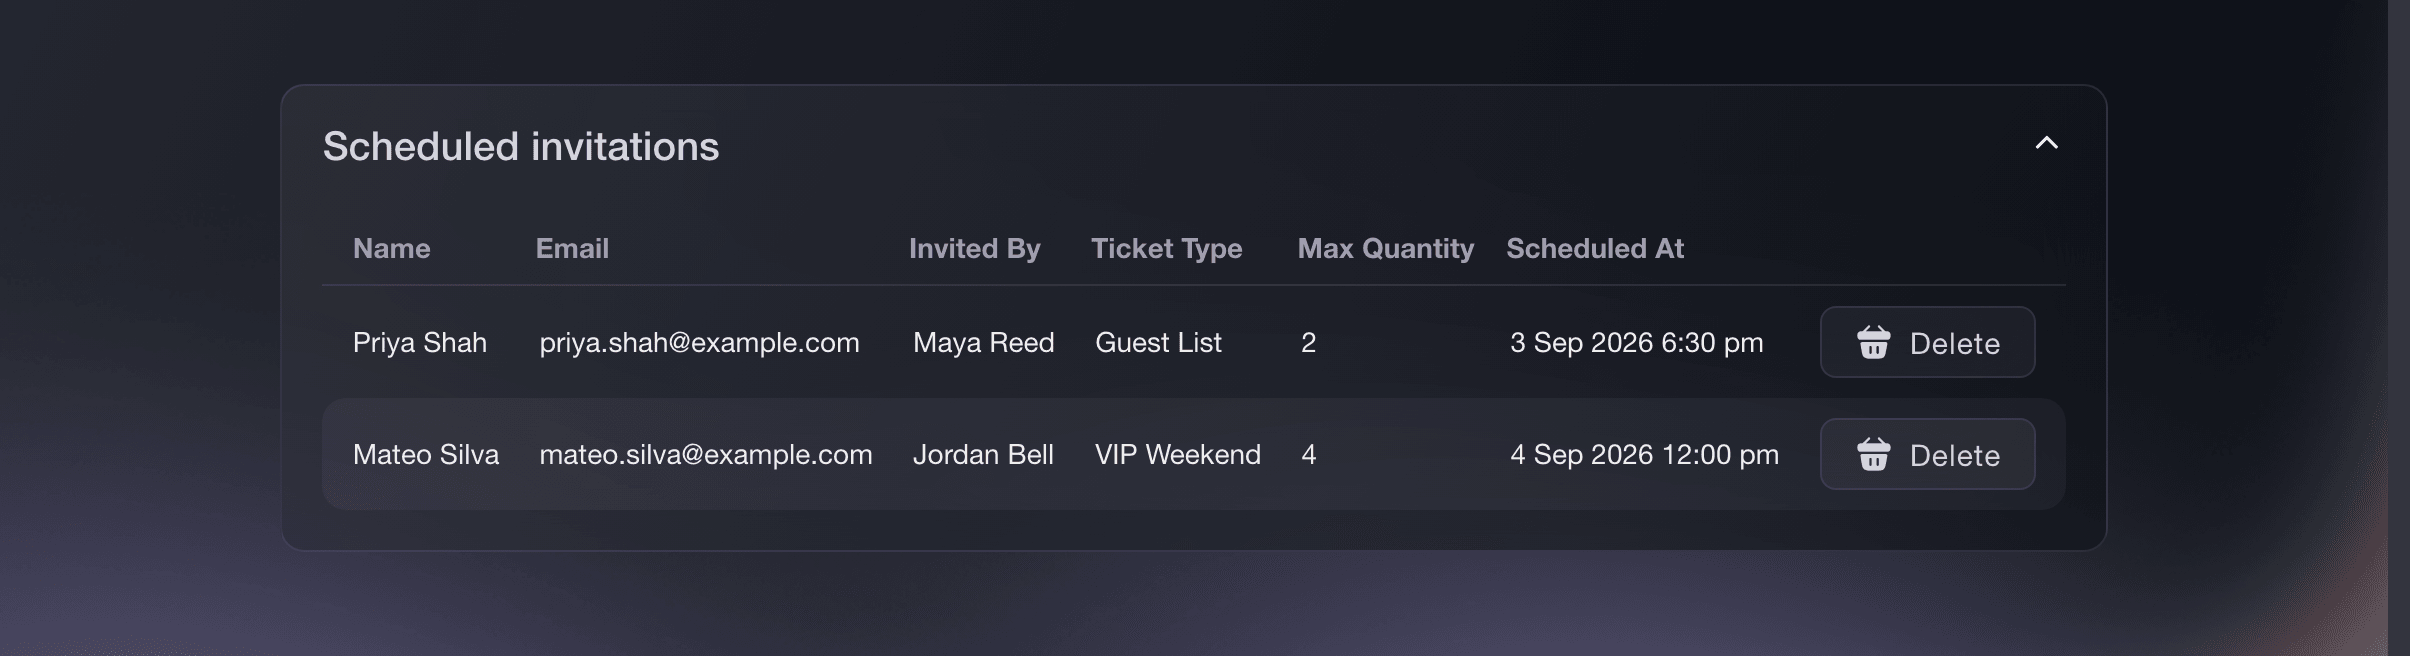
Interact, Invitations, Scheduled invitations. -
Delete a scheduled invitation before it sends
Select Delete beside the scheduled invitation. Check the warning, then select Confirm.
Deleting the scheduled send prevents that email from leaving. It does not delete invitations that have already been sent.
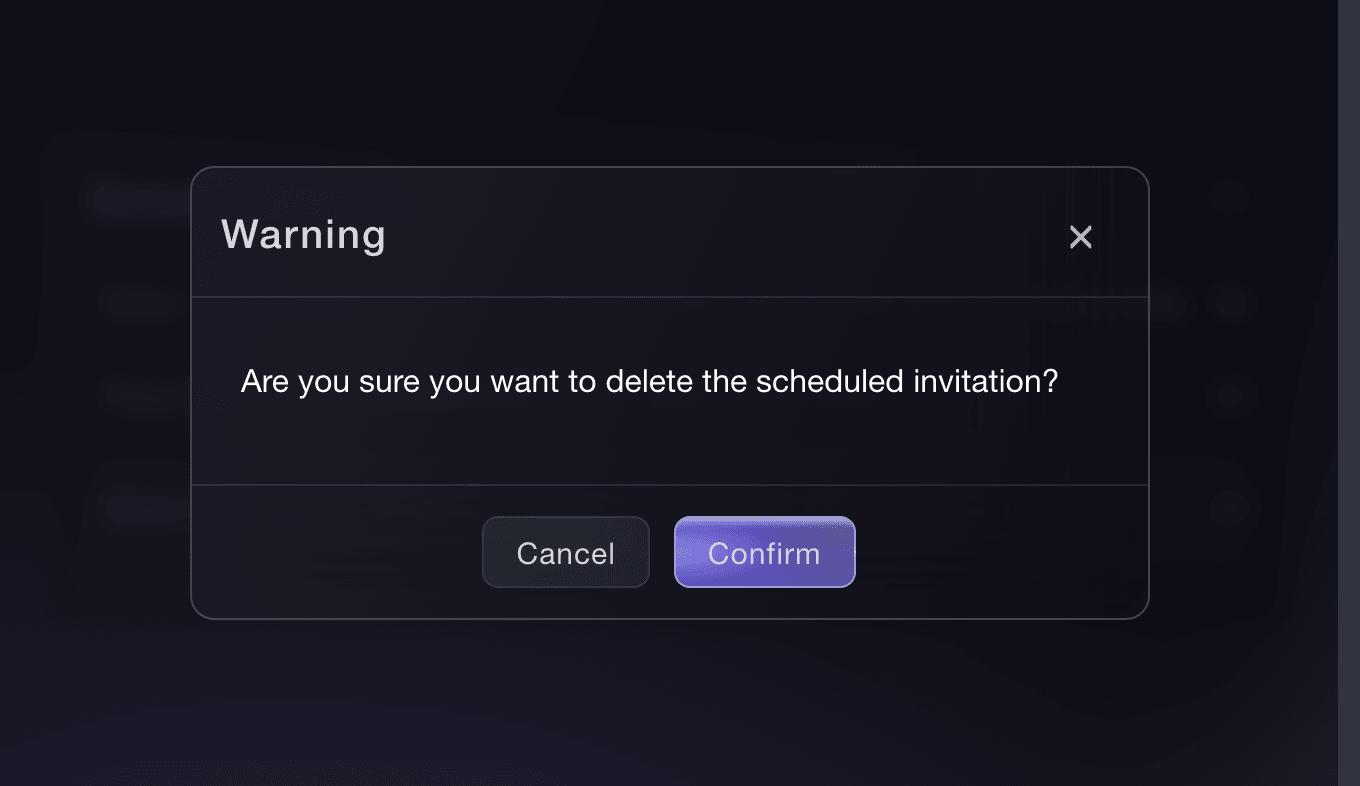
Interact, Invitations, delete a scheduled invitation. -
Follow each invitation after it leaves
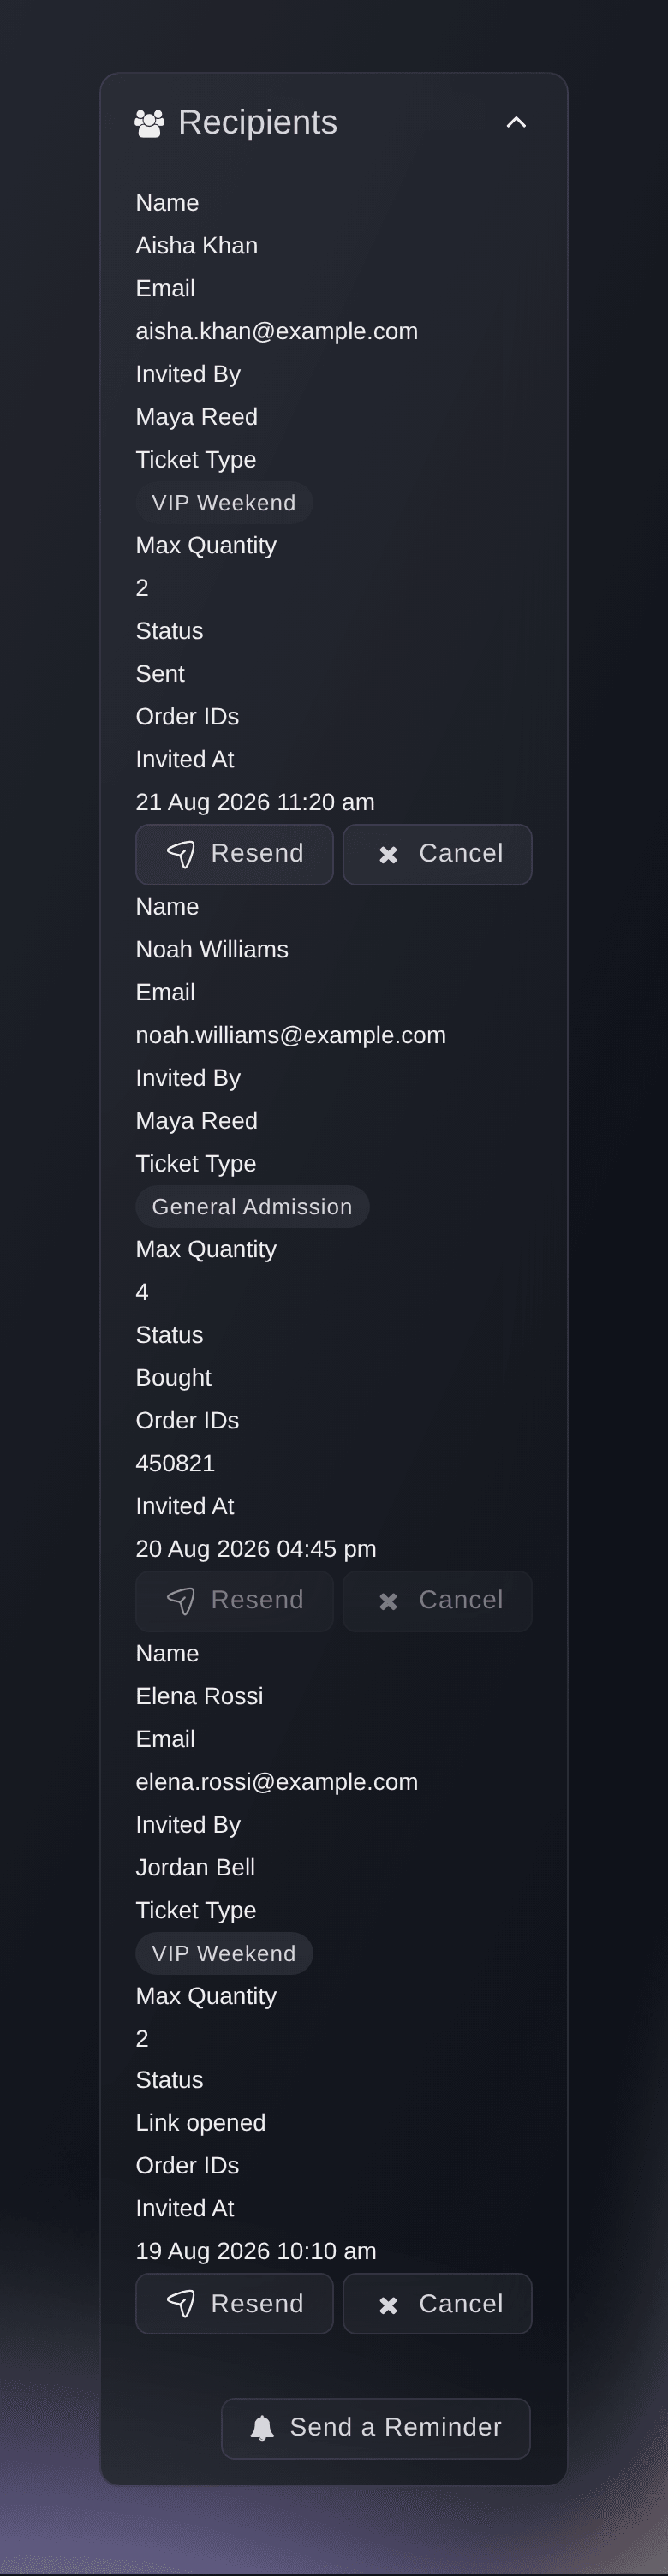
Return to Invitations and read the recipient table. Sent means the email left, Link opened means its link was used, and Bought means the invitation produced a completed purchase or an active payment plan. Withdrawn means the personal link was cancelled.
The table keeps the recipient, invited ticket type, limits and order IDs together, so you can check which allowance produced a purchase before you act.
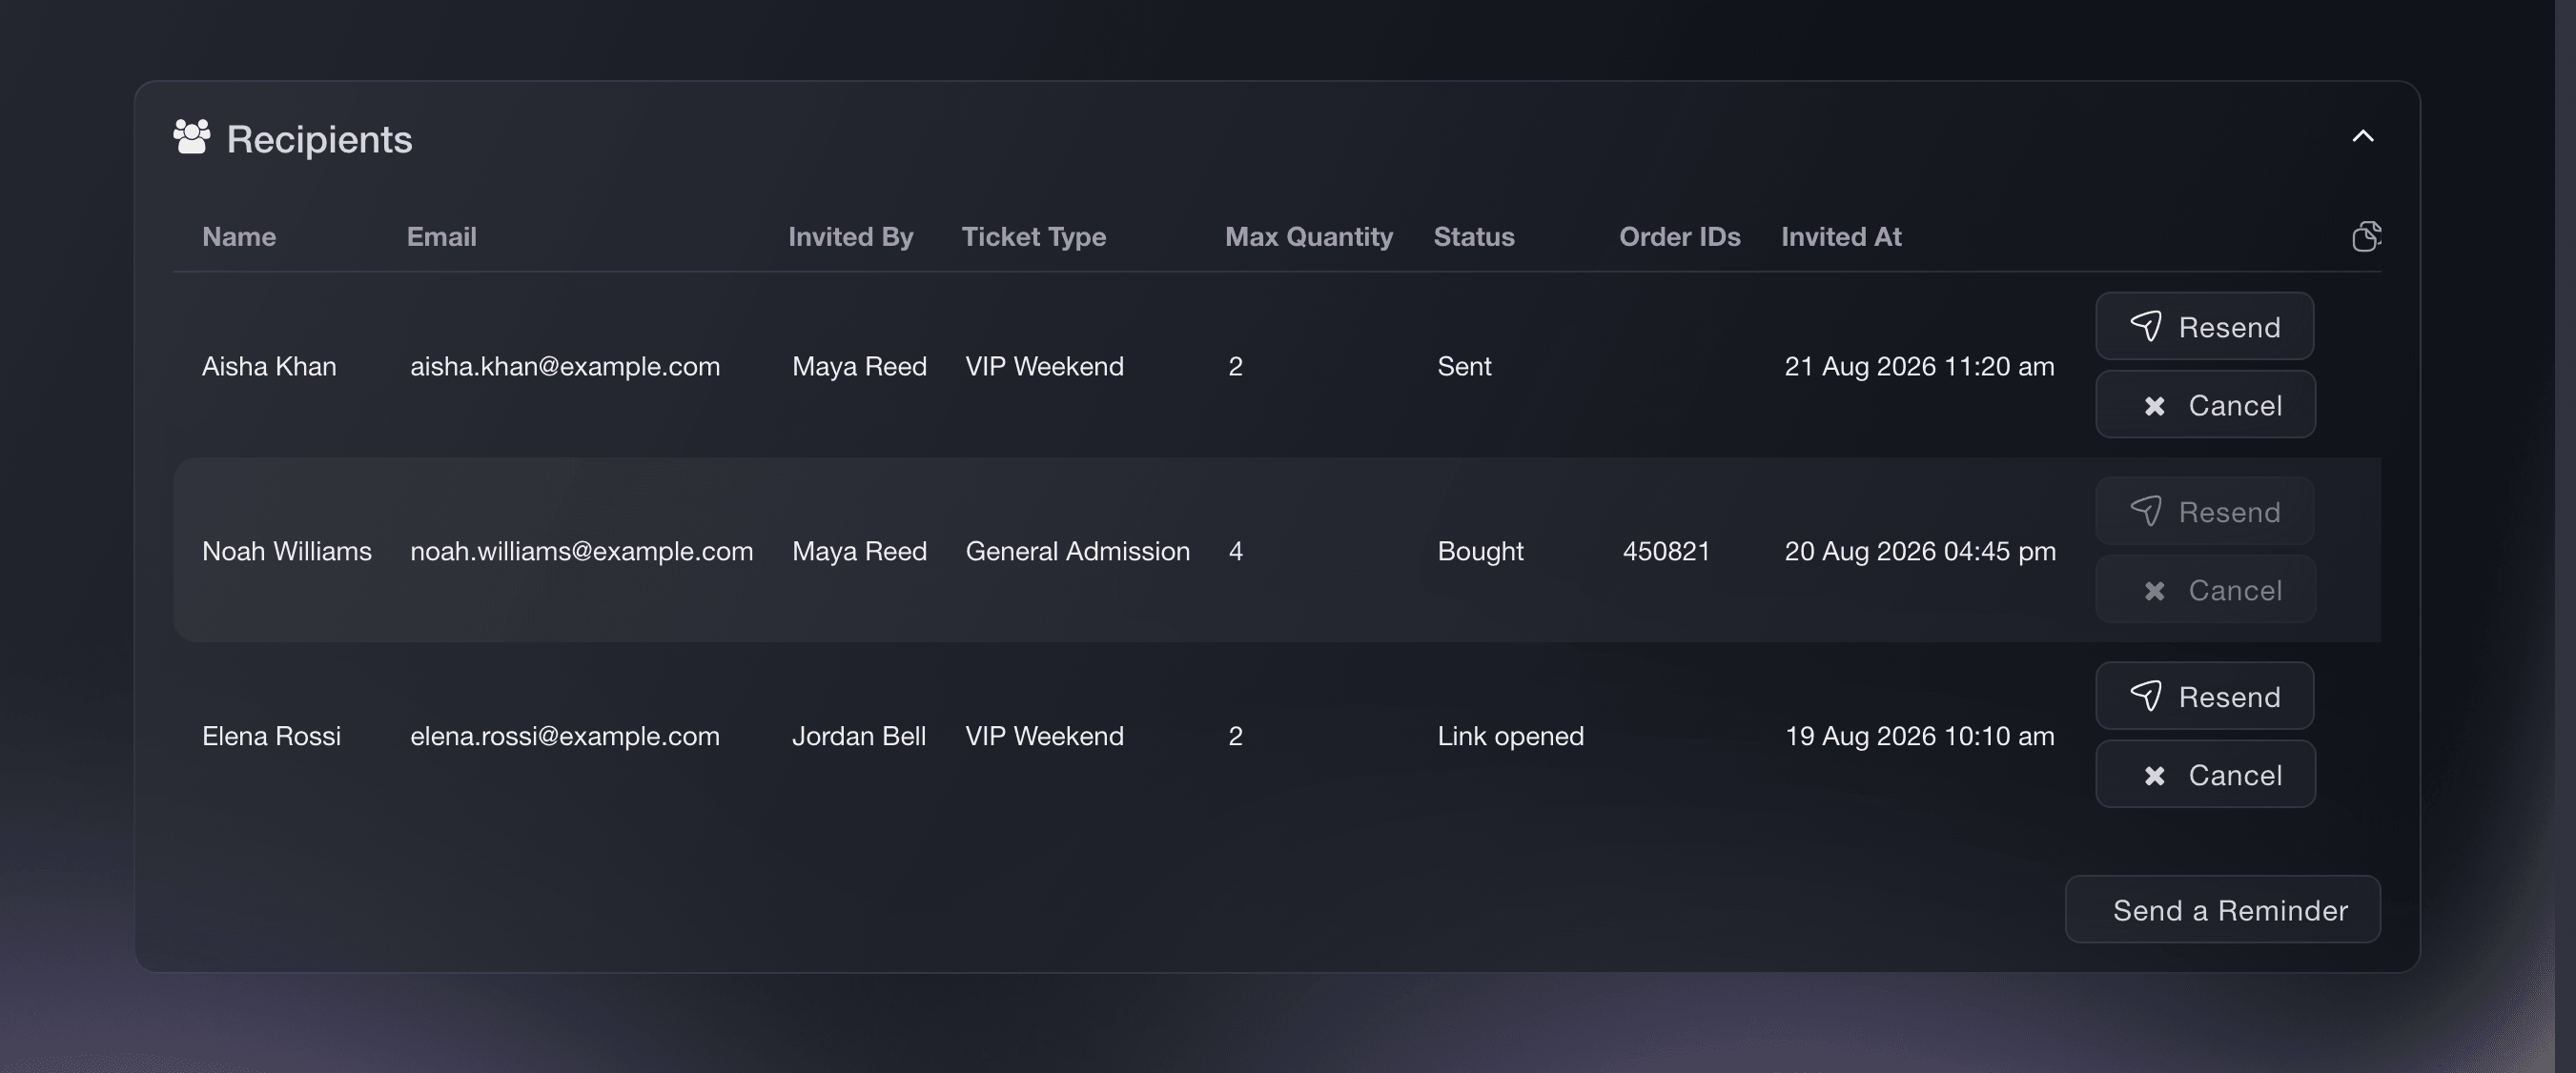
Interact, Invitations. -
Resend one person's invitation
Select Resend in the recipient row. Check the confirmation, then select Resend again.
Resend sends the same personal access again. It does not create another ticket or transaction allowance. The action is unavailable after the invitation is bought or withdrawn.
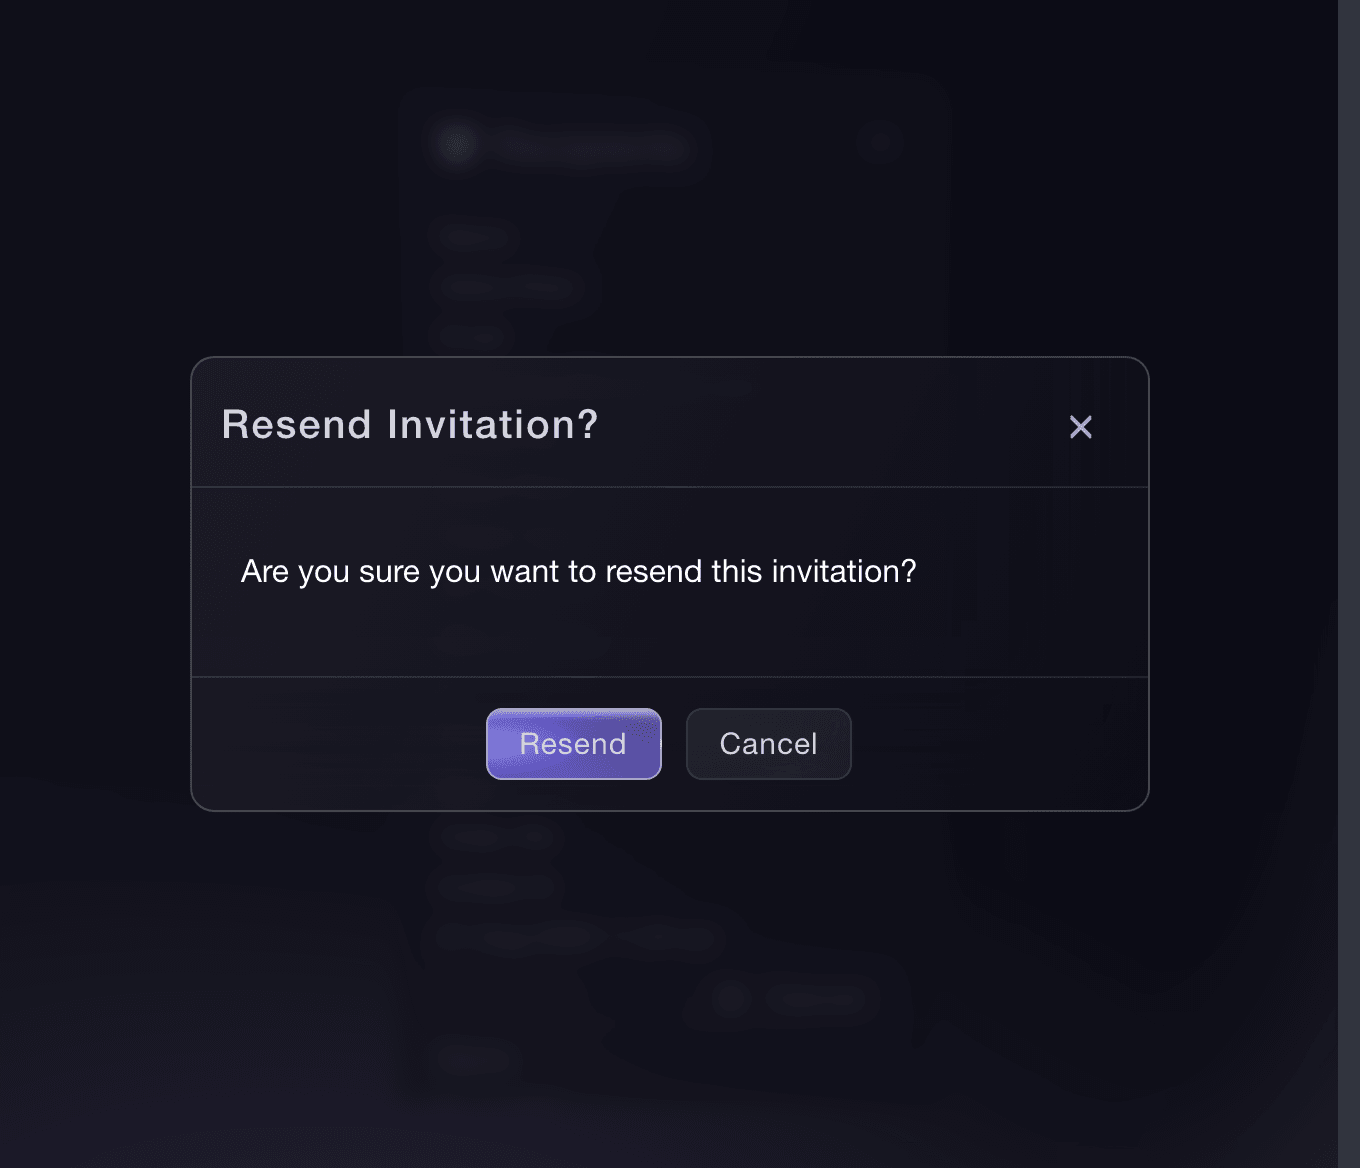
Interact, Invitations, resend an invitation. -
Cancel one person's invitation
Select Cancel in the recipient row. Check the recipient named in the confirmation, then select OK.
Cancel changes that invitation to Withdrawn and stops its personal link. Every other recipient and the event's invitation requirement stay in place.
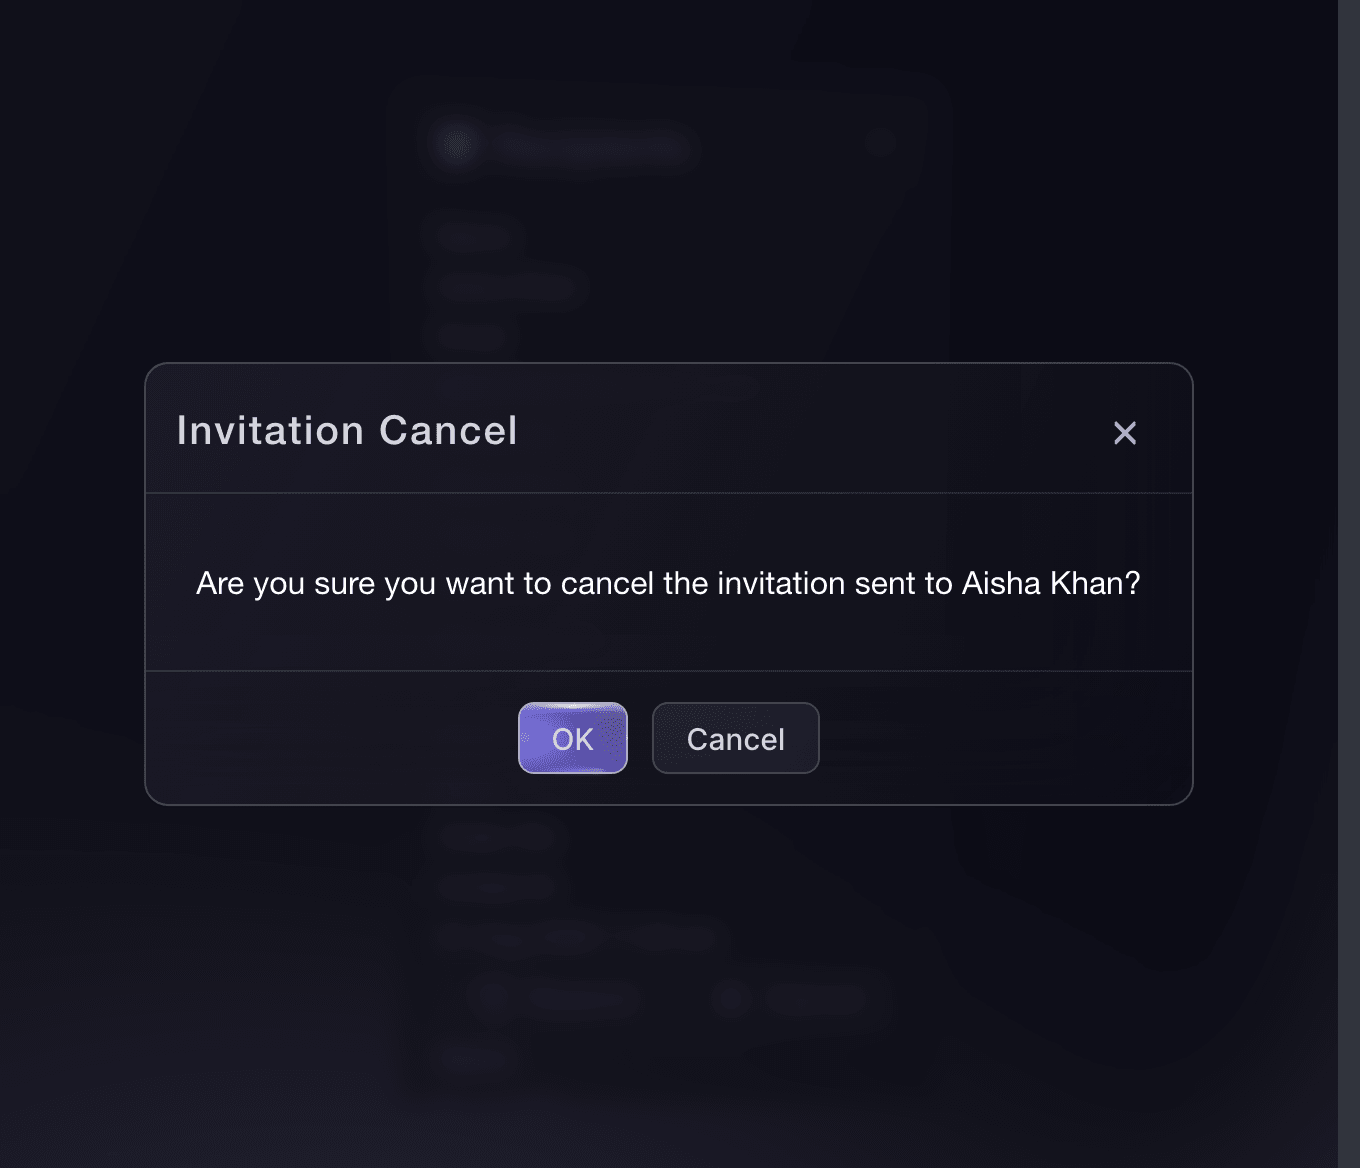
Interact, Invitations, cancel an invitation. -
Choose the reminder message
Select Send a Reminder. Under Message Type, choose Resend same message or New message. For a new message, enter Subject and Message.
A reminder goes to invited people who have not bought. Resending the original message preserves the first wording; a new message lets you explain a deadline, low availability or a changed plan.
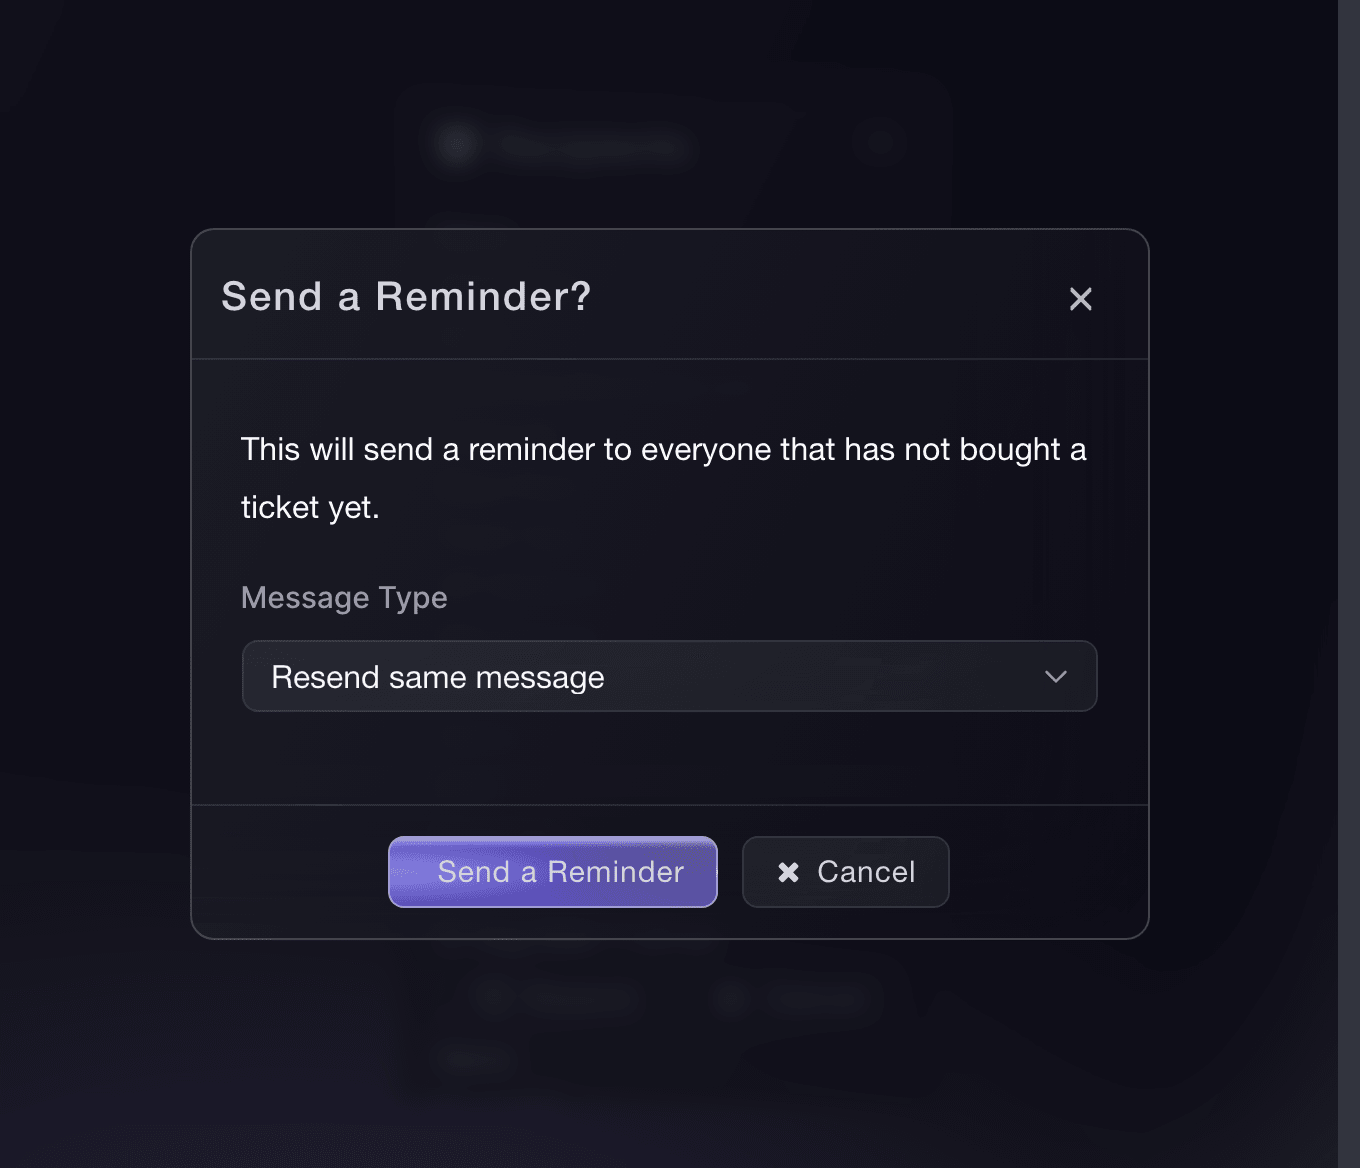
Interact, Invitations, Send a Reminder. -
Send the reminder
Check the selected message type and any new subject or message, then select Send a Reminder.
The reminder action can contact several recipients at once. Check the event and wording before you send it.
-
Test one invitation from the email to checkout
Send an invitation to an address you control. Open it in a private browser window, confirm that the intended tickets appear, complete a test order and check that the recipient changes to Bought.
Repeat the test from a normal event visit without the invitation link. Try to add a visible ticket and confirm the purchase action is refused. Ticket choices may remain visible until you try to add one.



Or have it done for you
Fai, the assistant inside your dashboard, can turn on the invitation requirement, prepare and send the approved list, and manage invitations after they leave. She asks you to approve each change before she makes it. You can also complete the whole workflow in the dashboard. Your own AI assistant over the MCP server can check existing invitations and help you resend or cancel one.
In your dashboard, with Fai
Find my event by name, turn on Invitation required to attend, and prepare an invitation email for these approved guests: <names, email addresses, maximum tickets and maximum orders>. Unlock these ticket types with the same invitation: <ticket type names>. Show me the event setting, subject, message, ticket access and each recipient limit, then ask me to approve the event change and the send
From your own assistant, over MCP
Connect your assistant to our MCP server and ask it:
The copied MCP configuration includes --read-only. Remove --read-only only when you want your assistant to make changes. Routine changes run when requested; destructive actions ask you in a compatible client. If your client cannot ask, make the change in your dashboard.
Find my event by name, list its invitations, and resend the invitation for <recipient email> if it is eligible to resend. Show me the recipient and current status, then ask me to approve the resend
Questions you might have
- What is the difference between Max Tickets and Max Transactions?
- Max Tickets limits the combined ticket quantity across completed purchases and active payment plans. Max Transactions counts each completed purchase, active payment plan or pending order once. A pending order may still be waiting for approval or payment confirmation. One order containing several ticket types still uses one transaction.
- Can someone forward a personal invitation link?
- Yes. Anyone with the link can use its remaining ticket and transaction allowance. Tell recipients to keep it private and cancel it if it reaches the wrong person.
- Can an invitation reveal a ticket that is hidden from everyone else?
- Yes. Choose it under Unhide Hidden Ticket Type (optional) before you send. The personal link reveals that ticket while ordinary visits keep it hidden.
- Can I invite the same email address again?
- Use Resend on the existing row when you want to send the same access again. Use Send a Reminder only when you want to contact everyone who has not bought. Create another invitation when that address needs a separate link and allowance.
- What does Link opened mean?
- The invitation URL was opened. It does not mean an order completed. Bought confirms that the invitation produced a completed purchase or an active payment plan.
- How do I revoke one person without closing the event?
- Select Cancel in the recipient row. Its status changes to Withdrawn, while the other personal links and the invitation-required event setting stay in place.
Where to go from here
Do this on your own event
Create your account, build your event and follow the steps in your own dashboard. You do not need to book a sales call.